SEARCH FINESCALE.COM

Enter keywords or a search phrase below:

P-47 "Jug" Group Build

75286 views
462 replies
1 rating 2 rating 3 rating 4 rating 5 rating
  • Member since
    November 2006
  • From: Coastal Maine
Posted by dupes on Friday, September 28, 2007 8:01 AM
So as long as I'm applying decals that are correct distinguishing between razorback D's and bubbletop D's, I should be generally ok? No big changes between razorback block #'s and bubbletop block #'s?
  • Member since
    December 2002
  • From: Northern California
Posted by jeaton01 on Friday, September 28, 2007 11:43 AM

The only obvious visible differences would be the propeller, which had four different types, and the cowl flaps. The cowl flaps aren't really an issue because so far as I know no kit has the early styles anyway, which were on only a very few of the first D's.  -1 only, I think.   Either of these things could be changed in the field so a photo is the only way of knowing.  One other visible difference is whether the airplane had wing pylons, which were added with the -15 block and on.  One other difference, only on most -5 and lower block numbers, was the bulged lower fuselage that came with the ability to carry the centerline drop tank.  Again, that's not really an issue because no kit has the earlier profile.

Tamiya's kits have either 3 or 4 propellers in them depending on the version, to cover all bases.

John

To see build logs for my models:  http://goldeneramodel.com/mymodels/mymodels.html


gzt
  • Member since
    May 2007
  • From: Massachusetts
Posted by gzt on Friday, September 28, 2007 7:29 PM

Latest on my P-47M

almost ready for decals. Just put a glossy coat...


Flying is a thrill #2 known to mankind. Landing is #1.

http://www.rwd-6.org

  • Member since
    December 2002
  • From: Northern California
Posted by jeaton01 on Saturday, September 29, 2007 1:21 AM
It's coming along very well, Greg.  I spent some time tonight looking at a Tamiya P-47D kit that I have.  They sure are nice kits.

John

To see build logs for my models:  http://goldeneramodel.com/mymodels/mymodels.html


  • Member since
    July 2003
  • From: Alabama
Posted by Circuitrider on Saturday, September 29, 2007 6:00 PM

Hey, Guys!

Here's the panel for the P-47 I'm building.

As you can see, it's resin AM.  I've painted some kit panels where you can use drybrushing, etc. to pick out the raised detail actually in the dials, but I've never used recessed dials like this.

How do you pick out the gague detail (needels, etc)?

  • Member since
    January 2007
Posted by Gigatron on Saturday, September 29, 2007 11:09 PM

If you have a really steady hand, you can use a brush like this http://www.ares-server.com/Ares/Ares.asp?MerchantID=RET01229&Action=Catalog&Type=Product&ID=81208  It's one of the finest tipped brushes around.

Just paint the panel dark grey (black is too black at that scale, IMHO), then use the above brush to paint the recessed needles.  You'll need to do it almost like a dry brush just to avoid getting too much paint in the recess.  Then, once it's dried, add a drop of future floor wax to simulate the glass.

-Fred


gzt
  • Member since
    May 2007
  • From: Massachusetts
Posted by gzt on Monday, October 1, 2007 11:15 AM

October 01, 2007  - an official start of this Group.

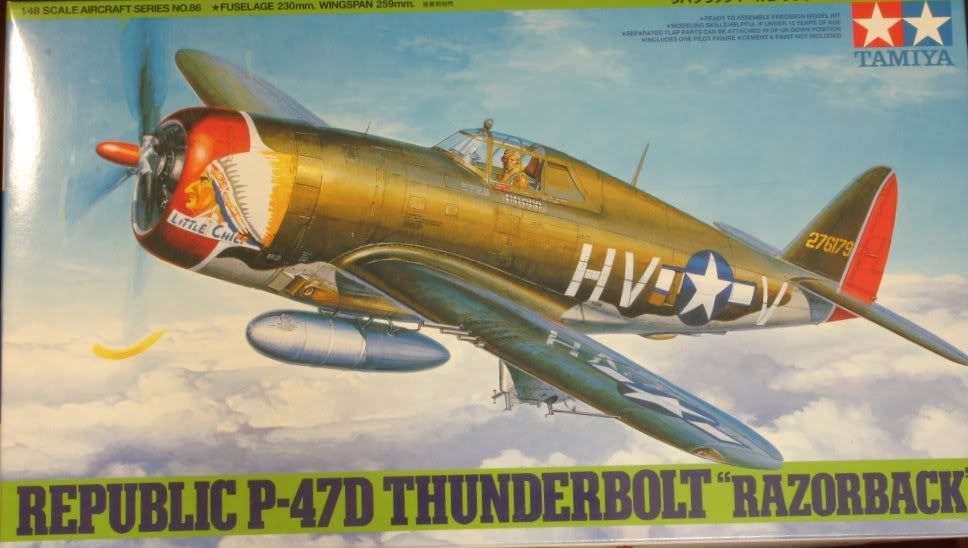
My choice was  a P-47D Razorback - Tamiya 1/48
and I do have Techmod decals
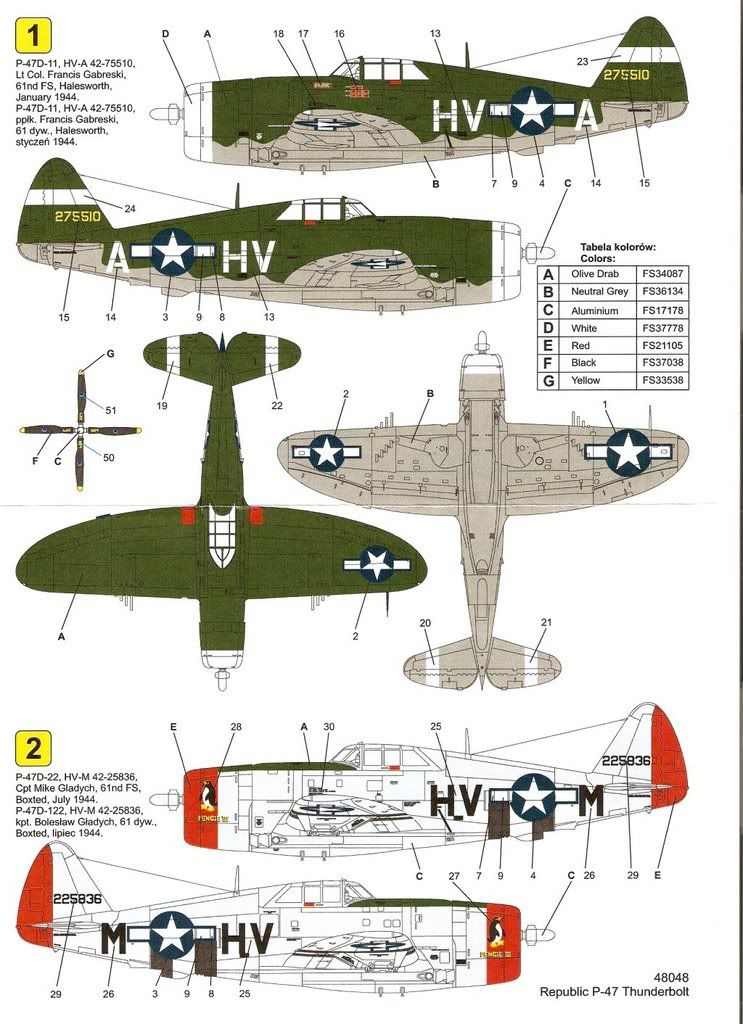
I did not decided yet which one to use:

Olive Drab - Gabreski's plane or Aluminum Gladych's aircraft.

What do you think ? which one will be more interesting ?

Besides this I have P-37M flown by Lanowski - waiting for decals
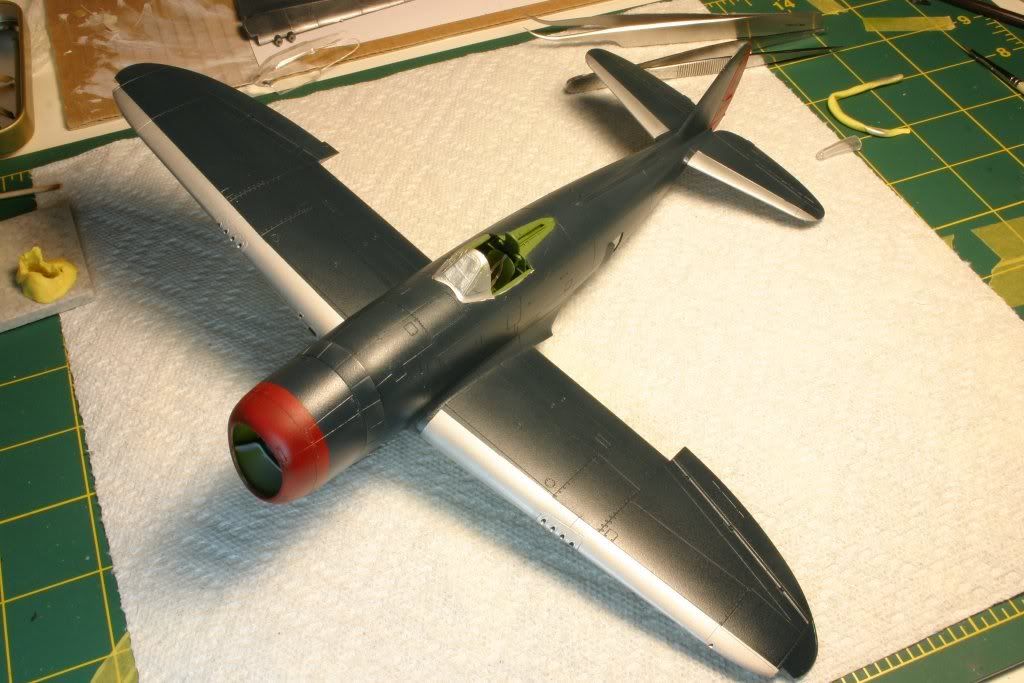
and I plan to do Gabreski's last aircraft P-47D bubbletop (Hasegawa) - also with Techmod decals:
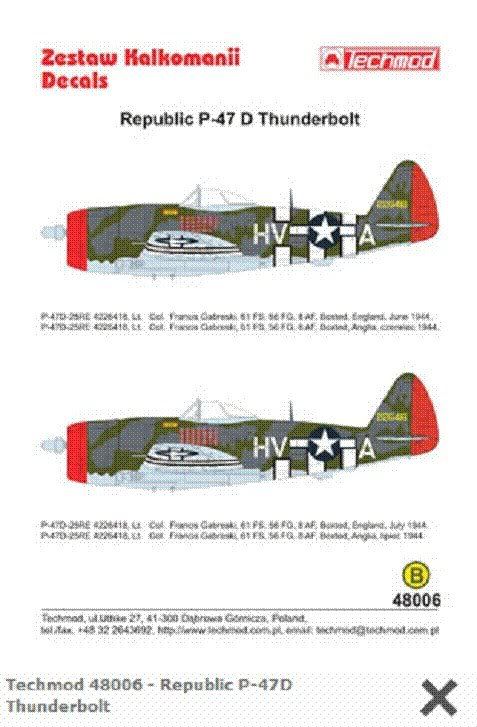
 

Which one will fit better to this collection ? Olive Drab or full aluminum ?? 

Flying is a thrill #2 known to mankind. Landing is #1.

http://www.rwd-6.org

  • Member since
    July 2003
  • From: Alabama
Posted by Circuitrider on Monday, October 1, 2007 1:54 PM
 gzt wrote:

What do you think ? which one will be more interesting ?

Which one will fit better to this collection ? Olive Drab or full aluminum ?? 

Greg,

IMHO, I would go with Gabby's, esp. if you're going to do his bubbletop. Other build looks smooth, friend.

  • Member since
    April 2005
  • From: Piscataway, NJ!
Posted by wing_nut on Thursday, October 4, 2007 2:18 PM

I have started my build for the GB.  Working on the engine at the moment.  The Quickboost engine is missing the around the crack case for the ignition wires and I am scratch building that now.  The ring was easy but what a PITA to make the 18 pairs of wires to glue to the ring.  It is also not a drop in replacement so the cylinders had to be cut off to attach to the kit fire wall.

Marc  

  • Member since
    January 2007
Posted by Gigatron on Thursday, October 4, 2007 2:49 PM
 wing_nut wrote:

I have started my build for the GB.  Working on the engine at the moment.  The Quickboost engine is missing the around the crack case for the ignition wires and I am scratch building that now.  The ring was easy but what a PITA to make the 18 pairs of wires to glue to the ring.  It is also not a drop in replacement so the cylinders had to be cut off to attach to the kit fire wall.


I can sympathize with what you're going through, Marc.  I'm building a 1/48 hasegawa and using a verlinden detail set.  My engine is a complete hodgepodge of AM and OOB.  I think I spent more time building, fabricating and modding the engine to get it to fit than I did on anything else thus far.

This plane has caused me more fits than I care to remember.  I can't wait till this little bugger is over and done with Laugh [(-D].

-Fred


  • Member since
    January 2007
Posted by Gigatron on Thursday, October 4, 2007 7:53 PM

Just some update shots showing the details of the gun bays

The guns and gun bay are AM from True Details (IIRC)

Enjoy.

-Fred


gzt
  • Member since
    May 2007
  • From: Massachusetts
Posted by gzt on Thursday, October 4, 2007 9:22 PM

It is a very nice looking TBolt !

Please show some details of this engine - some close up picts - it would be great !


Flying is a thrill #2 known to mankind. Landing is #1.

http://www.rwd-6.org

  • Member since
    November 2006
  • From: Coastal Maine
Posted by dupes on Friday, October 5, 2007 8:42 AM

Hey, can any of you guys recommend a good reference book on the P-47? I'm sort of "flying in the dark" here, and I'd like to fix that. Dunce [D)] Preferable something that isn't insanely expensive, just really need to know the basics, and maybe a bit more!

Nice builds you guys are cranking out so far, btw. Thumbs Up [tup]

  • Member since
    April 2005
  • From: Piscataway, NJ!
Posted by wing_nut on Friday, October 5, 2007 9:58 AM

Dupes... don't know what you mean bythe basics buts if if you Google P-47 You will be able to find and enormous amount of info, then click the Images tab and there will about a zillion pics.


Some prgress here... engine is done. And the groove from in my forehead the Opti-Visor is finally going awaySmile [:)] Quickbbost resin engine with scratched igniton harness.  69 Parts.Dead [xx(]

The wash is not as dark in real life as in the pics.


Marc  

  • Member since
    November 2006
  • From: Coastal Maine
Posted by dupes on Friday, October 5, 2007 10:18 AM

I'm really just looking for something I can put my hands on, to peruse at my leisure. Sadly, I'm still saddled with dialup internet access out here in the williwags of Maine - maybe one of these years! - and most of the time it's still preferable to do my research with books (*sniff, sniff*) Sigh [sigh].

That engine is pretty freakin' amazing. Yikes. 

  • Member since
    December 2002
  • From: Northern California
Posted by jeaton01 on Friday, October 5, 2007 11:15 AM
Dupes, a good reference is the Detail and Scale book on the P-47, it is volume 54, ISBN 1-888974-07-9.  You should be able to find a copy for less than $20.00.

John

To see build logs for my models:  http://goldeneramodel.com/mymodels/mymodels.html


  • Member since
    December 2002
  • From: Northern California
Posted by jeaton01 on Friday, October 5, 2007 11:18 AM
Nice work, Fred and Greg.  Looks like we are all working under microscopes, I'm doing the same on the WW I group build. I'll be starting on my P-47 soon.

John

To see build logs for my models:  http://goldeneramodel.com/mymodels/mymodels.html


  • Member since
    September 2004
  • From: Vernon, BC, Canada
Posted by razordws on Friday, October 5, 2007 11:19 AM
Nice work on the engine Mark! Thumbs Up [tup]  Lots of wires Shock [:O]

Dave

  • Member since
    January 2007
Posted by Gigatron on Friday, October 5, 2007 2:47 PM

Nice work on that double wasp, Marc!  I've got 3 more of those to build for other projects.  I think I'll send them your way for wiring Laugh [(-D].

I'll see if I can get better pics of my engine tonight.

But now I understand why people build planes that used Allison engines Smile,Wink, & Grin [swg]

-Fred


gzt
  • Member since
    May 2007
  • From: Massachusetts
Posted by gzt on Friday, October 5, 2007 5:33 PM
 wing_nut wrote:

Dupes... don't know what you mean bythe basics buts if if you Google P-47 You will be able to find and enormous amount of info, then click the Images tab and there will about a zillion pics.


Some prgress here... engine is done. And the groove from in my forehead the Opti-Visor is finally going awaySmile [:)] Quickbbost resin engine with scratched igniton harness.  69 Parts.Dead [xx(]

The wash is not as dark in real life as in the pics.


Marc: how did you do it ? What parts did you use ??

It is an exceptional job you did !!! (..again Big Smile [:D]) Bow [bow] 

a higher res pict would be nice Wink [;)]


Flying is a thrill #2 known to mankind. Landing is #1.

http://www.rwd-6.org

  • Member since
    January 2007
Posted by Gigatron on Friday, October 5, 2007 8:29 PM

Here's a closeup of my power plant

It's a mix of verlinden AM and OOB parts, all cobbled together.

-Fred


gzt
  • Member since
    May 2007
  • From: Massachusetts
Posted by gzt on Friday, October 5, 2007 9:57 PM

OK Guys: YOU ARE UNBELIEVABLE!

Those engines look great !!!

It looks I need to do some shopping .....  

here is my Lanowski's aircraft, just started to put decals ...


Flying is a thrill #2 known to mankind. Landing is #1.

http://www.rwd-6.org

  • Member since
    January 2007
Posted by Gigatron on Saturday, October 6, 2007 12:30 AM

That's a sweet looking build you've got going on there, Greg!

But I have a quick question and/or observation (and I may be completely wrong).  I am about as far from an expert on Lanowski's aircraft as any person could ever hope to be, but is the wing star upside down?  I always thought that the single point faced foward on the plane.  But like I said, I'm no Lanowski expert, so maybe his craft had the star that way.

-Fred


  • Member since
    April 2005
  • From: Piscataway, NJ!
Posted by wing_nut on Saturday, October 6, 2007 6:35 AM

Thanks guys. 

Nice work on that engine Fred. Looks good Greg  but I agree, check the wing decal.


Greg, I made 18 of these...

by drilling out the end of a plastic rod, gluing in 2 pieces of .009 solder and cutting the piece off.  The ring around the crankcase is a piece of wire and all the wires are CA'd to that. 

Marc  

  • Member since
    January 2007
Posted by Gigatron on Saturday, October 6, 2007 7:53 AM

Marc, that's insane and ingenious all at the same time Laugh [(-D]  It's amazing what you can come up when necessary.

-Fred


gzt
  • Member since
    May 2007
  • From: Massachusetts
Posted by gzt on Saturday, October 6, 2007 9:39 AM

Angry [:(!]

Guys, you are right, I ..... up a big time Angry [:(!]

Decal is wrong. It was late and I must be tired while doing it. Funny part is: I set it right and than turned 180 due to a opening in a decal (matching the wing).

So, anyone has an idea how to fix it ? or the only way is to get a new set of decals ?

Marc: it is a great idea and just fantastic engine finish. I am going to use this idea on my Razorback and bubbletop soon. The ring around the crankcase is just a wire ?? I can not believe how well this came up . Absolutely fantastic job - both of you glentlemen ! Bow [bow]

Flying is a thrill #2 known to mankind. Landing is #1.

http://www.rwd-6.org

  • Member since
    September 2003
  • From: South Central Wisconsin
Posted by Daywalker on Saturday, October 6, 2007 9:47 AM

Greg-

Bummer about the decal!  I have made similar errors when tired and trying to do "one last thing". 

Did you already put a clear over the decal?  If not, you could put tape over it and "rip" it off.  The decal would be history, but maybe you can get your hands on a replacement.

Frank 


gzt
  • Member since
    May 2007
  • From: Massachusetts
Posted by gzt on Saturday, October 6, 2007 9:53 AM

thanks, I am going to do it.  Angry [:(!] I did not finish decals yet, so those are not sealed yet.

Have to wait for new decals  ... to finish it but still have about two weeks of work with UC  and other details.

Thanks guys for pointing it so quickly. 

 last minute news: I was able to remove the decal but during the process some paint was pilled of as well Angry [:(!], now I have to repaint part of it, ohh well .. I will than put some shades on that wing anyway while waiting for the decals

Thanks again !! I think it is a very good idea to show a progress on a first plane so just you will point what is wrong soon enough to fix it Big Smile [:D]


Flying is a thrill #2 known to mankind. Landing is #1.

http://www.rwd-6.org

  • Member since
    September 2003
  • From: South Central Wisconsin
Posted by Daywalker on Sunday, October 7, 2007 12:09 PM

Greg-

Glad you were able to catch it before the clearcoat so you have a chance to fix it without ruining the whole airplane.  How is it going?  Did you remove the old decal yet?  Did it work out OK?

Frank 


gzt
  • Member since
    May 2007
  • From: Massachusetts
Posted by gzt on Sunday, October 7, 2007 2:30 PM

Frank,

thanks for help. Yes, I removed it (along with some paint Big Smile [:D] ) but it is not a big deal - I can fairly easy fix it. The only problem is - I have to order a set of Lanowski P-47M decals - those were a but diferent than regular US insignia (I think) the border was blue instead of dark blue. Besides that I also lost a horse shoe - so I have to get a decal anyway (or make a horse shoe myself ... not a bad idea Big Smile [:D]

At this moment I place the kit on side - just waiting for Monday to get new decals  

Flying is a thrill #2 known to mankind. Landing is #1.

http://www.rwd-6.org

JOIN OUR COMMUNITY!

Our community is FREE to join. To participate you must either login or register for an account.

SEARCH FORUMS
FREE NEWSLETTER
By signing up you may also receive reader surveys and occasional special offers. We do not sell, rent or trade our email lists. View our Privacy Policy.