SEARCH FINESCALE.COM

Enter keywords or a search phrase below:

AFV Club M42A1 Duster WIP - Done with pictures!!

83268 views
249 replies
1 rating 2 rating 3 rating 4 rating 5 rating
  • Member since
    May 2009
  • From: Poland
Posted by Pawel on Tuesday, March 26, 2013 9:40 AM

Bill, Karl, Kenny - thanks a lot for your kind words! Just a few details more! The fact you are reading this sure motivates me to mobilize myself and to finish it. Thanks again, have a nice day

Paweł

All comments and critique welcomed. Thanks for your honest opinions!

www.vietnam.net.pl

  • Member since
    November 2004
  • From: Essex England
Posted by spacepacker on Monday, March 25, 2013 7:20 PM

I like the detailing you have done, especially the toolsYes...cheers....Kenny

  • Member since
    January 2007
Posted by the doog on Monday, March 25, 2013 6:27 PM

WOW, Pawel! I dunno how I missed your updates, but man, you are KILLING this build! That track arrangement is stupefying! Cool!

  • Member since
    July 2004
  • From: Texas
Posted by wbill76 on Monday, March 25, 2013 5:10 PM

Nice update Pawel! Almost done with this one.

  • Member since
    May 2009
  • From: Poland
Posted by Pawel on Monday, March 25, 2013 9:00 AM

Hello!

I've got a little update for you. To balance the vehicle I put spare track links and some tools on the left fender, too. Here's what it looks like:

We've got a wrench for track (laying diagonally)  in the top right portion of the tool tray, track tool in the bottom of the photo, and a flash suppressor wrench in the top/left portion of the tray.

I also painted the headlights, so now the front of my model looks like this:

Hope you like it, thanks for reading and have a nice day

Paweł

All comments and critique welcomed. Thanks for your honest opinions!

www.vietnam.net.pl

  • Member since
    July 2004
  • From: Texas
Posted by wbill76 on Tuesday, March 12, 2013 7:44 PM

No problem Pawel! From what I understand, in-service tow cables were greased to prevent rusting for the very reasons you mention, hence their usually dark coloration as opposed to a brighter bare metal color. Hopefully one of the members with more direct experience can chime in as an authority on the matter. Wink

  • Member since
    May 2009
  • From: Poland
Posted by Pawel on Tuesday, March 12, 2013 9:21 AM

Hello Bill!

Thanks a lot for your comment. Compared to the rest of the model the cable is indeed pretty bright, although not silver, the new Humbrol Gun Metal is just brighter than it used to be. But I heard from the vets, that tow cable was sometimes your ticket to safety, so they really cared for it, I tried to show that. I sure would appreciate photos of the tow cable on an operational vehicle - on museum ones they are usually painted over, that wouldn't be acceptable on an operational machine.

So thanks for the heads up, and have a nice day

Paweł

All comments and critique welcomed. Thanks for your honest opinions!

www.vietnam.net.pl

  • Member since
    July 2004
  • From: Texas
Posted by wbill76 on Monday, March 11, 2013 8:01 PM

Tools look good Pawel! I'm not a modern armor expert so don't know if the modern tow cables and rods on the hull side would be as bright metal as they show in your last pic (could also be the lighting), they seemed the right color/contrast in the first pic so not sure if something changed in between?

  • Member since
    May 2009
  • From: Poland
Posted by Pawel on Monday, March 11, 2013 9:43 AM

Hello Shawn!

Thank you for your kind words! I actually intend to leave the guns fully movable, so you can choose the elevation of them any time. But I heard in Vietnam, when the combat got really close and personal, sometimes you couldn't get the guns low enough.

But I've got another update to show - the tools!

Here's what they looked like after painting:

From the top we've got here the tow rope, the gun cleaning rod, axe, shovel, mallet and mattock handle. On the right there are mattock head and the tanker bar (will be put on the rear wall of the hull).

To mount it I used several PE straps, that came with the Eduard PE set for the Duster. After mounting the tools looked like the below photos show:

I hope you liked it, thanks for reading and have a nice day

Paweł

All comments and critique welcomed. Thanks for your honest opinions!

www.vietnam.net.pl

  • Member since
    January 2010
  • From: St. Louis
Posted by Shawn M. on Tuesday, February 26, 2013 1:29 PM

looks great!

Will you be elevating the guns a touch or leaving them drooped as is?

I love the smell of plastic in the morning

  • Member since
    May 2009
  • From: Poland
Posted by Pawel on Tuesday, February 26, 2013 9:41 AM

Hello!

Eric - Thanks a lot, I gave my best - seems only fair, it's a DUSTER after all Big Smile

Bill - Thank you very much! I wouldn't be so sure about "done" just yet - still have some fitting out to do, fiddly bits like tools, packs and the sight for the gun. But I'm sure closer to the end than to the beginning!

Thanks for your comments, please stay tuned and have a nice day!

Paweł

All comments and critique welcomed. Thanks for your honest opinions!

www.vietnam.net.pl

  • Member since
    July 2004
  • From: Texas
Posted by wbill76 on Monday, February 25, 2013 12:27 PM

Looking good from here Pawel, almost done with this one! Beer

  • Member since
    December 2006
  • From: N. Georgia
Posted by Jester75 on Monday, February 25, 2013 9:50 AM

Nice Pawel, the dusting effects look really good!

Eric


  • Member since
    May 2009
  • From: Poland
Posted by Pawel on Monday, February 25, 2013 9:03 AM

Hello again!

I added some mud splatters, flat-coated everything and most importantly, put the tracks on! Before that I also picked up the rubber on the road wheels with Humbrol 32 (dark grey) and dusted them with Vietnam Earth pigment. Here's what it looks like now:

Hope you like it, thanks for reading, and have a nice day!

Paweł

All comments and critique welcomed. Thanks for your honest opinions!

www.vietnam.net.pl

  • Member since
    May 2009
  • From: Poland
Posted by Pawel on Tuesday, February 19, 2013 10:24 AM

Thanks a lot Bill! And I have to say this forum gave me a lot of tips on how to tackle that. Thanks for reading and have a nice day

Paweł

All comments and critique welcomed. Thanks for your honest opinions!

www.vietnam.net.pl

  • Member since
    July 2004
  • From: Texas
Posted by wbill76 on Monday, February 18, 2013 7:45 PM

Now that's some nice track work Pawel, recreates the look on this track type very accurately IMHO. Beer

  • Member since
    May 2009
  • From: Poland
Posted by Pawel on Monday, February 18, 2013 8:01 AM

Hello again!

Like I wrote, I was painting the tracks. I've already shown this photo before but let me post it again, so you don't have to scroll 12 pages back:

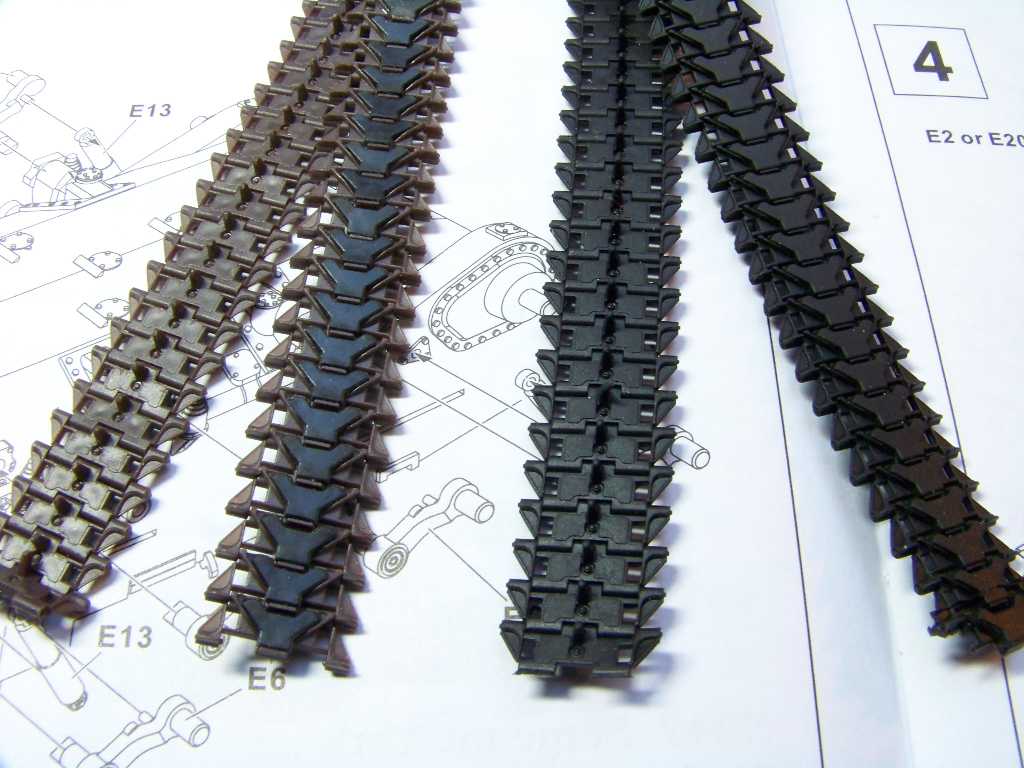
On the left we have the individual link tracks from AFV Club bought as an extra, on the right are the kit suplied tracks. I'm using the individual links - they drape better over the wheels Big Smile

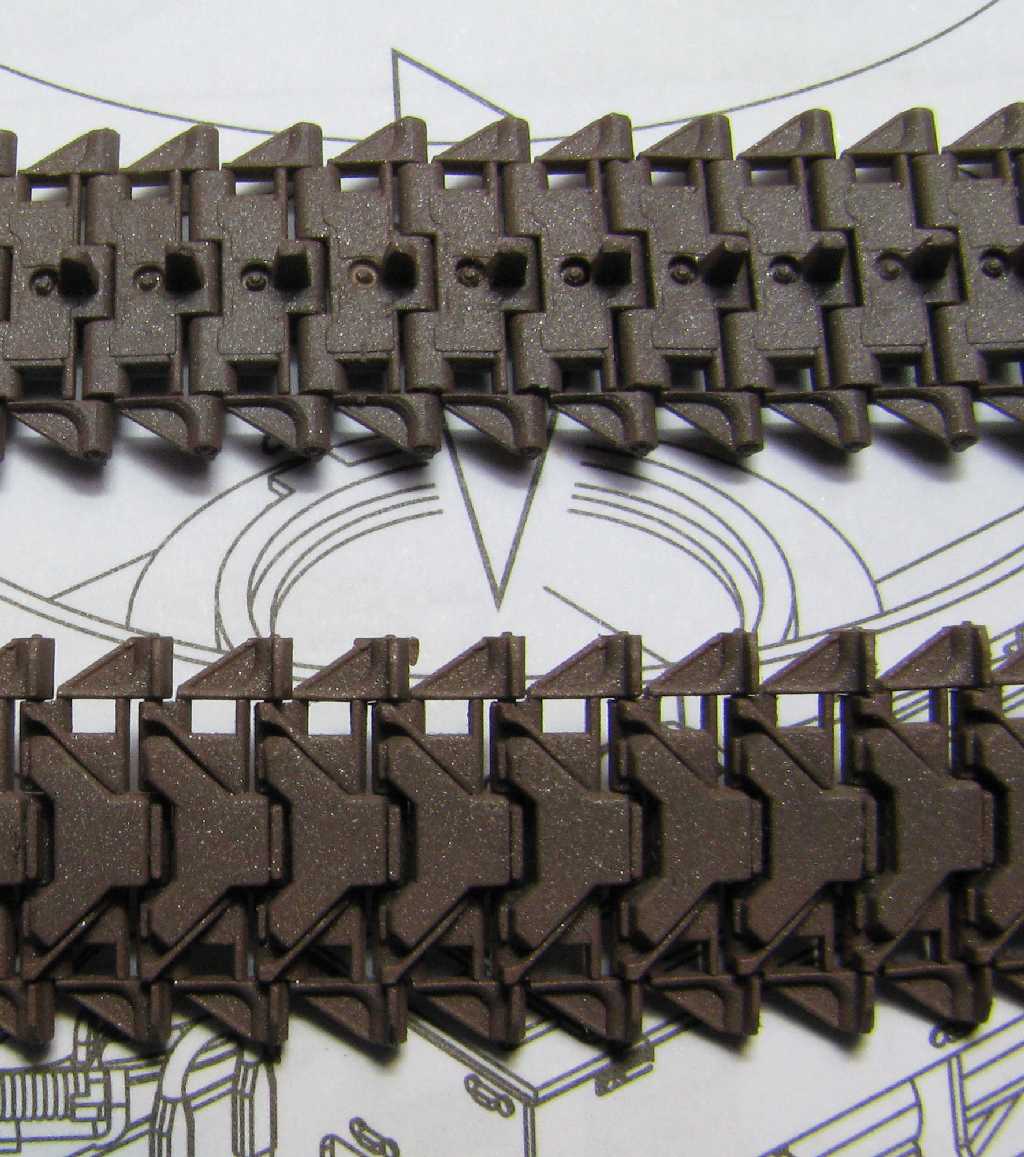
First thing I did, was to paint the tracks with a mix of Humbrol 113 (red-brown) and Humbrol 53 (gun-metal) using an airbrush. This is what I got:

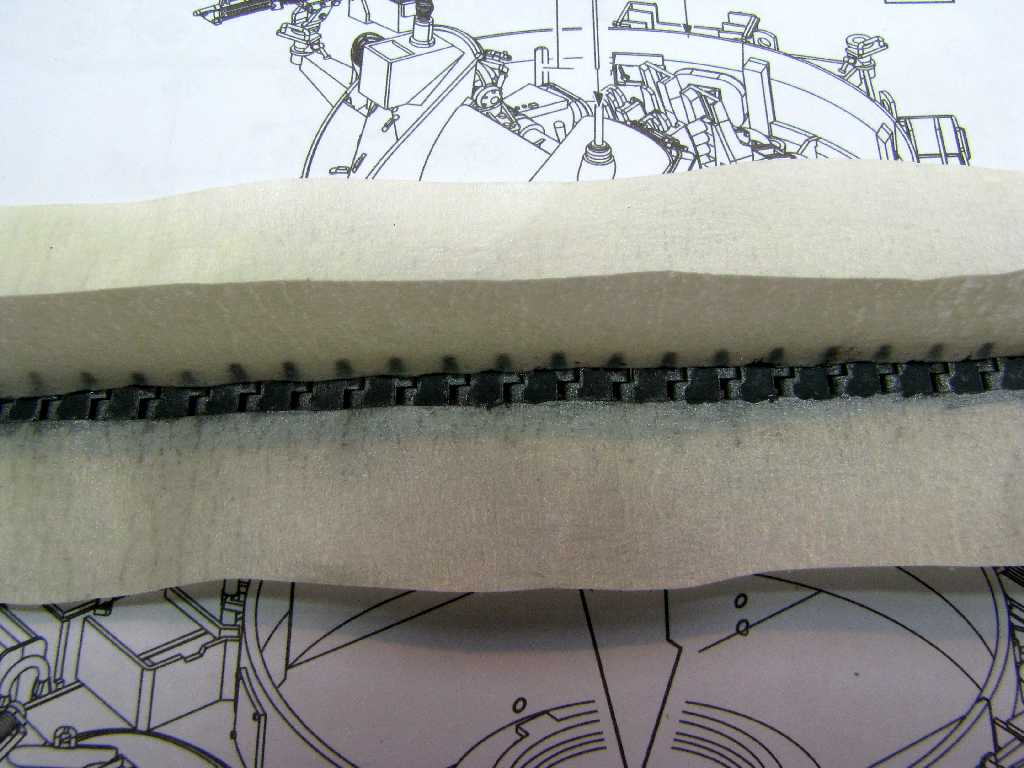
Then I carefully sanded the rubber pads on the outside of the tracks. The vinyl they (the pads) are made of shown through the paint nicely, giving a rough, weathered appearance. Then I moved on to the insides of the tracks - the road wheels leave two "trails" of shiny metal and worn rubber on the inside of the track. To show this, I masked two stripes with masking tape, drybrushed on some gun-metal and then picked up the inner rubber pads with Humbrol 32 (dark grey):

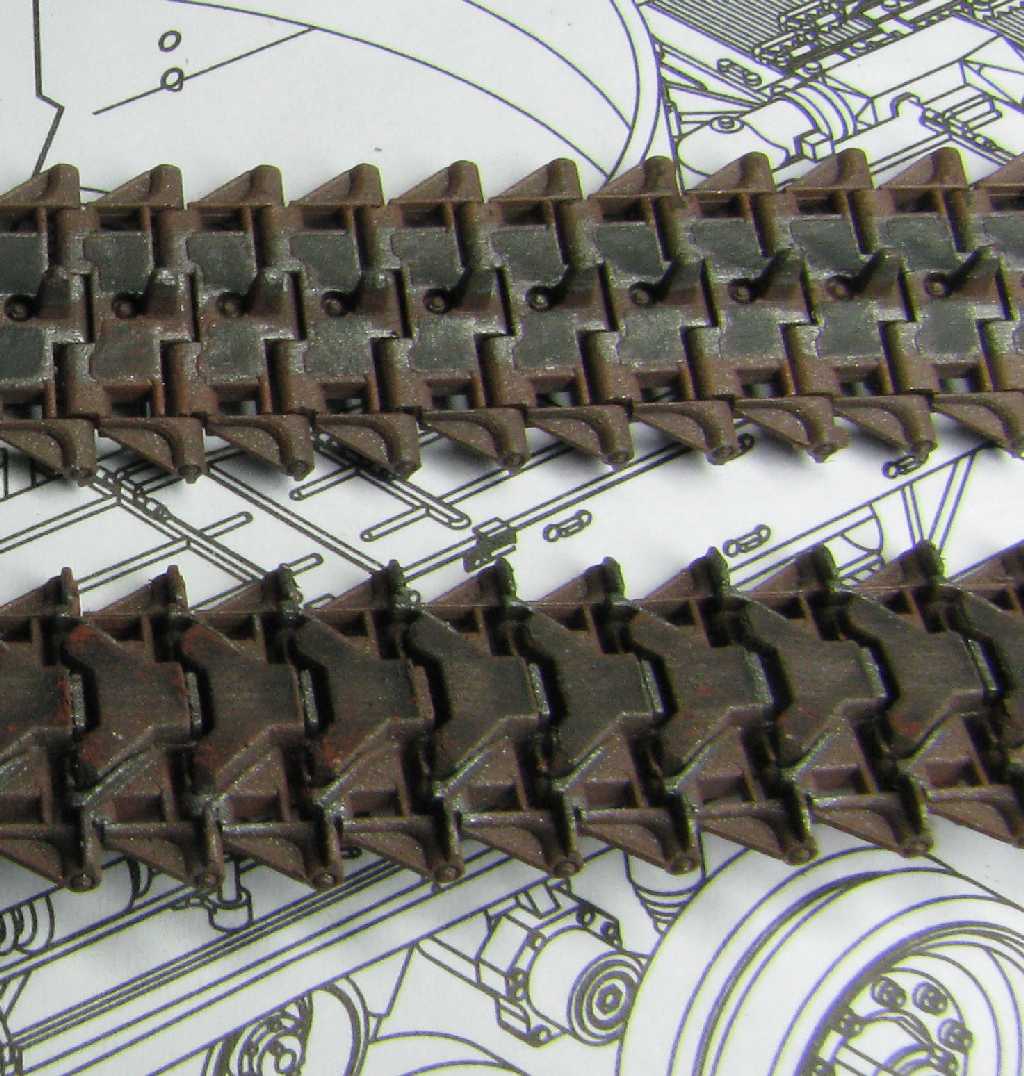
I also painted gun-metal traces on the guide-teeth of the track, and on the outside of the track, on the high-spots taouching the ground directly. I also brushed on some pigment. Now the tracks look like this:

I hope you like them - thanks for reading and have a nice day

Paweł

All comments and critique welcomed. Thanks for your honest opinions!

www.vietnam.net.pl

  • Member since
    May 2009
  • From: Poland
Posted by Pawel on Saturday, February 16, 2013 8:11 AM

Bill - thanks a lot!

Steve - No, that was a god one! Don't restrain yourself Big Smile

Karl - thanks for your kind words!

I'm painting the tracks right now - I'll post another update when I have the photos. Thanks for reading and have a nice day

Paweł

All comments and critique welcomed. Thanks for your honest opinions!

www.vietnam.net.pl

  • Member since
    January 2007
Posted by the doog on Friday, February 15, 2013 5:29 PM

Just superb work, Pawel! Your shading and painting keeps making "art" out of mere plastic!

  • Member since
    August 2007
  • From: back country of SO-CAL, at the birth place of Naval Aviation
Posted by DUSTER on Friday, February 15, 2013 1:55 AM

WOW nice Work!


say, do the springs creak when you close the hatch?  .....sorry I'll go be good now.                                                                                                                                                                                                                                                                                                                                 

Steve

Building the perfect model---just not quite yet  Confused

  • Member since
    July 2004
  • From: Texas
Posted by wbill76 on Thursday, February 14, 2013 8:52 PM

Attention to the details continues to pay off on this one Pawel. Sharp work for sure. Beer

  • Member since
    May 2009
  • From: Poland
Posted by Pawel on Thursday, February 14, 2013 1:32 PM

Eric - thanks for your kind words!

Mike - so it shows.. Big Smile You're right, somehow I researched this one really good - mainly because the Tamiya kit had so little detail it was apparent something's missing - and I went to chack what it was. Thanks a lot for your comment!

Have a nice day

Paweł

All comments and critique welcomed. Thanks for your honest opinions!

www.vietnam.net.pl

  • Member since
    July 2006
  • From: New Jersey
Posted by redleg12 on Tuesday, February 12, 2013 6:41 PM

You are having way too much fun with this one. I know you have been waiting and researching this build for a long time. It shows.....fantastic stuff

Rounds Complete!!

"The Moral High Ground....A Great Place to Emplace Artillery."

  • Member since
    December 2006
  • From: N. Georgia
Posted by Jester75 on Tuesday, February 12, 2013 1:20 PM

Looks very cool Pawel. The shading on the hatches and the rest of the vehicle looks awesome.

Eric


  • Member since
    May 2009
  • From: Poland
Posted by Pawel on Tuesday, February 12, 2013 10:06 AM

Hello again!

This time I put on the hatches, and also added those tiny latches holding them open. Now that felt like the final exam in gynecology, but I made it. I shaded the insides of the hatches with pigment fixed with future, with small amount of acrylic black added. It matched the surrounding surfaces nicely. The orange arrows point to the latches:

Here's another, showing the driver's hatch, the latch is also visible under/left to the hull lift ring:

I also added another coat of black doped future over the decals to fix them. Thanks for reading, please stay tuned and have a nice day

Paweł

All comments and critique welcomed. Thanks for your honest opinions!

www.vietnam.net.pl

  • Member since
    May 2009
  • From: Poland
Posted by Pawel on Tuesday, February 5, 2013 10:21 AM

Hello Bill!

Thanks a lot for your comment! You see, lots of the surfaces of the barrel were precisely machined, so I don't think they could have been painted. I'd say maybe blackened somehow - I don't know, the thing is on all museum exhibits you see some old scrap, painted over many times - no way of saying how it looked like out of the crate. Glad you like the chain - thanks again and have a nice day

Paweł

All comments and critique welcomed. Thanks for your honest opinions!

www.vietnam.net.pl

  • Member since
    July 2004
  • From: Texas
Posted by wbill76 on Monday, February 4, 2013 8:16 PM

Can't help you on the barrel question, it's an intriguing one for sure...I would imagine they would've come as stock OD? Nice job with the added details, the chains look the part scale-wise. Yes

  • Member since
    May 2009
  • From: Poland
Posted by Pawel on Monday, February 4, 2013 11:02 AM

Kenny - thanks a lot for your comment, and for your kind words. Sorry for replying so late, but I wanted to show an update on the way - and here it is:

In order to install the driver's hatch, I had to first install the spare barels and their holders. The front holder/bracket has relatively poor detail for this kit, so I decided to detail it some, to show how complicated it was in reality - with two locking screws, and chain holding various pins. I assembled the barrels before, and already managed to paint them. Locking the compressed spring inside drying polystyrene assembly isn't too easy neither. I'd recommend building some simple spring compressor in order to make this operation possible. Anyhow, here are the barrels and their brackets:

After installing them, I put on a piece of chain made by twisting thin copper wire and then flattening it. Now it looks like below:

Of course the chain has to be painted, and everything weathered to match, but I'm getting there. By the way, I'm really not sure about what colour those barrels should actually be. I only heard they came covered in thick layer of cosmolene - I imagine they got dirty really soon. If anybody has any info on that, I'd be obliged. For now thanks for reading, and have a nice day

Paweł

All comments and critique welcomed. Thanks for your honest opinions!

www.vietnam.net.pl

  • Member since
    November 2004
  • From: Essex England
Posted by spacepacker on Tuesday, January 29, 2013 6:30 PM

This is a great build, especially the subtle cammo'. Looking forward to the finish line...cheers....Kenny

  • Member since
    May 2009
  • From: Poland
Posted by Pawel on Tuesday, January 29, 2013 8:27 AM

Well, Karl, thanks for reading! Welcome aboard and thanks for your kind words.

Writing this thread, I wanted to show people planning to build a duster in the future what their options (Tamiya/AFV Club) really are, and give tips as to the small mistakes the AFV Club kit has.

Thanks again, please stay tuned a nd have a nice day!

Paweł

All comments and critique welcomed. Thanks for your honest opinions!

www.vietnam.net.pl

JOIN OUR COMMUNITY!

Our community is FREE to join. To participate you must either login or register for an account.

SEARCH FORUMS
FREE NEWSLETTER
By signing up you may also receive reader surveys and occasional special offers. We do not sell, rent or trade our email lists. View our Privacy Policy.