SEARCH FINESCALE.COM

Enter keywords or a search phrase below:

"Rite of Passage" the 1/96 Constitution

62296 views
155 replies
1 rating 2 rating 3 rating 4 rating 5 rating
  • Member since
    March 2012
  • From: Marysville, WA
Posted by David_K on Tuesday, July 16, 2013 5:30 PM

Looks great, Arnie!  I don't think there can be too much discussion about the Revell Connie builds...like you said, everybody's gonna build at least one!  I have a vintage one in my stash, just waiting for the right time!  Looking forward to your updates!

        _~
     _~ )_)_~
     )_))_))_)
     _!__!__!_         
     (_D_P_K_)
   ~~~~~~~~~~~~~
    ~~~~~~~~~~~

Current Project:  Imai/ERTL Spanish Galleon #2

Recently Finished: Revell 1/96 Cutty Sark

Next Up:  ???


  • Member since
    February 2003
  • From: Lacombe, LA.
Posted by Big Jake on Wednesday, July 17, 2013 8:20 AM

I always thought that "Right of Passgae" was building the USS Arizona and blowing her up with firecrackers.


  • Member since
    March 2004
  • From: Spartanburg, SC
Posted by subfixer on Friday, July 19, 2013 8:00 AM

Big Jake

I always thought that "Right of Passgae" was building the USS Arizona and blowing her up with firecrackers.

I second that.  Big Smile It's like crossing the line and becoming a shellback.  Pirate

I'm from the government and I'm here to help.

  • Member since
    June 2012
Posted by arnie60 on Monday, July 22, 2013 1:39 PM

Gun deck is finished. I execised some 'poetic license' here w/ the details. No doubt, having freight stowed on the gun deck would not have been prudent in times of war, but I am staging her in peace time, so arguably she could have had some freight on the gun deck. I only partially rigged the guns where they can be seen through the hatch of the spar deck. I still need to do the gun port doors before putting on the spar deck, but that should go fairly quickly and then its on to the spar deck.


  • Member since
    June 2013
Posted by scaledecks.com on Monday, July 22, 2013 4:26 PM

Nicely done, sir!  I love the contrast of the red gun carriages with the green trim.  The colors really pop.

I look forward to following along as you progress.  With the rate that you are going, it might not take as long as you currently think!

-- John D. --

  • Member since
    June 2012
Posted by arnie60 on Wednesday, July 24, 2013 11:28 AM

Thanks John....the carriages are actually the same salmon color as in her current incarnation, not red. My Iphone camera just does not seem to accurately reproduce some colors which is a real shame especially since it does not do adequate justice to the decking.

  • Member since
    December 2003
  • From: 37deg 40.13' N 95deg 29.10'W
Posted by scottrc on Wednesday, July 24, 2013 1:47 PM

Nice build!

  • Member since
    August 2011
Posted by Blueline on Wednesday, July 24, 2013 2:19 PM

Big Jake

I always thought that "Right of Passage" was building the USS Arizona and blowing her up with firecrackers.

Yep.  I remember doing that when I was a wee child in a fish pond in our backyard.  Mom got really mad too.  Dad helped :)

  • Member since
    June 2012
Posted by arnie60 on Saturday, July 27, 2013 11:05 PM

Here is a couple of shots of the spar deck going in. As you can see, I am having a few 'minor' (I hope) issues w/ it. The gap between the deck and the waterways its supposed to snug up to is rather significant. I may well have gotten in over my head on this one, but I think I have it figured out. The clips up by the bow are there to keep the deck flush to the top of the waterway. I have glued in the bow of the deck up to where the gaps begin on both P and S. After that sets, I will glue up the rest of the starboard side. The strings you see in the second pic will be my clamps. I put them on using a rolling hitch that allows you to keep cinching the loop tighter and tighter w/ out slipping. I did a dry run on this and it looks like it should work. After that sets, I will tackle the port side in the same manner. I am not sure just where this problem came from and now am curious if this is common for the Constitution, although I have  never seen it mentioned before. I haven't put on the veneer decking yet because I suspected this would end up being a messy job.  So.... wish me luck.

  • Member since
    July 2012
  • From: Douglas AZ
Posted by littletimmy on Sunday, July 28, 2013 11:31 PM

HEY   Big Jake    I can do you one better.

I built the Constitution way back in the day AND blew it up with firecrackers !!!

I wound up using it as a sunken wreck in my 50 gallon fish tank for several years.

 Dont worry about the thumbprint, paint it Rust , and call it "Battle Damage"

  • Member since
    June 2012
Posted by arnie60 on Thursday, August 29, 2013 11:28 PM

UPDATE 8/29/13

Well...as it turns out, the problem w/ the spar deck quickly turned into a nightmare and I have not felt like smashing up a model this much since I built the Revell 1/96 HMS Beagle.

Thanks to GMorrison in convincing me into not settling for close enough, I painstakingly removed the spar deck which was 3/4 glued in at this point. GM was right, there were two pins on the aft port side of the the gun deck that had not gone over the deck as they were supposed to, causing the hull to bow out. I cleaned that up, another little nightmare in its self, and went back to install the spar deck. There was still a gap and though there was much less tension up there now, there was still enough that my good old Testors still couldn't hold it closed.. The final solution turned out to be using  epoxy instead of glue. [Gods help me now if I ever have to remove the spar deck again.]

I

{some touch up painting needed, otherwise ready for veneer}

After hours of clean up... I started gluing down the veneer decking from Scaledecks using Tamiya extra thin and working my way out from the middle to the sides, but it just drys too fast I guess and I ended up w/ a lot of bubbling. It also melts the paint so I had some spots where the paint "stained" the underside of the veneer. Fortunately, i guess, the Tamiya didn't hold that well and I was able to very slowly and carefully scrape under the veneer w/ a flat blade exacto and get it back off. I was also able to sand the back of the veneer and get almost all of the paint stains off. [patience and determination can never be over rated]

I wrote to John at Scaledecks for a recommendation on the best way to glue the deck down.[I have decided on contact cement] and he told me that he is working on adding the butt pattern, and if I could wait two weeks, he should have it available. So....I guess I am going to turn my attention to either the pinnace (which needs a huge amount of work) or the masts while I wait.

Cheers and happy modeling to all for now.

  • Member since
    June 2012
Posted by arnie60 on Monday, September 16, 2013 5:40 PM

Okay then.... I finally got the spar deck glued in and got my "upgraded " version of the Scaledecks veneer. John added the butt pattern and joggling.

The butt pattern is really a bit fainter than I would have liked personally, But it really makes the difference.

I didn't like the cap-rails that came w/ the kit and decided to replace them w/ basswood. I think it just would have been a crime to put the plastic rails on next to that beautiful wood decking. I had to figure out how to bend the wood for the bow. I ended up using our vegetable steamer and letting it go for about an hour w/ some slats in the pot. I ended up, through a fair amount of trial and error, using the plastic rails for a jig to get the bend started and somewhat set, then finish up by clamping them in place until they dried out completely before gluing them on. This is the first time I have ever tried working with wood like this, and I have to admit to ending up w/ a significant trash pile before I was happy w/ the results.

So.... on to the deck furniture which I will post later.

  • Member since
    September 2012
Posted by GMorrison on Monday, September 16, 2013 6:45 PM

You Dah Man! Trash shmash, what's a good boat yard without a huge pile of shavings.

That's just great that you got the deck 2.0, I've never seen any AM wood deck that rose to that level.

 Modeling is an excuse to buy books.


  • Member since
    June 2013
Posted by scaledecks.com on Tuesday, September 17, 2013 11:54 AM

Wow - that is super-nice!  Want to go into bending basswood that I can include in the package with my decks???

You are doing a superb job, sir.  Well worthy of the first 2.0 deck!

  • Member since
    June 2012
Posted by arnie60 on Tuesday, September 17, 2013 3:08 PM

Thanks for the compliment GM, and again for encouraging me to go the extra mile as it were.Bow Down

  • Member since
    June 2010
  • From: Irvine, CA
Posted by Force9 on Sunday, September 22, 2013 12:39 PM

Your build is coming along nicely.  I very much like the new decking - the margin planking and joggling, in particular, looks well executed by Scaledecks.  

I will offer up a small quibble, however, on the veneer decks... Only relevant to those modelers who strive for complete authenticity.  It looks as though the butt ends of the planks are not centered over the theoretical positions of the underlying beams. The planks would need to be fastened into the beams and not "dangling" in thin air. Certainly this is most noticeable along the waist where the path of the beams is most apparent.   The hatch edges would also be important indicators for the positions of the beams.  After fashioning my own exposed beams on my build, I've gained a measure of respect for the original artisans who made the Revell kit... The general spacing of the hatches seems to correspond correctly across the entire spar deck to the even spacing of the appropriate theoretical beam positions.

Here is a look at the underside of my spar deck which gives some idea of how the beams might lay out:

Keep in mind that the plank ends would need to align to the main beams, not the smaller Carlings in between.

Here was my attempt to center the plank ends over the beams:

I should add that most modelers neglect this detail - it is a common miss.  I would expect that the vast majority of folks would never know the difference either way, but if John at Scaledecks is striving for authenticty, he may want to consider a 3.0 version at some point.

Your build is terrific and it is exciting to see such significant progress.  I am following along with keen interest!

Thx

EG

  • Member since
    September 2012
Posted by GMorrison on Sunday, September 22, 2013 7:31 PM

A very good point, 9.

Another good indication is the gun ports. By nature they occupy the space between two ribs, and the deck beams are supported by knees attached to the ribs, forming a frame.

So the butt ends of the deck should align with the gun port sides, offset by half of a beam width in either direction.

 Modeling is an excuse to buy books.


  • Member since
    June 2013
Posted by scaledecks.com on Monday, September 23, 2013 2:47 AM

No argument from me - you are right, of course.  The Constitution represents our first foray into wood ships.  Normally we work on wood planking for armored ships, where the planks are laid over steel.

I considered precise alignment of the ends, but I was hard pressed to get exact plank lengths and to know exactly where the butts were - short of visiting the ship itself and marking them out.  Unfortunately, most books on the subject to do not provide this detail, and the occasional photo of the ship's deck in small pieces is insufficient to set a full pattern.

I will visit the Constitution some day, and take those meticulous notes for every plank and how it is laid.

Let me confess, too, to this "deliberate" error: the "jogging" (or "nibbing" as it is called on armored ships) on my pattern follows the traditional rule.  There is an excellent reference to this is the fine book on the Cutty Sark (*See note), which also closely follows the pattern that I have personally inspected on the Iowa Class Battleships.  But the Constitution seems to get it wrong on the actual ship, and the pattern seems to be "inverted" going into the curve, with the cuts going completely the wrong way...

Here is a link to a fantastic photo:

http://www.history.navy.mil/ussconstitution/Images/Photos/WebRes/Restoration/20100105-N-5403C010.JPG

I am providing the link because it is high-resolution, and if you click on it you get a great close-up look at the planking.  Look closely at the planks between the two diagonal ropes at the left of the image, and note where they meet the bulwarks.

In all my studies, and personal visits to ships, the blunt end would be forward on the plank, and exactly half the width of the plank, and the angle cut would sweep aft.  But notice the cut here - it is a sharp point forward, and the blunt cut forms a notch at the rear, with a crude cross-cut into the wood visible between the ropes and just below the snow.  You can see another "backwards" cut in the lower left corner of the image, too.

Can somebody help me with this here?  To me, it seems like the actual ship got it wrong.  I chose, instead, to replicate a traditional jogging pattern - because I thought it looked better.  Here is a "blunt ends forward" image from a ship model

http://i1021.photobucket.com/albums/af335/seagull47/Ships/Fair%20Rosamund/plank-bow.jpg

If you want to see many more examples, Google "Ship Deck Nibbing" and look at the images that it finds.

Again, it seems like the actual USS Constitution in Boston got it backwards.  Was there some other nibbing technique that I am not aware of?


*Note: The "Cutty Sark" book that I mention is a two volume set, sometimes sold as a combined volume, by C. Nepean Longridge.  If sold in two volumes, you want Volume 1 for info on decking, which bears the ridiculously impractical title

"The Cutty Sark, The Last Of The Famous Tea Clippers V1: An Account Of The Ship Itself, With Plans And Full Instructions For Building The Hull, Bulwarks And Deck Fittings Of A Scale Model."

Volume 2 is entitled:

"The Cutty Sark, The Last Of The Famous Tea Clippers V2: Describing The Masts, Spars And Rigging Of A Scale Model, And Including The Builder's Specification For The Construction Of The Original Ship"

They are available on Amazon for about $20-$30 each.  I bought the two separate volumes, but they are offered in a single combined edition as well.  And the meticulous detail of the titles is a good indication of the quality of the content of these books!  They are an invaluable resource for any builder of model sailing ships, and well worth the investment.


  • Member since
    June 2010
  • From: Irvine, CA
Posted by Force9 on Tuesday, September 24, 2013 11:22 PM

Hello Scaledecks...

You were right to ignore the "joggling" on the restored ship - it is not accurate for 1812.  Here is my own picture of the forward area:

The modern folks obviously took a shortcut.  This is just one of many historic inaccuracies inherent in the modern restoration of Old Ironsides.

I don't think you'll need to get caught up in plank measurements of the existing ship either... Most of what you find will not correspond to our Revell model.  I think you're better off just coming up with an appropriate beam pattern for the Revell spar deck and letting that guide your planking... If you lay out a common step pattern using the beam locations as a guide, you should get a nice distribution of the planking lengths and a good representation of an 1812 era deck.  I've used the Longridge "The Anatomy of Nelson's Ships" book for guidance on the joggling and step patterns (ppg 118-122).

If we really want to get pure... Tyrone Martin outlines the interlocking plank pattern for the gun deck in his book "Creating a Legend".  Apparently part of the structural integrity of the ship involved two strakes of wide planking down each side that were scarfed together in an interlocking join that further added to the strength of the construction.  You can kinda see this in another photo I took on my last visit:

I think Martin says these joins are spaced about 40 feet apart, but the modern version of the ship has them spaced much closer.  Might not be worth the extra effort since most of the gun deck can't be seen once the spar deck is in place.

Thanks for the good discussion - and sorry to hijack this build log.

Evan

  • Member since
    June 2012
Posted by arnie60 on Wednesday, September 25, 2013 7:09 PM

Force9

First off, thanks for the compliment and I am looking forward to your next post on your Connie build. As for highjacking....please feel free. Your insight and knowledge is always a welcome addition.

And thanks again John for the beautiful deck. I think it takes the model to a whole other level. (And no one I know that will ever see this first hand will be any the wiser about the butt pattern).

I got started on the spar deck by pulling parts and laying them out for fitting and replacing the belaying pins. I got to the ramp thingy (part 140) that goes up from the deck to the bow sprit, took one look, and thought "No effing way am I going to use this!" So I pulled out my Bluejacket plans and am going to do my best to follow their layout.[ I am soooo happy I invested in them]

In doing so, I had to overcome a few problems. The first being that as I went to set the bow sprit in for fitting, the part that it seats on popped out of place. Of course! The part being on the gun deck, and the spar deck now and forever in place, getting it put back in, entailed a copious amount of not for prime time language (I was the only one home at the time, so I just let it rip). That situation remedied, I was then looking at an un-centered, in relation to the deck, bow sprit that has a 1/16" gap on the port side and is flush against the deck on starboard. I honestly don't know if this is Revells fault or mine. The pieces are all in their allocated slots per assembly directions, so I am going to ausage my ego and blame Revell.Anyway, the following pics show my remedy.

I filled in the gap with a piece of scrap basswood and then covered that with a cutting from one of the deck cutouts that, thankfully I saved.  As you can see, the mounting tab for the ramp thingy isn't centered and it is a little bit too far aft to follow the Bluejacket plans exactly.

I didn't have the right size styrene, so I made the coamings from basswood and used the Bluejacket PE grating.[I finally convinced them to send me the PE set after all. Yeah Bluejacket!] According to the plans, the grating should nearly butt up against the boom, but since that damned mounting tab had to be covered, I ended up making the coaming sides a tetch longer. The bucket is sitting on the part of the tab that sticks out to port. There is still a bit of a gap between the bow sprit and the coaming on the port side, but to do it any other way would have been even uglier. As it is, I can live w/ it.

I haven't glued anything dow here, and some touch up and dull-coat are in order, but, all in all, much better than that ugly ramp thingy. [painting wood is a whole different animal than painting plastic.In hindsight, I should have sealed the wood with a varnish or something before painting] And yes, the buckets and rope coils are hiding the tab part that still shows, and a couple of scrapes on the decking [more not for prime time language] that I made while paring down the tab. I may just redo this in styrene at some point. I don't like how 'bumpy' the paint finish came out.

Things are going much, much slower w/ the spar deck, so it may be a while before another post.

Axiom: There is no such thing as trash when modeling.

  • Member since
    March 2012
  • From: Marysville, WA
Posted by David_K on Wednesday, September 25, 2013 7:20 PM

Looks fantastic, Arnie!  You've gone a long way from OOB!  

        _~
     _~ )_)_~
     )_))_))_)
     _!__!__!_         
     (_D_P_K_)
   ~~~~~~~~~~~~~
    ~~~~~~~~~~~

Current Project:  Imai/ERTL Spanish Galleon #2

Recently Finished: Revell 1/96 Cutty Sark

Next Up:  ???


  • Member since
    September 2012
Posted by GMorrison on Thursday, September 26, 2013 3:24 PM

Nicely done. If you know ahead of time that you will be painting the parts, I recommend using styrene. Wood is finicky stuff, and only the best hardwoods like holly avoid a discernable, non-scale grain. It's good stuff at 1/48, problematic at 1/87 and 1/96 unless you use only the smoothest and best quality, and gets very awkward as the scale gets finer. I built a series of wood railroad stations (5 slightly different based on the Southern Pacific Railroad Common Standard Plan) in 1/160 completely out of styrene sheet and strip and they looked better than if I had tried to use wood.

 Modeling is an excuse to buy books.


  • Member since
    June 2013
Posted by scaledecks.com on Friday, September 27, 2013 2:12 AM

I must confess that when I am not building model ships, I like to build aircraft and rockets.  Balsa is great to work with, as it is soft and sands so incredibly easily.  However, it is very soft, and when you paint it, it "fuzzes up" something terrible.  UNLESS you use a good sanding sealer.  Aero Gloss is by far my favorite brand.

www3.towerhobbies.com/.../WTI0001P

Do about three coats, sanding with a fine grit paper in-between each one.  The first coat really gets soaked into the wood in a big way; the second coat less so, and the third really lays down a smooth surface.  When all is said and done, the sealer fills in all the pores, and virtually transforms your wood into a plastic-like material that is very hard and strong (hard enough for rocket fins that bounce on the ground upon landing.)

I would think it would work good on basswood, too.  You might want to pick up a bottle and check it out.  (Oh, and get the matching thinner, too, for cleaning up your brushes!)


Advantage balsa for ease of shaping and bending; advantage styrene for no need to finish prep the surface prior to painting.  I use both, depending on the needs at hand.

  • Member since
    June 2012
Posted by arnie60 on Friday, September 27, 2013 11:20 AM

Thanks John and GM for the tips. I think I will get a bottle of the Aero Gloss, sand down the coamings that I made from the basswood, and give it a try. No doubt it would be less work to just rebuild it from styrene, but I want to see how it comes out for possible future use.

  • Member since
    June 2012
Posted by arnie60 on Tuesday, October 1, 2013 6:13 PM

Here's a small update

With our Oregon rains setting in hard and early, being outdoors has been less than pleasant so I have been spending more time at the work bench. i replaced all the belaying pins w/ ones from Bluejacket and gave all a coat of paint, I put in shot racks along the hatch just abaft ot the capstan, and the capstan as well.

The racks and the capstan are modeled after pics from the current Connie.

I aplogize for the poor quality of the pic. The capstan on the current Connie had a brass cap and stainless steel sides. I did not think they would have stainless steel in 1858 so I painted that part light grey, and the brass paint I have for the cap was just wrong, so I painted it dark grey. I am pretty happy w/ it, but I would love to get some input on color scheme here, also w/ the pin rails. I painted the top pin rails green and the heavey support timbers brown. I am thingking all brown or maybe all green. Nothing except the shot racks are glued down at this point, so easy to change. The shot racks are brass wilre that I used blacken it on. Getting the 'bends to be the same length and parallell was tricky. Installing them even trickier, but nothing worth seamans language about. I plan to do one more up near the foremast.

The little shot trays on the deck are pure supposition on my part. I wondered how they got the shot to the decks and came up w/ the trays. i figured two men (boys) could easily transport 3 balls at a time this way. I found plenty of info on what the 'powder monkeys' do, but nothing on how the balls were moved,. If any one has insight/ info on this I would appreciate knowing about it; Input on the paint scheme is also very welcome. Right now I guess I like it but am ambivilant.

I added the capstan arms? spokes? usind bass wood stained colobnial maple. Rough,Not my best effort . I shall try some more later and see if I can do a better job (good practice for doing the yards?) I left it at four for the time being ( 8 total) as I havent decided that I really want to do more than that. So let me know what you think about that as well.

Moving sooo slowly now. I like it.

Axiom: if its going to end up hidden, it's not a mistake.

  • Member since
    June 2012
Posted by arnie60 on Tuesday, October 8, 2013 12:14 AM

Following Force9's lead, I decided to redo the wheel housing using the current Connie's helm as my guide.

I came up w/ what I thought was an awesome idea. I downloaded the drawings from the Connie site.

Then I re-sized the pic to scale and printed it out. Then I cut out the stand part and glued it to some basswood sheeting and carefully carved it out using the pic as my guide. Then I glued a piece of .01 styrene sheeting to the back and cut it out. The next step was going to be to glue another piece of the .01 to the other side, cut it out, sand, file and shape for a finished product.

You can see why that's as far as I got w/ that idea.Maybe if I did 20 or so of them I would get two that worked, but I couldn't face it. Just getting these took far too long. So I fell back on Force9's method w/ a slight variation. Instead of laminating two pieces of styrene, then bending them to shape, I used a single solid piece. I made a jig first, then I had read somewhere that boiling the styrene would allow you to bend it like steaming wood does. I am happy to say that in fact that does work, but not quite as well as it does w/ wood. Still, I was able to get the shapes that I wanted pretty near perfect after a few tries (you need to let it boil for about ten minutes at least, and then you need to work quickly w/ it) The end result is not nearly as nicely done as the ones Force9 did, but considering my skill level, I am fairly happy w/ it.

Haven't decided if this will be the final color(s) or not yet, and I need to do some clean up but overall, much, much better than what came w/ the kit.

Axiom: If you are trying something for the first time, clear your calendar for the day.

  • Member since
    September 2012
Posted by GMorrison on Tuesday, October 8, 2013 12:26 AM

Notice something? The drawing has ten spokes; the kit eight. There's always been something about that wheel. Truly.

Your base color is good. Have a look at the WW1 guys' GB. They do wonders with that umber, and Testors "wood" grain effect.

 Modeling is an excuse to buy books.


  • Member since
    June 2012
Posted by arnie60 on Tuesday, October 8, 2013 10:34 AM

i did not notice the discrepancy being so focused on the stand and not the wheel. Good catch there GM.

  • Member since
    June 2012
Posted by arnie60 on Sunday, October 20, 2013 9:54 PM

Tackled by the Tackle:

So I decided that I wanted to run the side tackle on the carronades on the spar deck. I ordered some 2mm single and double blocks from Syrene [amazing quality! Not a single bad block out of 100 total, and I have not had to file, sand, or  re-drill a single hole that I didn't accidentally get glue into. I can not recommend them enough. http://www.syrenshipmodelcompany.com/ ] and set to work, and set to work, and set to work. I knew there was going to be a learning curve on this one, but not so damned steep a one.

Here's my objective:

A single block on the carriage and double on the bulwark. I would have done well to reference this photo before I got started on this.

Axiom: Do your homework first.

I had it in my head that the blocks were stropped in iron w/ the hook end, Not as in the above, stropped in rope w/ the hook attached. So I started out by trying to figure out how to strop the blocks using twist tie wire, which was the smallest gauge I could find that was still flexible enough. I did try a smaller guage of brass also, but it was just too hard to bend at that size of block. So I stuck w/ the twist tie wire and also added eyebolts to the carriage using it. The wire seemed a bit too large for the scale but looked reasonbly good. Sometimes you have to use a bit of "willing suspension of disbelief" when trying to work in scale. Threading the blocks turned out to be the easiest [although not by any means easy w/ my shaky hands] part, and I got a practice run placed.

Not the worse, but far from my expectations. I freaked out having spent many hours getting to this point and threw it out to the forum hoping for help. As it turns out, the best help I got was the pic of the carronade on the present day Connie.[remember? The one I should have looked up in the first place.]

Back to the grindstone, I pulled the eyebolts and moved them to the rear of the carriage. As it turns out, there is a little lip at the back end where I could place and glue the eyebolts under the carriage. Then I went back and tried some different cordage till I got one that worked for me to strop the blocks w/ and just bagged the idea of the hooks. At this scale its not really an issue and made my life considerably easier.

Still room for improvement, but much much better. Moving the blocks to the end of the carriage and the other one to the center of the bulwarks expanded everything enough to catch that wonderful geometry going on there. The breech tackle is somewhat frazzled, and I may replace it, but it came out pretty good as well. The hardest  for this part was getting the slack right. So, as it stands, this is going to be my template for the rest. [21 more? sigh.]

"Until the time Eustes, until that time."

  • Member since
    December 2010
  • From: Salem, Oregon
Posted by 1943Mike on Sunday, October 20, 2013 11:23 PM

Arnie,

Did you get the pear or the boxwood blocks? It's hard to tell from the pictures (for me) since the color may not "translate" from the images on their site to the images you've posted.

Their prices seem very reasonable for the quantities and I may get some for a future build. I know JTilley recommends getting just what one needs to work on for a few weeks and then order more but, from what I've gathered regarding the sale of companies like Model Expo and Bluejacket, I may want to stock up Confused.

Mike

Mike

"Le temps est un grand maître, mais malheureusement, il tue tous ses élèves."

Hector Berlioz

  • Member since
    June 2012
Posted by arnie60 on Sunday, October 20, 2013 11:35 PM

Mike;

These are the boxwood blocks. I liked them the way they came and didn't bother w/ staining them. I may go a different route w/ that idea when it comes to the rigging. The glue does change them a little, but obviously I don't see that as a problem.

I just ordered a minimum to see how good they are, and as I said earlier, that's damn good. I will probably go over my rigging lists and figure out what I need and then order the bulk of what I will need.

  • Member since
    June 2012
Posted by arnie60 on Monday, October 21, 2013 12:28 AM

Here's a pic.

  • Member since
    June 2013
Posted by scaledecks.com on Monday, October 21, 2013 2:40 AM

Randy -


Your work continues to amaze and inspire.  Before you get too far along, you should check this out...

I have moved on to working on the CSS Alabama.  The Revell 1/96 kit is really honked up; they just sort of tweaked around their model of the USS Kearsarge which was roughly comparable, and then moved around the deck stuff a little but and Presto!  They had an Alabama.  But the biggest problem was that they didn't mold new guns, and the gun sweeps for the pivot guns mounted in the deck were all wrong, and when you are done with the kit it doesn't really look like the Alabama looked.

So I did some hunting around and came across a firm named "Cottage Industry Models."  They make a really cool gun set for the Alabama in 1/96 scale - I picked it up, and it's awesome.  I also ordered a 1/32 model of the 7" Blakely Rifle by Flagship Models, and inside was a little packed of awesome rope, by...  Cottage Industries.  You gotta check out this rope!  You can get 15 feet of it for just a few bucks!

http://cottageindustrymodels.com/?page_id=153

Here is a photo of the actual rope in my Blakely kit.  The larger is for the recoil rope, and the smaller is for the tackles.  But I gotta think that the smaller rope in 1/32 scale would be perfect for the recoil rope in 1/96 scale.  And it just looks so much like teeny-tiny real rope.  Check it out!


Here is the photo from their site:


  • Member since
    June 2013
Posted by scaledecks.com on Monday, October 21, 2013 2:44 AM

Hmmm...  Photo did appear on the last post.  Let's try that again...

  • Member since
    June 2012
Posted by arnie60 on Monday, October 21, 2013 12:43 PM

John;

Yeah, that's some really nice looking cordage. Definitely better than what I got from BlueJacket. What's the turn around on order time?

I have checked out cottage industries before. They have some ironclad models that I have drooled over. Someday.

And thanks for the Kudos.

  • Member since
    November 2012
Posted by abishag98 on Monday, October 21, 2013 4:34 PM

Arnie60, no doubt you as well as Force9 and a couple of others on this forum, dwell in the upper echelons of rarefied air when it comes to the modelling world! Such attention to the smallest details is mind-boggling. Quite impressive!

  • Member since
    June 2012
Posted by arnie60 on Monday, October 21, 2013 6:23 PM

So as I am rigging the side tackle on the carronades I got to thinking about the force advantages of using pulleys and realized I really did not know just how they work. I figured I would share what I learned here in case anyone else was curious.

Lest assume we want to move 100 lbs. In a 2 t0 1 ( this would be two single blocks) there are two lines that carry the load around the pulleys, so the weight gets distributed equally on those two load lines, i.e. 50 lbs each in this case, so that in effect, the free side that is being pulled is the same as pulling on 50 lbs, not 100. In the 3 to 1 (this would be a single and a double block) you would only be effectively pulling on 33 1/3 lbs of the total 100. So simple!

Here's the math behind it.

MA is the mechanical advantage    W is the weight or load   T is the tension or force of gravity  n is the number of load lines.

I know, its nerdy, but, being a former math teacher I can't help but see the mathematics and geometry in all the parts of a sailing ship. Its all really quite elegant to me.

  • Member since
    November 2012
Posted by abishag98 on Monday, October 21, 2013 7:14 PM

For sure, you definitely would not like me as a student in your classroom. :-) Math and geometry was all Greek to me. But thanks for the lesson anyway.

  • Member since
    September 2012
Posted by GMorrison on Tuesday, October 22, 2013 12:15 AM

Gotta love that mechanical advantage!

 Modeling is an excuse to buy books.


  • Member since
    November 2005
  • From: Formerly Bryan, now Arlington, Texas
Posted by CapnMac82 on Tuesday, October 22, 2013 12:44 AM

Arnie's diagram is for a fiddle block, which uses non-coaxial sheaves.  As the diagram shows, they are often of different diameters.

Which makes for complicated equations versus using a double block with coaxial sheaves of the same diameter.

Blocks are sized to fit the lines they serve.  Around 9 times diameter (3x circumference) for natural fibre, and 3x diameter for wire.  You size the fiddle block using the smaller sheave for this reason.

Some tackles have names, too.  A Gun tackle uses two single blocks, the bitter end of the line to the becket of one block, then through the  other block and back again--this can be either a two-part of three-part tackle.  

A Luff tackle uses a double block and a single block; the bitter end to the becket on the single block, then through the two blocks to make either a 4-part or 5-part hoist.

Moving to one double and one triple block gives a Gyn tackle, a 5 or 6 part hoist.

The recoil tackle on the main guns is set up as 4-part luff tackle, if memory serves.  One reason to use gun tackle instead of other tackle is in speed.  The more sheaves in a tackle, the more line to reeve it.  Every added sheave makes for an easier pull, but it's also proportionately more line to pull.

Let's say a gun tackle needed a "pull" of 6' of line to move the blocks three feet.  Changing to luff tackle adds more than six feet of line in the three foot "throw" of the tackle.  So, instead of pulling 6' of line, you need to pull 13-14' of line.  This is not as fast, and leaves a lot more line on the deck--neither of which are ideal for a fighting ship.

Yeah. math--you can grow up all you want to, but, you still wind up using it every day.

  • Member since
    June 2012
Posted by arnie60 on Tuesday, October 22, 2013 2:03 PM

I honestly thought I was "blowing in the wind" posting about the pulleys. Did not expect this kind of response. Cap is right. The diameter / circumference of the wheels complicates the math.  I just wanted to show how simple it can be. And thanks for the further clarification Capn. Very interesting, at least to me.

  • Member since
    September 2012
Posted by GMorrison on Tuesday, October 22, 2013 4:00 PM

Pulleys a different animal. Mac brings up a good point though which is that in physics there's no free lunch- in fact you pay but that's a detail.

Sheave diameter and offset axles are lesser factors than number of circuits. I can't really tell from the picture I posted exactly how that bridge crane is rigged, but it looks like 6 or so wide blocks. That'd be 24 to one since they are doubled, which means that machine would take in about a half mile of cable to raise that load bar more than 100 feet.

 Modeling is an excuse to buy books.


  • Member since
    November 2005
  • From: Formerly Bryan, now Arlington, Texas
Posted by CapnMac82 on Wednesday, October 23, 2013 10:56 PM

The (clearly) tireless engineers at Link-Belt; FMC; American; Bucyreus; et al, who cipher not only how many parts to put into boom and lift rigging for cranes, derricks, draglines and the like--let alone the spindle speeds to work all that gear--have my endless admiration.

Luckily for me, I never had to apply much of this, except by rule-of-thumb, and generally only for evolutions like making up a tripod of dunnage poles to be the base of an impromptu gin-pole derrick.  That, and growing up with Knight's Modern Seamanship and The Bluejacket's Manual will give a person fundamentals they did not know existed.

  • Member since
    November 2012
Posted by Jaguar1969 on Thursday, October 24, 2013 3:21 AM

Beautiful work. I like it

  • Member since
    December 2003
  • From: 37deg 40.13' N 95deg 29.10'W
Posted by scottrc on Thursday, October 24, 2013 5:02 PM

Looking great!

  • Member since
    June 2012
Posted by arnie60 on Thursday, November 7, 2013 12:04 AM

So after beating my head w/ the tackle for the carronades, I'm now on version 4.2 and waiting for more supplies, I decided to take on the bow heads and railings which led to a lot of frustration that I wont elaborate on at the moment (I promise to come back to it tho).

Axiom: when frustrated, take a break or work on something else.

Which takes us to the pinnace for distraction. I ordered the resin cast pinnace from Blue Jacket a while back. Honestly, I wasn't too happy when I opened the box. The detail of the interior is exceptional, but the outside of the hull looks like the aftermath of a serious teenage acne outbreak. Wish I could show you a pic, but I guess I did something wrong and deleted it.

Anyway, I spent more than a couple hours puttying and sanding, puttying and sanding, to fill in the craters. That done I primed and painted then laid the footlings w/ styrene.  Nice!  I used basswood for all the seats etc. stained w/ colonial maple. I also added a top rail so that I could add the oarlocks. Had to break out the steamer again for that part.

This went much easier than the cap rails I did earlier since I did not have to bend the wood against the grain.

Gluing them on was a bit tricky (btw... testors cement does not work well w/ wood...thank got for CA) but they came out pretty good. I then used a rat tail file to carefully file down the grooves for the oarlocks and then painted the insides black. The rudder actually proved to be the most difficult part and did not come out as well as I would have liked. I will probably get bugged by it enough after time and re-do it, but for now, meh.

I still need to do a lot of touch up and add details, one being the mast which will be placed stowed, but for the most part, I am really happy w/ it, and it was just plain fun to do.

My carronade supplies just arrived so I will be getting back on those next and post when I get something to show.

PS. Anyone know what the mast should look like? Dimensions? Rigging? If so a pointer would be greatly appreciated.

  • Member since
    November 2012
Posted by abishag98 on Thursday, November 7, 2013 4:07 AM

Wow! Your work never ceases to amaze me. Extraordinary to say the least!

  • Member since
    June 2012
Posted by arnie60 on Friday, November 8, 2013 1:23 PM

I found the pics of the pinnace, a little late, but ....

Like I said, a serious case of acne craters.

Lots of putty... lots of sanding

But the interior is nearly perfect.

  • Member since
    November 2005
  • From: Formerly Bryan, now Arlington, Texas
Posted by CapnMac82 on Saturday, November 9, 2013 2:28 AM

It's a bit late for me to dig trough for Constitution-specific references, but, ship's boats of the era usually used a lug sail.  The lug sail is a lopsided rectangle which resembles a gaff-rigged sail.  It has a lug spar the length of the angled head of the sail.   This was hoist to the very top of a stump mast.

The rig is handy for boats as the spar and the mast could both be about the length of the boat.  Rigging for the mast--when used--was often just a forestay and two backstays of a single line each tied off at the gunwale to an eye, cleat, or the thwartclamp.

Oh, and to really vex, these boats were often to the discretion of the captain, sailing master, or boatswain in charge of them.  So, they might have two masts.  Or, they might step a second mast "on the fly."

I fear that, with references in hand, you may feel a bit thwarted by your thwarts, though.

As a rule-of-thumb, thwarts are about 16" wide, the oarlock/thole pin/oar notch is about 1 thwart aft of the after edge of the thwart, about one thwart above the deck board/grating, and they are about 3 thwarts apart for spacing.  At 1/96, that's 5/32" to 11/64" wide, spaced about 1/2" apart.  (I know the parts in the Revell kit vexed me--those thwarts, as moulded, are closer to waist-high.)

  • Member since
    March 2004
  • From: Spartanburg, SC
Posted by subfixer on Saturday, November 9, 2013 10:22 AM

Great info there.

I'm from the government and I'm here to help.

  • Member since
    June 2012
Posted by arnie60 on Saturday, November 9, 2013 10:55 AM

Thanks Cap'n. That's really a big help w/ the mast info. I did use the dimensions from the blue jacket plans for the pinnace, so the thwarts and their spacing are pretty close, assuming BJ's plans are accurate. The oar locks are a bit off, but my shaky hands could do no better.

  • Member since
    December 2012
Posted by rwiederrich on Saturday, November 9, 2013 2:28 PM

Outstanding mods to a great ship.  Super job.

Rob

  • Member since
    November 2005
  • From: Formerly Bryan, now Arlington, Texas
Posted by CapnMac82 on Saturday, November 9, 2013 7:34 PM

No sweat Arnie,

Just do not read Freeston's Model Open Boats--unless you are in need of an inferiority complex.  (Shoot, I've built a couple of 1:1 boats, and his craft daunted me at full scale [sigh]).

I know that when I last built a Connie, twenty-mumblemumble years' ago, I way over-obsessed with the boats.  For all the efforts I put in casting plugs (repeatedly) from the plastic boats, I could have just built the things up from scratch to much more uniform result.

  • Member since
    June 2012
Posted by arnie60 on Monday, November 18, 2013 2:04 PM

BOW HEADS AND RAILS

To put it simply, the bow heads and rails in the Revell kit are atrocious. Force9 came up w/ a nice solution for the supports between the rails, but I thought I would go one better and build them from scratch using the BlueJacket plans. I had ordered their britanica metal rails and already had the PE for the grating and the heads. Well....the bow of the Revell kit just does not match up w/ the Bluejacket model. The PE grating did not come anywhere close to fitting, and the rails just did not look right scale wise. I did attempt to use them anyways (the rails) and after many hours of exasperating trial and error finally gave up and decided to go w/ the Revell kit pieces w/ some modifications.

I cut out the existing two, way out of scale, heads from the grating and fitted the BJ PE heads in its stead. Strictly speaking, they are not correct for the time frame that I am attempting to stage the model in, but sometimes you end up sacrificing accuracy for appearance.

This means that I also won't be able to use the forward boomkins w/ out some fairly serious refitting, but the BJ plans do not call for them, and as they are a part of the running rigging that I do not intend to include, no great loss. I guess I can always go back and figure something out later if I need/want to.

I ended up painting the two top rails solid white as the detail just did not come out on those pieces. There is a bit of 'corrections and touch up to do, but they came out satisfactorily enough. Note that I also "fleshed out" the hawse ports w/ some chain links that I picked up at the local craft store to meet the specifications that I outlined at the beginning of this log.

The carronades are coming along very nicely, but excruciatingly slow. I figure I am averaging about two hours per gun. It is much more tedious and difficult than I would have thought.

Axiom: It's a good idea to know how deep the water is before you jump in.

The way they are now will be their final fitting (version 4.2). I went back and added a "bridle ring" for the breech rigging to pass through by using some crimping beads that I had. They are just a little bit larger than scale, but still look soooo much better and more accurate.

The cordage comes from Syrene, where I ordered my blocks from. Pretty expensive stuff, but I finally got the right sizes w/ out having to build my own rope walk. I really need to finish these before I can place the pin rails, so it may be a while before I post again.

  • Member since
    December 2012
Posted by rwiederrich on Wednesday, November 20, 2013 1:21 PM

Looking very nice...for sure.

Rob

  • Member since
    June 2012
Posted by arnie60 on Wednesday, November 20, 2013 2:22 PM

Thanks Rob, and all others that have made compliments.

I really get my inspiration, and often guidance from the learned and experienced community we have here. This is my first stab at working at this level of modification and detail, much of which has been a somewhat steep learning curve for me, and I could not have gotten this far w/ out everyone's input, help, and encouragement.

  • Member since
    December 2012
Posted by rwiederrich on Wednesday, November 20, 2013 3:36 PM

I like how you *Hyper* detail your standard kit.  Exactly what I do myself.  You're doing an exceptional job.  

Will you be rigging with deadeyes and lanyards as well?

Rob

  • Member since
    June 2012
Posted by arnie60 on Wednesday, November 20, 2013 5:08 PM

Yes Rob;

The plan is to replace the masts from the top mast up along w/ the jib boom and flying jib boom w/ basswood and brass rod (sky sail masts, stunsill booms,etc) following the BlueJacket plans that I have, as well as the deadeyes and lanyards for the shrouds. I will only be doing a very small part of the running rigging.  Working on the jib boom and flying jib boom now.

  • Member since
    September 2009
  • From: Miami, FL
Posted by Felix C. on Friday, November 22, 2013 5:24 AM

Will the mast and spars be replaced with wood ones?

  • Member since
    December 2012
Posted by rwiederrich on Saturday, November 23, 2013 9:56 AM

Good work Arnie....

Rob

  • Member since
    May 2003
  • From: Greenville, NC
Posted by jtilley on Saturday, November 23, 2013 10:32 AM

I don't recommend basswood for spars.  It's too soft - especially when shaved down to tiny diameters.

Hardware stores, craft stores, and home centers usually carry dowels made out of one of three materials: birch, maple, and oak.  Birch and maple make good spars.  (For a long time modeling handbooks recommended against birch because of its alleged tendency to assume gross shapes.  It seems the lumber suppliers have licked that problem; I've got dozens of birch dowels that have been lying around for years and are as straight as they were when I bought them.)  Oak is lousy, because the grain is so coarse.  Maple isn't as nice as birch because it tends to break - at the worst possible moment.  Of the three, I recommend birch.

Places like Woodcraft sell walnut and cherry dowels:  www.woodcraft.com/.../search.aspx .  Walnut is awfully dark and pretty coarse-grained for the purpose; cherry is a little bit dark, but the color varies from sample to sample, and it's beautiful stuff.  If you play around a bit with some stain (I like Minwax) you can make the color a little more orange, and it will look just about right.  (And in the case of the Constitution, you'll be painting a lot of the spars anyway).  I used cherry for the spars of my little Model Shipways Phantom, and I'm very happy with the results.

The wood ship model companies sell birch dowels that are already tapered.  The taper probably won't be just right for your purpose, but it's easy to touch it up. 

Some people swear that the only way to make a wood spar is to start with a square stick and plane it down, but I've gotten along perfectly well for many years using the old electric drill trick.  (I've got an old Unimat lathe, but it's not big enough for larger spars.)  Cut the dowel an inch or so too long.  Clamp your drill in a vise on your bench.  Arm yourself with some sandpaper in various grits and a soft rag.  Chuck the dowel up in the drill.  Assuming you're right-handed, hold the end (with the rag, to avoid burned fingers) in your left hand, and the sandpaper in your right.  Turn the drill on (at a pretty high speed) and lock the trigger.  Have it with the sandpaper.  It won't take more than a few minutes to get the taper right. 

Many spars have sections that are either square or octagonal.  For those, you need to start with a larger dowel and carve/sand/file the section in question first.  Then use the drill to take the round sections down to the right taper.

A digital machinist's caliper comes in mighty handy for checking the diameter as you go.  If you don't already have one, nowadays such things are remarkably cheap:  http://www.woodcraft.com/Product/2081537/31416/General-Tools-6-Carbon-Fiber-Digital-Fractional-Caliper-Model-146.aspx .  You may in fact be able to find one at your local Lowe's or Home Depot.  It will come in handy for all sorts of things.

Hope that helps a little.  Good luck.

Youth, talent, hard work, and enthusiasm are no match for old age and treachery.

  • Member since
    June 2012
Posted by arnie60 on Saturday, November 23, 2013 3:03 PM

JIB BOOM / FLYING JIB BOOM

Thanks for the heads up JT. I actually typed in bass wood when it should have been birch wood. I am using the dowels that I ordered from Blue Jacket as outlined in their parts list for the Connie. Very reasonably priced, especially since my LHS does not carry them.

This is yet another first for me and I was unnecessarily worried about it as it turned out to be not only easy, but fun to do. As I have been working w/ wood for the first time w/ this model, I am finding it much nicer to work w/ than styrene and am now seriously considering my next build after the upcoming Alabama to be entirely a wood kit. Anyways....

Assembly materials: Brass sheeting, hexagonal styrene, birch dowels

I followed the advice about using a drill to do the tapering using my cordless variable speed propped in my lap, left hand on the trigger, right holding the sanding stick.

It went really quick and easy. I checked it against the BJ scale plans rather than using calipers and adjusted until I got a match (or as close to one as I could)


I finished up by trimming the extra length off the ends and final shaping, then staining w/ min-wax colonial maple.

Using scissors, I cut some narrow strips from the brass sheeting and made bands, one for the flying jib, and one for the cap end of the jib boom. The octcagonal styrrene connector was glued to the band for the flying jib. The BJ instructions did not have much instruction on this, but it did have an image of what it should look like, and I think I came pretty damn close if not right on.

The flying jib boom is offset to Port by 45 degrees and slightly above the jib boom and buts into the bowsprit mast cap. I ended up deciding to use epoxy to lock it in place as I was nervous that w/ all the tension from rigging, there would not be a strong enough bite w/ such little surface area to glue to.

I have to say that I am quite happy w/ the results considering this is my first endeavor.

The black rings on the jib boom and flying jib are travelers for the running rigging that will come into play later. I still need to attach a number of bullseyes and blocks for the rigging, but that will have to wait for supplies in the mail to arrive. As you can see, I used the kits bow sprit and maritngales. They fit the BJ plans profile almost exactly, Although the BJ rigging plans calls for a set of fairleads that I will have to add as well as the blocks and bullseyes.

  • Member since
    December 2012
Posted by rwiederrich on Saturday, November 23, 2013 3:11 PM

Well there you go....Isn't adding wooden aspect fun....? not to mention they give the model a wood finish..almost making it appear as if the entire model is wood.  I use anything to get the job done.

Looks like you're on your way.

Rob

  • Member since
    June 2012
Posted by arnie60 on Monday, November 25, 2013 12:05 AM

IN NEED OF ENCOURAGEMENT

I staged all the deck furniture and some details that I have done, as well as the bow sprit and booms to get a better idea of where I am at and see what kind of problems I was going to have with the overall length of the ship since my work space is really quite compact. [ I have read of some of you that are working/ have worked from a closet space.... which I can not imagine as I feel so crampped as is. ]

As can readily be seen...this is going to bring up some issues, so I will need to be extra careful once I step the bow sprit.[BTW: notice that my table top is glass. This is a 25x35 inch piece of tempered glass which I ordered special that cost me only $45 . Worth three times that from my perspective. I can not reccommend this enough. I have been a huge Testors work mat fan for some time, but this is so much easier to clean up any kind of spills, or scrape off any dried up paint or glue from. No replacement ever needed.]

I would have liked to save the bow sprit for later, but of course it is THE starting point for doing the rigging. I will however not be gluing down any more deck furniture than I have to before doing as much rigging as possible.

I had no idea what a boost I would get from this staging, but it really is starting to look "ship shape" and I am excited to do more after seeing how good it is going to look. I was really getting into a slump w/ all the carronades and all the pieces in different piles and stages of completion.

Axiom: Take a minute to see what you have acomplished and not dwell on whats left undone.

another BTW: I got really nervous reading through JayMans build for his Connie where he apparently had some critical issues w/ the rake of the masts so I went ahead and placed mine to check it. The BlueJacket plans show the rakes as 91 deg. for the foremast, 92 deg. for the main, and 94 deg. for the mizzen. I tested them using a level and protractor. I am happy and relieved to report that, at least in my kit, Revell hit the mark on these. I wont have to make any modifications for it to come out right.

Unitl that time.....enjoy.

  • Member since
    December 2012
Posted by rwiederrich on Monday, November 25, 2013 10:23 AM

Looks outstanding.....:)  Plus your build space may not be huge..but it does the job.

Rob

  • Member since
    June 2012
Posted by arnie60 on Thursday, December 5, 2013 4:35 PM

AND NOW FOR SOMETHING TOTALLY DIFFERENT

So I am sitting around waiting for supplies and going through my reference photo cache and found this in the folder.

I had kept it with the idea that I might try to make one for final staging details, but with time on my hands decided to give it a go now.

Here's the result.

For fabricating something this small and not really able to see the details from the photo, it came out pretty good. I used some old watch parts for the cog wheel and the locking bar. Looks good enough from viewing distance to pass. I haven't decided yet just how to use it, if at all.(and yes... I know I need to re-glue the cap rail down)

Also I got this little goodie in the mail the other day.

$5 from Amazon. This thing is so nice. Very small with a fierce suction grip that just wont come loose. I actually paid more for shipping than I did for the vise. Type in 'mini vise' in the search box and it should come right up.

  • Member since
    August 2012
Posted by JimNTENN on Thursday, December 5, 2013 4:48 PM

Very nice work. I attempted to build this one years ago and actually got it mostly built. I worked on it pretty steady for two years straight and by the time I got to the point of attaching the sails I was so burnt out that I set it aside and never resumed work on it. It's still sitting in a corner of my workbench collecting dust. And it's hard telling how many spiders have made it their home. I've been thinking about either buying the kit...as far as I know it is still available and I've never known of it ever being out of production...and building it again applying lessons I've learned from my previous attempt or buying a more expensive wooden kit of it. Old Ironsides will always be a special ship to me because I've actually been on board it.

Current project(s): Hobby Boss: 1/72 F9F-2 Panther

                                  Midwest Products: Skiff(wood model)


  • Member since
    February 2014
Posted by Smitty on Monday, February 3, 2014 8:15 PM

Thought I'd stop by and give a huge thumbs up to your work here, Arnie. I'm keeping an eye on this one as well. Oh...and I'm taking notes! :)


Work in progress: Revell 1/96 USS Constitution

  • Member since
    June 2012
Posted by arnie60 on Tuesday, February 4, 2014 11:10 PM

As Time Goes by:Music

I just realized that I am rapidly coming up on a year that I have been working on this build and I still have a long way to go. Phewwww! I guess that's what happens when you can't bring yourself to compromise.

The last two months have been full of holidays, honey do lists, work, and sundry exigencies so I haven't had a lot of time to work on my model but I have managed to get a few things done and figured that I was overdue on posting....so here is the latest.

I managed to get all the cannon rigged with the exception of two of the forward 24 pounders, the reason being that one of the cats decided that one of them was its new chew toy, all but utterly destroying it, and rather than be one short, I decided to even it out and leave two off. I may stage the one I have left as being placed with the tripod lift that I built. Well see.

Note the two missing cannon, and I added the pin rail to the bow as per the blue jacket plans. I realized after' that I have not rigged the side tackle strictly correct. They should not have been belayed to the center of the bulwarks. I will probably go back and fix this later, but just now I am so sick of rigging cannon that I just can't bring myself to do it. I still have a few pin rails that need to be placed on the starboard side and a shot rack around the charlie noble and that will wrap up the spar deck except for detailing, much of which I will not do until I get most of the rigging done.

I also added the BlueJacket cathead fittings, which I had to file down since the kits catheads are actually smaller than what the BlueJacket plans call for. The photo is the best I could get w/ out a macro lens.

I added brass rod to the pin rails and the main fife rail. drilled new holes for them, and all are epoxied rather than using testors to make sure there won't be any screaming from a rail pulling loose later.

I also managed to get the masts done in wood from the top mast up. Can't say that it was easy, and there was plenty of firewood on the bench by the time I got some satisfactory results, and they are far from perfect, but for never having done this before they came out pretty good. I still need to touch up w/ the stain I used but I test fitted all and I am quite happy w/ the outcome. Wife was aghast when she saw how tall it was going to be. (huge grin)

The T'gallant and Skypole masts are one solid piece of wood that I then had to "build up" the "cheeks" that the cross trees rest on. A lot of work to say the least, but seeing all that real wood soaring up like that made it so totally worth it.

I plan to add the royal masts using brass rod, but may go w/ the kit parts since I am going to have to paint them anyway. I also have bagged the idea of making the yards from wood since they will all have to be painted black anyway, although I will probably do the top gallant and royal yards out of brass or wood since the kit parts are so flimsy.

As I go along here making compromises, I have to remind myself that one of the main reasons that I like working with plastic models is that you don't have to recreate the wheel every time and spend "years" (plural) to attain a finished model. And honestly, at this stage, I am being much less fickle about historical accuracy and just want a finished model that I can be proud to display.

I am currently working on the channels and will post w/ an update hopefully sooner than this last one.

  • Member since
    September 2012
Posted by GMorrison on Thursday, February 6, 2014 1:51 AM

arnie60

 I also have bagged the idea of making the yards from wood since they will all have to be painted black anyway,

Print same, tape to bathroom mirror, delay decision.

 Modeling is an excuse to buy books.


  • Member since
    February 2014
Posted by Smitty on Thursday, February 6, 2014 11:07 PM

Arnie,

  Beautiful work, as always. I was glad to see some progress! Watching your build is giving me so many new ideas. I haven't made too much progress since my last post (too busy trying to figure out where my next tank of LP is coming from), but I'm plugging along. Keep up the excellent work!

PS> Mind if I "borrow" those Bluejacket plans when you're done? :)


Work in progress: Revell 1/96 USS Constitution

  • Member since
    June 2012
Posted by arnie60 on Thursday, February 6, 2014 11:49 PM

GM

am·biv·a·lence

amˈbivələns/

noun

noun: ambivalence; plural noun: ambivalences

   1.    the state of having mixed feelings or contradictory ideas about something or someone.

Smitty;

I am pretty sure you were kidding (for the most part) about the BlueJacket plans, but I thought that I needed to say something about my feelings on copywrited material, which they are. I am more than glad to give away or pass on tools, supplies, ideas, and plans of my own creation as I like the "pay it forward" idea very much. But copywrited stuff is usually something that someone else has worked hard on as a means of income. I just could not bring myself to deprive an excellent company such as BlueJacket of their justly deserved income. I want them to be around for myself and future modelers to depend on as a resource.  Thanks for understanding, and for the compliments as well.

  • Member since
    September 2012
Posted by GMorrison on Friday, February 7, 2014 12:10 AM

Well said, and I didn't expect you to have any feelings one way or the other.

 Modeling is an excuse to buy books.


  • Member since
    March 2013
Posted by Marcus.K. on Friday, February 7, 2014 7:01 AM

WOW .. I did not see this beautiful building log before! .. what an interesting document. Have to study more intense and will - just as from Force9´s one - learn a lot for my future acitvities!

Great project! Very nice details ..

  • Member since
    February 2014
Posted by Smitty on Friday, February 7, 2014 2:42 PM

Arnie,

I was only kidding about the plans. It's very difficult to convey sarcasm in text. :-) I know that if I had the plans in my toolbox, I wouldn't want to part with them either and I agree with your viewpoint on it. Buying the BJ plans is on my 'bucket list' for this build, but I'm having a very difficult time justifying to myself (and my wife) spending that kind of money right now. But tax time is coming :)


Work in progress: Revell 1/96 USS Constitution

  • Member since
    June 2012
Posted by arnie60 on Saturday, March 1, 2014 1:52 PM

Installing the hammock cranes

I started working on the channels and realized that the deadeyes were too large, so while waiting for new ones to arrive i set to work on the hammock cranes, which I was going to leave until nearly last, but decided what the heck.

I had figured this was going to be a quick and easy install, but of course it proved to be more difficult than I had thought.

I fortuanately had the BlueJacket PE for the stanchions so i did not have to worry about working w/ delicate plastic parts.

Installing the stanchions went pretty smoothly. I used the original plastic rails to mark out where they should be placed and drilled new holes for them.

Rather than paint them, I used blacken-it on them, glued them in and then ran the "cables"

I looped the cable around the forward end and added an eyebolt to tie them down at the aft end. I did the same for the forward cranes except adding a tie down at the bow.

Adding the netting took some figuring and finegaling. I used some toile (pronounced twahl) that I pick up at a local fabric store. I got the smallest mesh that they carried and it seems to work well for this scale. What I ended up doing was using a ruler to cut a swath the same width as the ruler which proved to be plenty wide enough.

I then just laid it on top after running a thin coat of CA along the cable on one side

. The tricky part was then getting the mesh to stick to the cable. I found the best way was to use the back end of my tweezers to gently tap it down and then after it set to go back over it with another coat of CA.

The next step was to use the back end of my tweezers again to gently and carefully push down the netting in between the stanchions. Using a piece of dowel to hold it down I then repeated the gluing process on the other side.

Once that set, I went back with my xacto knife and very very carefully trimmed off the excess. It did not come out as perfect as i would have liked, but the results are more than acceptable.

For the mid ships I had to find a way to deal w/ the "grooves" designed to hold the kits pieces.

I had thought to putty them in but then came up w/ the idea to use some channel styrene that I had that was the right width, although I did have to shave one side off as it wouldn't completely straddle.

I painted them black, glued them on and drilled the holes to add the stanchions.. Once in place I added some bass wood "slats" and some gangway boards. The gangway boards are traditionally embellashed w/ some sort of carving or decoration, but I left them blank for the time being, If I can find some decent decals that might be appropriate, I may add them later. I still have to finish up the port side, but I have the process down pretty good now and that should go fairly quick.

I am really glad I went ahead and did this now as it adds some real dimension and finish to the deck.

  • Member since
    November 2012
Posted by abishag98 on Saturday, March 1, 2014 2:31 PM

Your work is so clean and pristine! Absolutely extraordinary! Thanks so much for sharing these photos with us. They're inspiring, at least for guys like me who can barely assemble a kit out of the box. Thank you sir!

  • Member since
    June 2010
  • From: Irvine, CA
Posted by Force9 on Sunday, March 2, 2014 2:46 PM

Very nice work Arnie...

You may be the first documented case of a Revell kit utilizing the BJ PE hammock cranes!  I used Blacken-It on the ring bolts on my gun deck.  Even with a pre-bath in Acetate, I still got some with a "rust" effect instead of a clean black.  I'll have to get better before using on the hammock cranes.

Great progress!

Evan

  • Member since
    June 2012
Posted by arnie60 on Sunday, March 2, 2014 11:57 PM

Thanks Evan;

I had that same problem w/ the eye bolts. surprisingly not w/ the hammock cranes. I had to go back, wash off and re-blacken the eye bolts. that seemed to work pretty well. some I just left a little rusty for effect and since they would not be in direct line of sight areas. That front curve on the netting proved to be a biotch and is still not to the best of my liking, but from view distance looks pretty damned good.

I am in the process of trying to figure out the correct blocks etc to use on the bow rigging. Have to say that the BJ plans are not all that insightful. Any idea if the blocks coming off the catheads are deadeyes of thimbles? I am guessing thimbles.

Looking forward to your next post.

And thanks for the Kudos Wendyl :)

  • Member since
    February 2014
Posted by Smitty on Monday, March 3, 2014 2:03 AM

Beautiful work as usual, Arnie. You continue to inspire!


Work in progress: Revell 1/96 USS Constitution

  • Member since
    June 2012
Posted by arnie60 on Friday, March 14, 2014 12:38 AM

LET THE RIGGING BEGIN!

I have fair amount of touch up etc, to do on the spar deck, but it is all just a matter of maybe 2-3 hours of work, so I decided to go ahead and get started on the rigging. I really wished that I could wait on stepping the bowsprit until last because of the limited work space that I have. Turning her around and around with that jib boom and flying jib boom sticking way out there means a broken something just waiting to happen. But it really is THE starting place for the rigging.

I scoured a number of resources as well as my BlueJacket plans to do my best to make sure that I got all the fittings and sequence right. Needless to say, none of them agree entirely. I found that the "Anatomy of a Ship - The 44 Gun Frigate - USS Constitution" by Marquardt to be the most helpfull in giving me a nice clean picture of the rigging its self, and the BlueJacket plans for the fittings and rope sizes.  I have made some allowances and compromises in deference to my skill level (first time rigging at this level of detail) and the constraints of the Revell kit, but am not at all displeased w/ the outcome so far.

Gammoning the bowsprit in place was quick and easy, specially since I had had the foresight to only tack on one side of the bow rails instead of gluing it permanently in place, making it easy to access the rigging points and apply the frapping.

I then started off the rigging with the bow sprit bobstays and shrouds. I used 3/32" deadeyes for the bobstays and 2.5 mm bullseyes for the shrouds. [ to the best of my interpretation, bullseyes and thimbles are essentially the same thing]

I initially used a piece of brass wire as a guage to set up the length of the rigging for the lanyards.

I later figured out that it was actually easier and quicker to just use a set of dividers and make adjustments to the lanyard until the length matched.  I cheated a bit and instead of seizing the strops, I just twisted the wrap around, a tiny drop of CA, and snipped off the short end. You have to get real close to tell that they haven't actually been seized.

The hardest part here was getting the fittings placed right on the bowsprit and at the knight head.

Nothing close to perfection here, but.... by the time I get done with the rigging on this build, I should be a lot closer to that ideal?

Next on the docket was the martingales. These called for 1/8" single blocks on the sprit and booms, and deadeyes at the knight head (shown above)

Ideally the martingales should be perpendicular to the water line but I just had to much fear in my heart that they would break if I forced them any more than I did [one of those kit constraints].

I still need to run the jib boom guys and sprit sail lifts before I move on the the foremast, but I am hoping to get most, if not all of that done this weekend. Apologies for the quality of the pics. Although my new Iphone has a much better camera, it still leaves a lot to be desired. Must admit that I am really pumped up at this point since doing the rigging at this level was one of my main reasons for choosing this model to begin with. Still, I can see that I far, far underestimated how long this was going to take, and my original project completion date of February of so has come and gone and I still have a long ways to go.

Axiom: the first thing to break is invariably the one that was the most difficult to do.

  • Member since
    November 2012
Posted by abishag98 on Friday, March 14, 2014 4:54 AM

As always, extraordinary work Randy! You're an inspiration to all us tall ship modelers. Thank you sir!

  • Member since
    June 2012
Posted by arnie60 on Tuesday, March 18, 2014 12:45 PM

As hoped, I did get to finish up rigging the bow this weekend. I followed the BlueJacket plans for the jib guys, which meant adding two eyebolts to each cathead. Adding the pin rail to the bow allowed me to belay the sprit sail yard lifts so that the lines are straight and clean looking. The BJ plans calls for fairleads on the bowsprit, but I decided to leave them off.

Now its on to the foremast and the channels for the shrouds.

  • Member since
    March 2012
  • From: Marysville, WA
Posted by David_K on Wednesday, March 19, 2014 5:42 PM

Great work, Arnie!  Your Constitution is very elegant, and I only hope I can come close to that level of awesomeness when I finally get around to opening mine!

Well done!

        _~
     _~ )_)_~
     )_))_))_)
     _!__!__!_         
     (_D_P_K_)
   ~~~~~~~~~~~~~
    ~~~~~~~~~~~

Current Project:  Imai/ERTL Spanish Galleon #2

Recently Finished: Revell 1/96 Cutty Sark

Next Up:  ???


  • Member since
    June 2012
Posted by arnie60 on Wednesday, March 19, 2014 10:27 PM

Thanks David;

I've seen your work and have no doubt that you will more than rise to the occasion.

  • Member since
    July 2010
  • From: Tempe AZ
Posted by docidle on Thursday, March 20, 2014 1:33 AM

Arnie,

Beautiful rigging work!  I can hardly wait to see the foremast rigging.  I am going to have to pick up a set of the BlueJacket plans when I start my 1/96 Connie.

Steve


  • Member since
    December 2012
Posted by rwiederrich on Thursday, March 20, 2014 7:53 AM

Great job Arnie...I too enjoy quality rigging detail applied to plastic models.  Foregoing the plastic Dead eyes and Bull eyes.  Nice work indeed.

Rob

  • Member since
    June 2012
Posted by arnie60 on Thursday, March 20, 2014 1:26 PM

Thanks to all of you for the kudos. I can hardly wait to see the foremast up and rigged myself. Kind of on hold waiting for some cordage and deadeyes to be shipped. Hope to have something more to show in the next week or two.

  • Member since
    June 2012
Posted by arnie60 on Sunday, April 6, 2014 10:46 PM

First some pics, then a hopefully not long winded synopsis.

Well, as can be seen, I have most of the lower foremast rigged including the stays. Running the shrouds was actually the easiest and fastest part of the whole process. You can see in the next to last pic that I only rigged the first and second shroud and the rest are just tied down in anticipation of needing access to the pin rails. I followed the BJ plans on this where there are only 9 shrouds total. The first shroud is a single rather than a pair and is rigged w/ blocks instead of deadeyes. Its designated as a "swifter". Not sure what that means or why it was rigged differently than the other shrouds. If anyone has knowledge of this I would be glad to be informed about it. You probably notice that I cheated somewhat w/ the chain plates which I was agonizing over how to do them. While perusing Longridge for ideas, there was an illistration using regular chains. I had some left over chain from the rudder and some extra belaying pins which I nipped the heads off of, drilled holes and used them to attach the chain to the backing link. I used a small piece of brass wire to connect the chain to the deadeye strop and used CA to secure it. The connecting loop is not soldered, but you really cant see it since the gap is to the back. I am going to have to order some more chain.

In the first pick you can see where I attached the forestay and fore preventer stay. My research showed several different locations, This is what I settled on. The snaking turned out to be a real pain. I finally ended up using CA to stiffen each run to maintain an even spread. All in all it turned out pretty good. Oh..and the mouse for each stay is way, way out of proportion. I used some miliput to make them, but somehow did not realize that I was making them way to big.

The next shot shows the jeers, sling and horses for the yard. I chose not to use black for them solely for asthetics.  Rigging the jeers and the sling was quite arduous and you will note that I did not take any real close ups so that you can't see my mistakes, The hardest part was getting the jeers sling on the masthead right. I had to run the jeers line up and run a turn of the sling around the jeers strop line which I then weighted down with a clamp so that I could adjust the "hang" of the sling for each side. Again, not ever going to be in a museum, so they came out good enough. The next pic gives a top down view showing the yard sling as well. The two blocks w/ black line running aft are for the main topmast stay and preventer which run down to a set of blocks and lanyards attached to an eyebolt on the deck next to the fore mast.

The third pic shows the hearts and stay collars. I ordered the BJ britania metal hearts and really wish I had gotten wooden ones instead. They just did not want to blacken or hold paint. I finally ended up soaking them for 10 minutes in blacken it, then spraying on some dull-coat. Still not happy w/ the results, but now its done and looks okay. The lanyards are, through my own lack of focus, the wrong size. They scale out to 3.5 inch, but should have been 6. I may go back and rectify them at the point where it is just annoying me too much.

Overall, my work is coming out a bit more sloppy than I would like, but I have to take into account that I have never attempted to do this kind of rigging before and I don't know all the ins and outs of making things work right and I am constanly jumping between reference materials, checking and rechecking. My office floor is strewed w/ plans and open books and notes. So it is all going very slowly whilst I figure out how and then undo and fix the things that I did wrong. I am hoping that by the time I finish up with the fore mast from bottom to top, I will have a much better handle on how to go about this and the rest will go much quicker.

As always, I welcome input, suggestions, and considerate criticisim. 

  • Member since
    March 2006
Posted by TD4438 on Sunday, April 6, 2014 11:50 PM

What a work of art.

  • Member since
    November 2012
Posted by abishag98 on Monday, April 7, 2014 5:37 PM

Awesome job, as always Randy!

  • Member since
    June 2010
  • From: Irvine, CA
Posted by Force9 on Wednesday, April 9, 2014 11:12 PM

Looking very good for a first timer!  It is clear that you are focused on the details - even if you are your own harshest critic.  

The deadeyes look great - where did you source yours?

Keep on keeping on!

Evan

  • Member since
    June 2012
Posted by arnie60 on Thursday, April 10, 2014 11:58 AM

Thanks for the Kudos everyone.

Evan... the deadeyes are walnut and are actually model shipway products, which fortunately a relatively close by hobby ship carries a decent supply of. My experience w/ ordering from Model Expo has often ended up w/ me often getting a " on back order" notice instead of what I ordered. Granted, none of those items were from model shipways. I have a considerable amount of cordage that I ordered from BJ which has been working out fine for the standing rigging, but all my blocks and running rigging are from Syrene. (BJ supplies totally white cordage for that, which a lot of is pre- waxed, so even if I were up to dying it all, the pre-waxed lines won't take the dye. Syrene is a bit spendy, but so totally worth the money to me.

  • Member since
    June 2012
Posted by arnie60 on Saturday, May 3, 2014 6:57 PM

Shake, shake, shake yer booty.

I have had little to no time to work on my build this past month and a half, and w/ my shaky hands keeping me from working quicker, things are moving at a snails pace just now. I am hoping to get more time coming up soon.

Anyway...here is the progress since my last post. 

This is the starboard side and my first run on doing the shrouds and chainplates which did not come out as nice as I would have liked. You can see that in spite of using a jig for the deadeyes that they did not come out perfectly even, but pretty close, and the tie offs are rather sloppy and uneven as well. The port side came out much cleaner. I guess that I will be staging the model so that it is viewed from the port side.

I also added the BlueJacket airports. It looks so crisp and finished w/ the brass that I doubt that I am going to paint them and fall back on my argument that I am staging her after her 1858 overhaul. New airports seem reasonable enough.

The above is the port side (much cleaner - by the time I get to the portside mizzen mast, they should be nearly perfect) and I have begun running the rat lines. I ran w/ a clove hitch for the first two courses, but fell back on a simpler overhand knot. Looking at them, I can't tell the difference and it goes considerably quicker. Still, it is quite tedious and my palsy slows me down even more. Meh...no hurry.

I also managed to rig the topmast shrouds on the starboard side. You can see the port side is just tacked for now. The running rigging that you see above the jeers are the lifts for the main jack. I will only be adding the braces and halyards and no clew or bunt lines as these pertain to the sails which I am also leaving off. I figure I have definitely exceeded my skill and ego on this one and am calling it a win just to finish w/. only that much done.

This is a shot of the futtock and betnick shrouds that are rigged on the starboard. These proved to be quite challenging. Addding the futtock stave made from brass rod was actually really quick and easy which led me into a false sense of ease. Attaching the futtock shrouds to the stave and then the tails to the thimble was an interesting puzzle in vector calculus so as to get all of them to have the right tension on them. Note that the port side is not done yet. I am saving it for a day when I am already frustrated and angry (joke).

Okay

That''s all I have for now. Hopefully I am freeing up some more time to work on her this month.

Until then.

  • Member since
    July 2010
  • From: Tempe AZ
Posted by docidle on Sunday, May 4, 2014 2:46 AM

Arnie,

She is coming along nicely and I love the chains; how many links per inch did you use?  I know how frustrating it can be when doing rigging and it is not coming out as well as you would like.  Heck, I have taken down rigging that I was not happy with.  It can be a major pain but I know that it would be bugging me until I did something about it.  Just my two cents worth.  You are doing a bang up job that you can be proud of.  Thanks for posting the pictures since I, like so many others, have this kit in their stash and I am learning a great deal from your WIP.

Steve


  • Member since
    June 2012
Posted by arnie60 on Sunday, May 4, 2014 4:09 AM

Thanks Steve;

The chain is 21 links per inch. .

From what I could discern from various resources is that chainplates varied from ship to ship, in part based on what was available in the area where they would be fitted or re-fitted. The use of single flat or round iron bars (as she is currently configured) came into popular use around the late 1830's.

I seriously thought about redoing the starboard, but once you have set the shrouds and the fighting platform and jeers, it is pretty much a done deal and there is no going back w/ out trashing a whole lot of good work as well. Hind sight tells me I should have rigged the deadeyes before I ever attached the main jack and platform..The upside of making mistakes like this is that the lesson is usually painful enough that you are going to do your damnedest not to repeat it.

  • Member since
    March 2012
  • From: Marysville, WA
Posted by David_K on Sunday, May 4, 2014 9:59 AM

Looks awesome, Arnie!

I'm about to try making chainplates in a similar way for my current build...hope they look as good as yours!

Well done!

        _~
     _~ )_)_~
     )_))_))_)
     _!__!__!_         
     (_D_P_K_)
   ~~~~~~~~~~~~~
    ~~~~~~~~~~~

Current Project:  Imai/ERTL Spanish Galleon #2

Recently Finished: Revell 1/96 Cutty Sark

Next Up:  ???


  • Member since
    June 2012
Posted by arnie60 on Wednesday, May 7, 2014 12:36 AM

Another brief update.

I think I have finally broken out of my funk on this build and am getting all excited again.

I decided to try and use the kit spar for the fore topsail yard, but w/ some modification

I drilled holes all the way through and epoxied in some brass pins to which I then attached brass stun'sail booms which worked quite well to stiffen up the yard. Attaching the boom to the pins was a bit more of a challenge than I really had figured. Two tiny points of attachment like that w/ my shaky hands! I finally managed it w/ CA and a spray of zip kicker (never could have done it w/ out it). It makes me seriously consider learning how to braze, which I believe is definitely the saner way to go on this.

Here it is w/ the halyards in place. I went w/ the BlueJacket plans on this one and ran a single block from the center of the yard. Marquardt calls for two blocks, very similar to the fore jack below, but I have been following the BJ plans pretty closely and did not see any reason to depart from that, especially since it is the easier rig.

I did screw up a bit on the parells. When I did a dry fit, there seemed to be the perfect number of them to hub the mast. [BTW... I used the parells from BlueJacket, but they just look too big to me] Somehow the actual fit left some gaps. Also, the BJ plans calls for two courses, one above the other, the bottom one which I had a senior moment on and forgot to add. Ah me.

Here it is done w/ the halyards and lifts all done and tied off at the deck.

The halyards have an interesting tie off to the channel rather than the deck.

The plans call for the eye bolt its attached to, to be set a little farther aft, but I set it here, part for aesthetics, part for ease. The final tie off is to a bulwark pin rail.

K. I hope you are all getting some heads up from my mistakes and can save your self some woe somewhere down the line. I will try to finish up the spars for the fore mast this week and get the results posted then. No promises though.

  • Member since
    July 2010
  • From: Tempe AZ
Posted by docidle on Wednesday, May 7, 2014 5:15 PM

You are doing great and thanks for posting even the mistakes, I know I learn from them.

Steve


  • Member since
    March 2012
  • From: Marysville, WA
Posted by David_K on Thursday, May 8, 2014 6:45 PM

Love it!

She's coming along well, Arnie...

I want to mention that, for whatever reason, I like the way lift rigging looks when the yards are lowered...is that weird?

Also, there's nothing like breaking through a funk!  That renewed sense of ambition and purpose!

WooT!

        _~
     _~ )_)_~
     )_))_))_)
     _!__!__!_         
     (_D_P_K_)
   ~~~~~~~~~~~~~
    ~~~~~~~~~~~

Current Project:  Imai/ERTL Spanish Galleon #2

Recently Finished: Revell 1/96 Cutty Sark

Next Up:  ???


  • Member since
    June 2012
Posted by arnie60 on Thursday, May 8, 2014 7:28 PM

Thanks David;

I am pretty sure that I may have mentioned this before, but the amazing geometry and symmetry that comes out in all that goes into these ships just thrills the mathematician in me as well as my esoteric appreciation.

  • Member since
    July 2010
  • From: Tempe AZ
Posted by docidle on Saturday, May 10, 2014 12:58 AM

I am with Dave on the look of the lowered yards, but I would add that I love the way rigging looks period.  For me, when the rigging starts after I have finished the hull and masts, is when the transformation from model to sailing ship take place.

i also wanted to ask, are you serving any of your lines?

Steve


  • Member since
    June 2010
  • From: Irvine, CA
Posted by Force9 on Sunday, May 11, 2014 7:17 PM

Arnie - A masterpiece in the making.  Your rigging looks terrific and it looks to me like any shaky handedness is not impairing your result.

Wonderful!

Evan

  • Member since
    June 2012
Posted by arnie60 on Friday, May 16, 2014 2:28 AM

Thank you for the compliments gentlemen.

Steve - I served the first pair of lower shrouds and then just bagged it. It really does not show w/ out getting in real close, so to save some time and work I just left off doing it henceforth.

The fine break in the weather here made long un-attended yard work take first priority, so I haven't done anything new, but, I did manage to get a run in to the local JoAnn's and found some goodies.

Left to right: thing-a-majig which is a plastic peg board with different sized pegs for bending and shaping wire and whatever else I can think of. Crimping tubes in four sizes (more on that in a sec). A nice pair of really sharp seamstress scissors. Twirl a ring which is a mandrel for making connecting rings a dozen of more at a time 3mm, 5mm, and 7 mm which I am using to make rope loops.super fast and easy. A 100 ft roll of black 26 guage wire. Some connector rings (more on that as well) and to the far right a super thin and point pearl corer. I haven't been able to find a rat tail file this thin before.

Note the little eyelets on the rings. I was thinking bentnick shrouds when I picked them up. They are a bit large but are easily cut and downsized to meet my needs.

You can see my thinking on the crimping tubes. I saw where this guy uses a mandrel to make what he calls "zip seizings" wraps it for about 5 inches, glues the string, slides what is now a string tube off and cuts seizings to size as needed. I think this goes one better and they do in fact blacken very nicely, and again, you have to get nose close after its done to see that they are fake. I left them silver in the pic so you could easily see the contrast.

The grand total came to less than $40. Gotta love JoAnn's!

  • Member since
    May 2014
Posted by mdkboggle on Friday, May 16, 2014 7:39 AM

Hi Arnie

I have had a look over your build log and i will say i think you are doing a fantastic job,well done sir.

Tim

  • Member since
    June 2014
Posted by Charles_Purvis on Sunday, June 22, 2014 12:16 PM

I love BOTH of these ideas for creating "zip" or instant seizings.  I can see instances where either would be a better fit, depending on size, placement, etc.  Brilliant!  

Congrats on what is a lovely build.  

  • Member since
    June 2012
Posted by arnie60 on Monday, November 17, 2014 8:53 PM

Well it has been quite some time since my last post. I make no apologies as the summer here in Oregon was exceptionally warm and sunny and I spent every possible moment outside till long after dark instead of inside working on my build. But, summer has definitely come to an end here and I have managed to get a bit more done.

The foremast is nearly complete, about all I need to do is run the rest of the ratlines and braces for the yards. All fore stays and back stays are complete, along w/ the futtock and bentnick shrouds. ( I will have more on that shortly).

I will try to get some better pics posted later.

I also have the main mast stepped, shrouds placed, fore stays, main yard, futock and bentnick shrouds done.

A few notes on construction:

The evenness of the deadeyes is my best effort so far. Although I used a jig, I still had issues w/ getting them all the same height. I realize now that this is in part due to the fact that some of the aft shrouds have a greater angle than the forward shrouds. Since I rigged them from aft to fore (which eliminated the slack problems that I was having w/ the fore shrouds ) I made my jig based on the longest aft shroud which made the forward deadeyes end up a bit higher than the aft. Still, much better results, and I won't make that mistake w/ the mizzen shrouds.

Now, back to the bentnick and futock shrouds. When I rigged the ones for the foremast, well...it was a biotch to put it mildly. I spent a lot of time thinking about what I had done and how I might do it better (easier) this time. So this time rather than doing the futock and bentnicks individually I ran them as a single line by rigging them to the ring before attaching.

Here's the pre rigging.

This went together really quickly.

The long single line was then run through an eye bolt on the deck and a clamp hung off the end over the side to provide tension. I attached the middle shroud to the futock stave first, then up to the middle deadeye.

(My biggest headache in attaching the fore mast bentnicks was trying to get the right tension for each shroud.) Then alternately attached the shrouds working out from the middle. This proved to be surprisingly easy and maintained the proper tension on each line. Any slack I had at the end was easily taken up by tightening the belay point at the deck which I glued in place once I was happy w/ the results. Adding the catharpins was the final step to complete them. 

[note: I did not use "hooks" to attach the futock shrouds to the deadeyes. This could be problematic using my reverse method, but not by any means insurmountable. I still think this is a much easier way to to this even if you want to use the hook attachment.]

Thats it for the moment.

As an aside, if you are in the Portland Oregon area, you might want to check out our clubs new website ( for which I am the webmaster). You can also download our newsletter/minutes if you are interested.

http://nsomspdx.com/

  • Member since
    July 2010
  • From: Tempe AZ
Posted by docidle on Tuesday, November 18, 2014 10:39 AM

She is looking sweet Arnie, nice work.

Steve


  • Member since
    June 2014
Posted by Charles_Purvis on Tuesday, November 18, 2014 3:48 PM

Love it!  Very nice work, Arnie, and a great update!

  • Member since
    June 2012
Posted by arnie60 on Friday, November 21, 2014 6:27 PM

I was going to upload some better pics, and w/ that goal in mind was going back over the ones I recently posted. I hadn't realized before that clicking on the pic takes you to my photo bucket cache, at which point you can click on the + icon to enlarge the pic. So... given how nice the detail comes out w/ the enlargement, I do not feel the need to post other pics than the ones I have up now. My new Iphone 6's camera is waaay better than I realized. Now I won't have to go out and buy a camera to take those close ups that I couldn't get into focus before. Yeah!

WhisperI also noticed by looking at them how much touch up and dull coating I need to do, not to mention the "typos" (so to speak). When mentioned at our club meeting, the overwhelming response was, "once its in a case, no one is going to be able to get close enough to see them".Zip it!  Amen for pragmatism!Stick out tongue

  • Member since
    March 2012
  • From: Marysville, WA
Posted by David_K on Friday, November 21, 2014 8:07 PM

Fantastic stuff, Arnie!  I think I need to go back through and read this thread from the beginning again!

Dave

        _~
     _~ )_)_~
     )_))_))_)
     _!__!__!_         
     (_D_P_K_)
   ~~~~~~~~~~~~~
    ~~~~~~~~~~~

Current Project:  Imai/ERTL Spanish Galleon #2

Recently Finished: Revell 1/96 Cutty Sark

Next Up:  ???


  • Member since
    June 2012
Posted by arnie60 on Sunday, November 23, 2014 3:30 PM

Anchors - "A Way" 

Thought I would put together the anchors at long last. Taking a look at the kit pieces, I thought I could do better, so I spent some time browsing the net looking for some replacement, with really no luck in finding anything that looked better than the kit anchor. However, the stock definitely needed to be chucked.

I laminated the four strips together using good old Elmers, using the haft of the anchor to set the spacing in the middle. I had originally thought to just use some square stock, but doubted my ability to carve out the opening for the anchor haft. 

I then filed down the wood to match the tapers as close as possible (not perfect by any means) and then stained the wood w/ min-wax sedona red.

I then cut a very thin strip from a  .01 styrene sheet to simulate the bandings and attached them using CA and then painted them. I had originally tried a thin strip of masking tape, but it would not stick well and didn't have quite the heft I wanted. Glued all the pieces together and attached a ring to the haft from a bag of assorted size rings that I got from JoAnnes jewelry dept. 

I used Marquardt as a referance to secure the anchor. 

Marquardt shows two possible configurations. I opted for the forward rigging. It is not quite the same, as Marquardt shows the belay points at cleats outside. I will be belaying to inside cleats.

So, here's how it came out. 

Before anyone descries my use of dark grey for the anchor instead of black, I did originally paint it flat black, but it disappeared when up next to the hull. I tested the grey and found I liked the contrast and as it was iron or possibly steel (Bessemer perfected the steel process in 1856, but it had been around for something like 3 or 4 thousand years. Who would have thunk it huh?) it seemed a reasonable color to use. I don't know if they painted their anchors in those days or not. If someone knows, please share.

until next time then....

  • Member since
    June 2012
Posted by arnie60 on Tuesday, December 2, 2014 12:00 AM

Constructing rope coils:

I know this has been done ad-nauseum, but I am very self impressed w/ my easy system for making loops to hang from pin rails etc., and I don't recall ever having seen any one do it w/ out using glue except to tack it to the rail, so I am going to give it a walkthrough here.

After much experimenting, I have found that this will only work w/ a quality linen or cotton cordage. Any line w/ any percent synthetic fiber will not give you the same results. I am using cordage from Syrene and highly recommend it to one and all.

I first use a mandrel to form the loop (I have found 4 turns to be just right for me) applying the smallest amount of CA possible to bind it.

You will have to experiment to find the right mandrel size as well.

After prying the loop off the mandrel and trimming it, I drop it into a glass of water.

 I use my tweezers to rough shape the loop once it is thoroughly soaked, then hang them from a false pinrail.

I do some further reshaping (mainly just pulling down w/ my tweezers) while it is still dripping wet.

Ironically, the hardest part of this process is hanging them on the rails. Once you get it hung over a pin, you can shape it a bit more if needed/wanted, but it does not need to be perfect at this stage.

Leave it set until it dries, then come back and tack it to the pin rail w/ CA. Once the CA sets, you can come back w/ a soaking wet paint brush and re wet the line for any final shaping.

Takes me about 20 minutes to do 4 loops.

Here's what the results look like.

The really nice thing I like about this process is that since no glue was used to hold the loops shape, there is no discoloration or sheen or un-natural stiffness as a result. 

  • Member since
    December 2003
  • From: 37deg 40.13' N 95deg 29.10'W
Posted by scottrc on Tuesday, December 2, 2014 8:48 AM

Hello Arnie,

I just read your whole build log and am quite impressed with your work.  I am in the middle of setting up and installing the yards on the main mast of my model and have sworn I will never build and rig plastic masts and yards again.  

Wood makes the build and rig so much more enjoyable.  

I have a Revell Alabama that the cat dismasted a few years ago and your build gave me some good ideas to resurrect that model.

Scott

  • Member since
    June 2012
Posted by arnie60 on Tuesday, December 2, 2014 12:35 PM

Thanks Scott;

I actually have the CSS Alabama in line for my next build. I would be interested in seeing yours, and your Connie as well. Glad my log was a help to you. I think you will find that making the masts and yards from wood is actually quite easy. Let me know if there is anything I can help you with.

  • Member since
    May 2003
  • From: Greenville, NC
Posted by jtilley on Tuesday, December 2, 2014 1:09 PM

Those wanting to model the C.S.S. Alabama should be warned that Bluejacket is going to release a solid-hull wood kit pretty soon. As I understand it, the scale will be 1/8"=1' (1/96). It undoubtedly will cost several hundred bucks, but it's virtually guaranteed to be a whole lot better than the ancient Revell kit. (That one is more than fifty years old now. It and the Kearsarge kit were released in conjunction with the Civil War centennial. We're now in the midst of the 150th anniversary.) To make that old plastic kit look like the real ship would be an enormous project. I personally wouldn't attempt it.

If you do build the Revell kit, and you have the version reissued by Revell Germany a few years ago, for heaven's sake beware of the instructions. The rigging diagrams in it are utter nonsense - and the person who built the model in the photo on the front of the booklet couldn't even figure out where the sails were supposed to go.

Youth, talent, hard work, and enthusiasm are no match for old age and treachery.

  • Member since
    June 2012
Posted by arnie60 on Tuesday, December 2, 2014 3:23 PM

I just bought a copy of " CSS ALABAMA ANATOMY OF A CONFEDERATE RAIDER" by Bowcock. (which I managed to get for a mere $50) which I will be using to guide me in making some modifications and the correct rigging. I am well aware of all the "problems" that the Revell kit has. I won't be able to do anything about the length, but I can correct the stern and gun ports. I am also hoping to correct the rake on the masts, which may not be feasible, and John from Scale Decks is working on a veneer deck, replete w/ corrected brass sweeps, and I have the two back issues of FSM w/ Joseph Bossert's mods to draw upon as well. So, I anticipate ending up w/ a fairly decent "representation" of her.Whistling

  • Member since
    June 2012
Posted by arnie60 on Thursday, December 11, 2014 11:04 PM

Small progress post

Running the Mizzen Stay, Mizzen preventer, Topmast stay, and Topmast preventer turned out to be rather interesting. All but the mizzen stay was pretty straight forward. The mizzen stay actually straddles the main mast and is belayed via a strop to eye bolts just forward of the main mast. What was not clear to me was the exact way the strop belayed to the mizzen stay. The Bluejacket plans call for the strop to pass through a thimble behind the main mast, and that connected w/ lanyards a thimble attached to the stay, as shown in this picture I took from the BJ manual.(which coincidentally is what the Revell plans show as well)

However, looking at pics of the Hull model I found one that shows an open heart, but was unable to find a shot any farther up the stay.

So I compromised and did both. I used one of the open hearts that I just got in from Syrene (assembly required, but worth it) . 

Anywho.... all I have for now. Nearly done w/ mizzen shrouds. More soon.

  • Member since
    June 2014
Posted by Charles_Purvis on Friday, December 19, 2014 7:24 AM

Looks terrific Arnie!  

  • Member since
    July 2010
  • From: Tempe AZ
Posted by docidle on Friday, December 19, 2014 11:26 PM

Arnie,

Thanks for posting the drawings by Marquardt, they are very informative as well as beautiful drawings.  Also, thanks for showing how you are looping your line, I am planning on using the Syren line for the Catalan Ship build I'll be starting while I wait for my hands to work properly again.  Big heavy parts are just what the doctor ordered.  It is nice to know that they lay nicely with just water!

I did want to ask you about the ScaleDecks you used, I was thinking of using them for the Cutty Sark.  Were they difficult to glue down, how have they held up so far, any lifting?

Steve


  • Member since
    September 2005
  • From: Groton, CT
Posted by warshipguy on Saturday, December 20, 2014 11:11 AM

I tried with the Revell kit.  I can't wait for the Bluejacket kit. But John, I heard that it was to be a plank-on-bulkhead kit. Solid hull would be better.

Bill

  • Member since
    June 2012
Posted by arnie60 on Saturday, December 20, 2014 12:06 PM

Docidle;

I used contact cement to fasten the veneer decking. Working w/ contact cement is a bit tricky as once it is set, there is no going back. I used bamboo skewers for shims to place between the two surfaces and slowly removed them as I worked my way from on end of the deck to the other.I have had absolutely no problems w/ it pulling up anywhere. Scaledecks is still in the process of making a deck for the Cutty Sark (I am assuming you meant the Revell 1/96 kit). If you go to the site, you can drop John an email from there and ask about it.

  • Member since
    December 2003
  • From: 37deg 40.13' N 95deg 29.10'W
Posted by scottrc on Saturday, December 20, 2014 2:33 PM

Hello Arnie,

Here is my old Connie, its been a WIP for some time since I now prefer wood over plastic and kept it pretty much out of the box. The Alabama was built some 20 years ago and was dismasted in my last move, so its perfect for building wooden upper works.  I have another kit of this and of the CuttySark and now plan to built them as a composite kit like you did.  I REALLY need rigging practice and these kits are large enough to practice on.   Keep on posting your progress, this is quite the practicum your providing.

  • Member since
    September 2005
  • From: Groton, CT
Posted by warshipguy on Saturday, December 20, 2014 6:54 PM

Scale Decks has just released its deck for the Revell Cutty Sark. They also have one for the USS Constitution, the Heller 1/100 HMS Victory, and will release one for the Heller Le Soleil Royal early next year (2015). Interestingly, they also have one for the Revell 1/196 USS Constitution as well, a two-part affair with and without the cutouts for the molded-on carronade carriages.

Bill

  • Member since
    March 2012
  • From: Marysville, WA
Posted by David_K on Monday, December 22, 2014 11:32 AM

Interesting...might just have to pick up a scaledeck for the SR....

Thanks for the heads-up, Bill!

        _~
     _~ )_)_~
     )_))_))_)
     _!__!__!_         
     (_D_P_K_)
   ~~~~~~~~~~~~~
    ~~~~~~~~~~~

Current Project:  Imai/ERTL Spanish Galleon #2

Recently Finished: Revell 1/96 Cutty Sark

Next Up:  ???


  • Member since
    September 2005
  • From: Groton, CT
Posted by warshipguy on Monday, December 22, 2014 2:17 PM

David,

My pleasure! I am still very impressed by your Golden Hind!

Bill

  • Member since
    May 2004
  • From: Mount Bretherton Model Aircraft Observatory
Posted by f8sader on Sunday, December 28, 2014 9:59 AM

So impressed, every time I see this!

Lon-ski

  • Member since
    June 2010
  • From: Irvine, CA
Posted by Force9 on Monday, December 29, 2014 6:37 PM

Arnie -

Catching up on your fine build... Love the anchor, the rope coils, and the Bentinck shrouds!  Your solution for the mizzen stay is a nice compromise.  The Hull model shows the stay essentially blending into the "shark's mouth" that straddles the mast with no lanyards as suggested by the BJ Manual... Really tough to do at this scale.  I very much like your approach with the open heart, etc.

Now that I'm back at it with my own build, I'll be keeping up on yours for more insight as you proceed.

Great work!

Evan

  • Member since
    June 2012
Posted by arnie60 on Tuesday, December 30, 2014 12:06 AM

Evan;

As always, your comments and input are greatly appreciated. I was pretty much hoping that,considering your extensive knowledge base, you would chime in on the Mizzen stay and give us the "correct" setup,especially in my having some doubts about the verisimilitude of my compromise. I am very much looking forward to your next post on your own build. Much of the direction I have taken here was inspired by your penchant for qualitative work.

As an aside. I picked up a (to me) simply wonderful book by chance in an out of the way bookstore the other day for $14.


Conway's History of the ship "The Line of Battle" The sailing warship 1650-1840 ISBN 0-7858-1267-9

Chronicling the evolution of the sailing warship in quite some detail w/ copious references, drawings, paintings and photos that clearly relates the why as well as the how of all aspects of development, including decorations, Fireships and Bomb vessels (which I had never heard of before), oared warships and support craft are covered as well. What I found particularly edifying was the sections on Naval Tactics (where now I no longer mistakenly understand what a "ship of the line" actually means) and seamanship as it pertains to how these incredibly huge square rigged vessels maneuvered w/ surprisingly remarkable speed and extreme finesse.  This book may well be known already to many of you, but I wanted to recommend it for others like myself who are still "new to the game" as it really, really puts things in perspective and answers a ton of questions I have been dancing around for some time.

  • Member since
    May 2003
  • From: Greenville, NC
Posted by jtilley on Tuesday, December 30, 2014 3:42 AM

That book - at a bargain price - is a real find. Most copies of it I've seen advertised on the Web have been hideously expensive.

I was lucky enough to pick up all the volumes of the Conway's History of the Ship series one by one, as they were being published. (There are twelve volumes in all.) Whenever a question of when something was introduced, or just what some word means, comes up, those books are the first places I check. They aren't exactly new any more, but I know of no other works that do as good a job of summarizing the current scholarly thinking about the history of ships.

Some of the volumes cover subjects that just aren't covered in any depth elsewhere. The Age of the Galley is the best and biggest treatise on ancient naval architecture I've seen. But all the volumes are good. And each contains an annotated bibliography to steer you in the right direction if you want to pursue something in more depth.

For a while the whole series was available in paperback. But now even the paperback copies are expensive. Like I said, Arnie lucked out.

Youth, talent, hard work, and enthusiasm are no match for old age and treachery.

  • Member since
    June 2012
Posted by arnie60 on Saturday, January 17, 2015 1:49 AM

Spanker Boom and Gaff

(spank her boom and gaff ?) [groan!]Confused

This is probably premature in the process, but I could not see a strong reason not to go ahead and rig the spanker boom and gaff and put up a visible goal line so to speak

I followed the BlueJacket plans of course, and replaced both kit pieces w/ scratch built wood ones.

The hardest part was fabricating the throats of each piece. According to the plans I needed to taper the yards then 'flatten' the ends (ensuring that they are parallel was tricky) and laminate additional wood to the flattened pieces to form the throat.
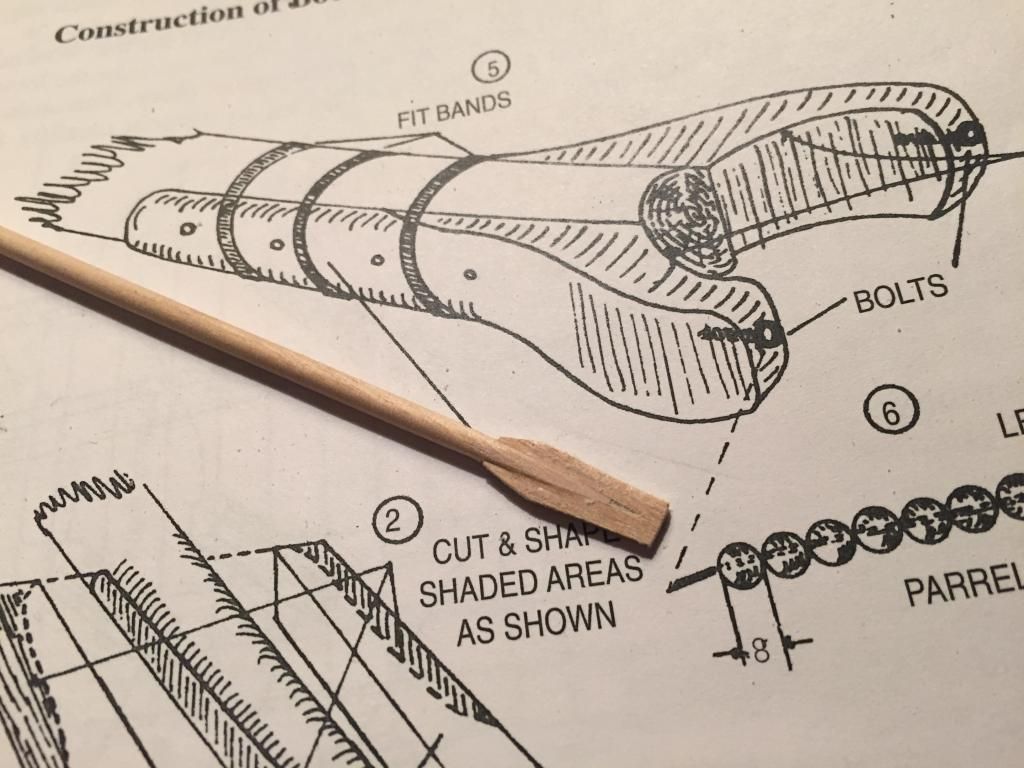
Once that was done, I had to form the throat by drilling a pilot hole in the correct location and then use successively larger bits until I got a hole 1/8" in diameter to fit the tri-sail mast that I replaced the kit part w/ a 1/8" dowel, after which I used a rat tail file to shape and finish the hole. That done, I cut off the excess at the ends to open the throat.
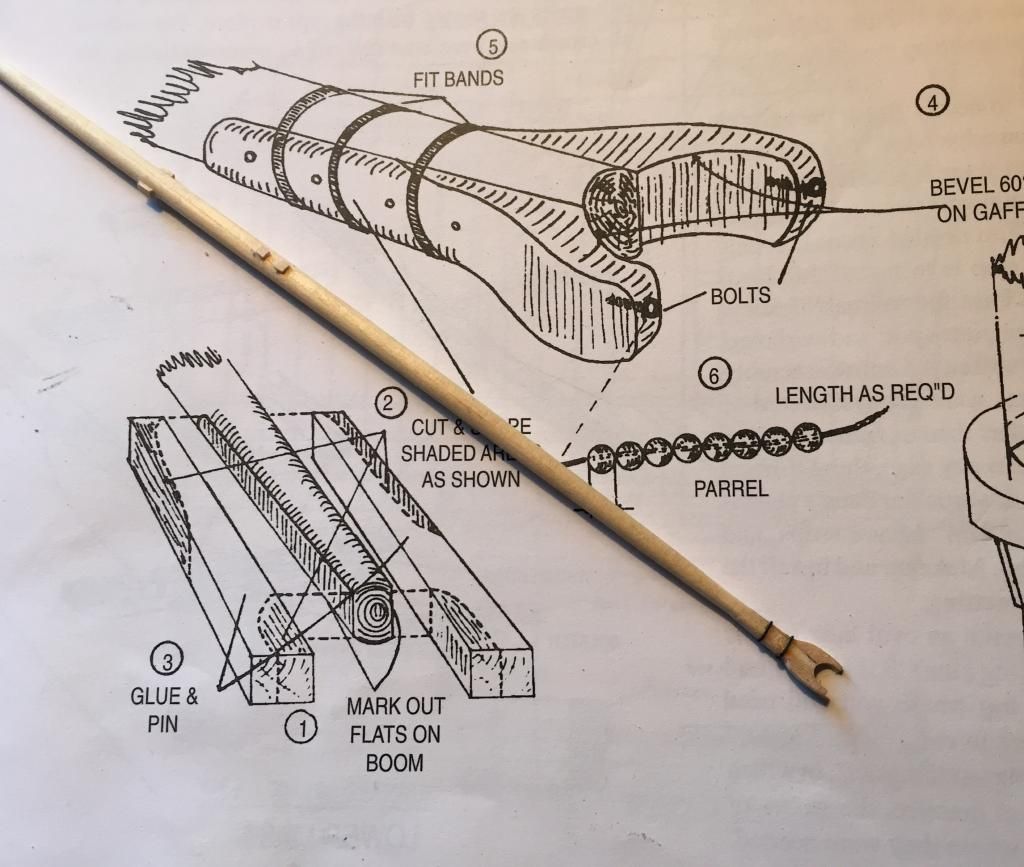
I used .08 in. line for the bandings.  All things considered, they came out pretty good. I originally wanted to leave them stained like the masts to further showcase the wood, but they are in fact yards, not masts, and all the yards are black. 

Here is a side by side of the kit pieces w/ the scratch pieces before I painted them black. The kit pieces were so flimsy, and the spanker was warped on the sprue.

And the final product.

The rigging proved to be a little bit tricky. You can see that I had to use some ingenuity and balance w/ my clips to get the gaff rigged. The small copper clips I picked up from RadioShack for a pittance. They are non serrated, tiny, and really quite strong. Can't tell you how handy they have proven to be.
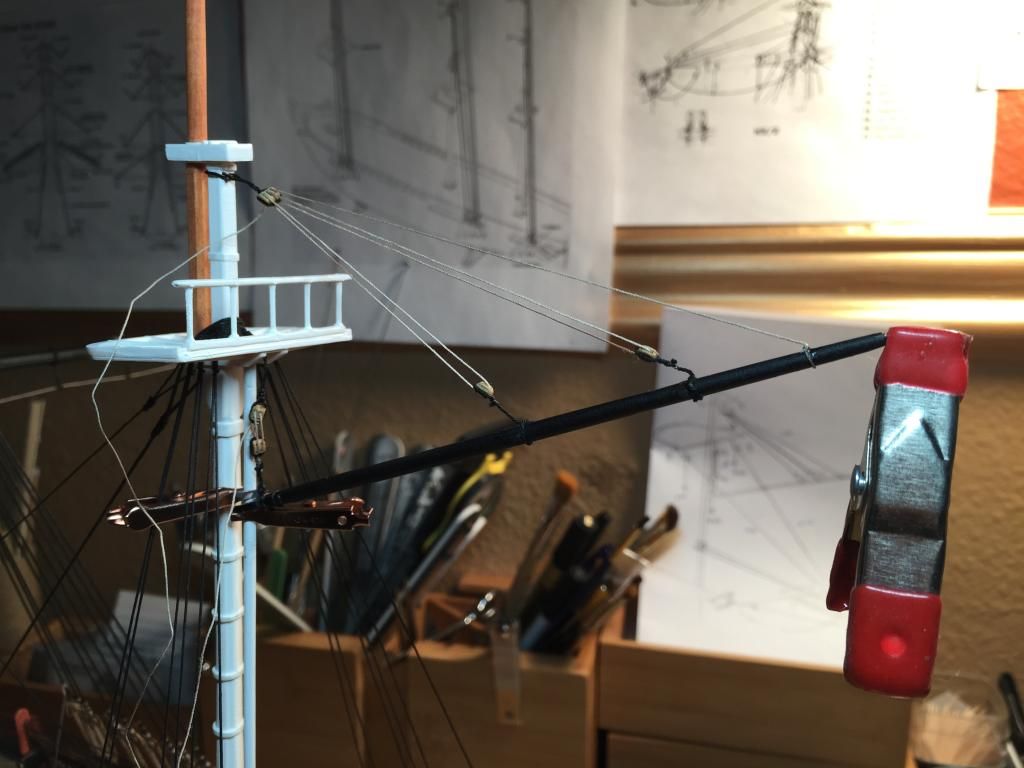
One aspect of the gaff is that it needs to be set at a 60 degree angle to the mast, meaning the throat had to to angled accordingly. There is no way in hell to tell if you are filing something at 60 degrees by sight alone, so I had to file some, fit and test, using a 30/60 triangle to approximate by. It came out close enough in the end.
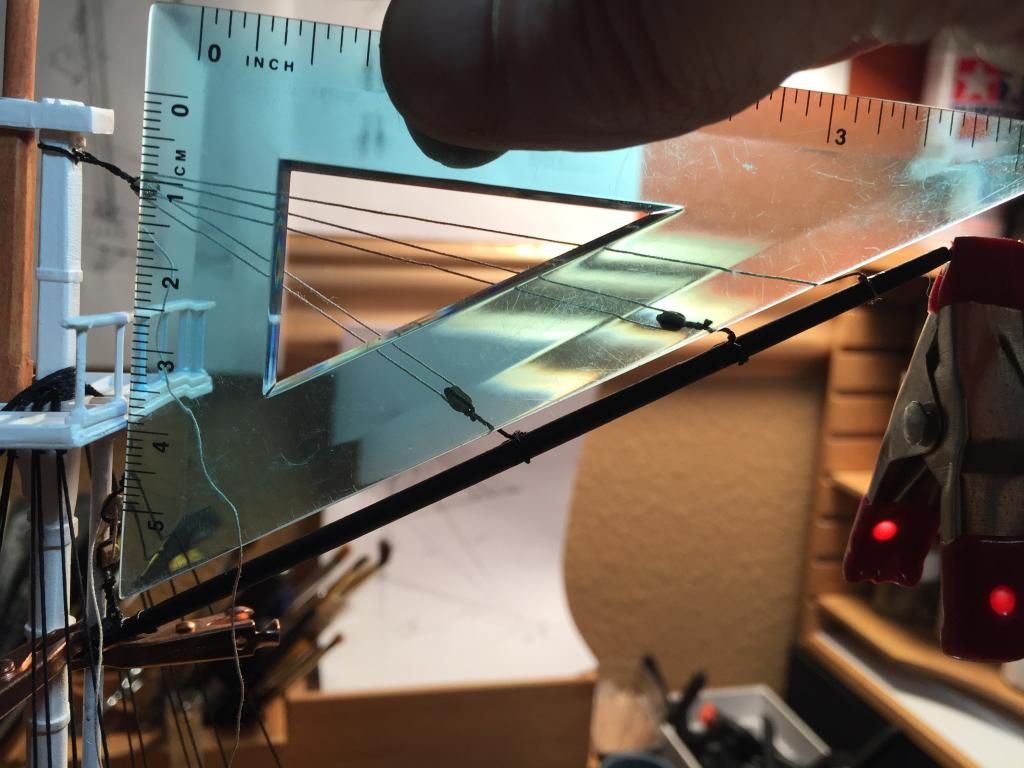
Rigging the spanker top lifts had some quirks as well. Got out the big boys for this. The clip at the end of the spanker is from Home Depot, and I use these and the cooper ones more than any of the plastic ones I picked up from the LHS for three times the cost. 
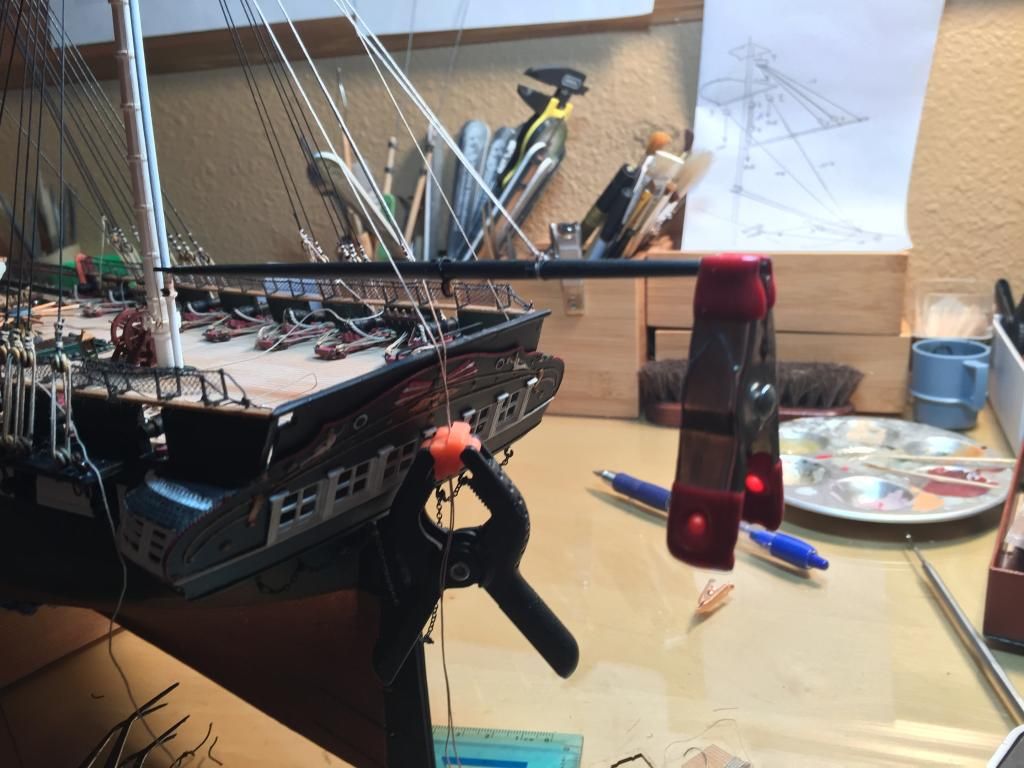
And finally, rigged, and all in place. [ I have been continually surprised at how closely the Revell rigging instructions mirror the instructions from Blue Jacket, so if you went with Revell alone, you would be well within the "correct" rigging. (caveat: I haven't compared it to the rigging for the sails since I am not bothering w/ any of it)]
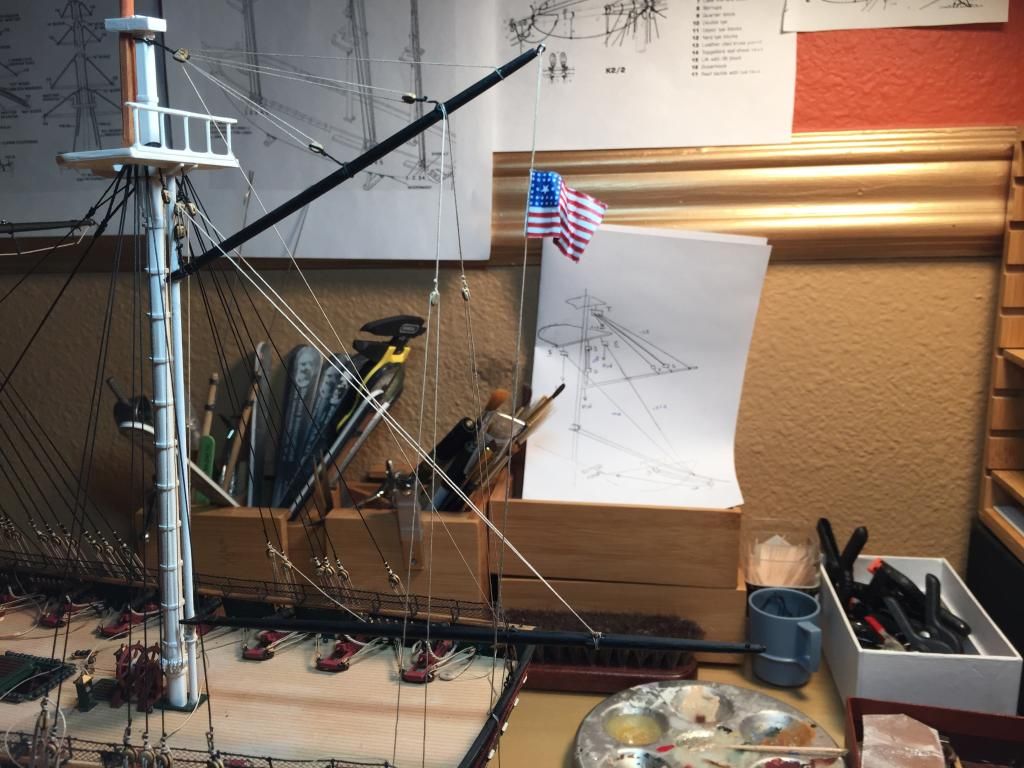
I am continually enraptured w/ all the geometry that occurs here. [You can see the rigging diagram I made from the BJ instructions in the background.]

The flag was an interesting adventure in discovery as well.

I have said that I plan on staging her after her 1856 overhaul, so I had to do a little research about flags for that period. And there are, as it turns out, just about as many different styles of American flags for the period, and so many other periods also, as there are stars (and stripes) in the sky.

The flag I chose here is one that was used by the Navy from around 1778 - 1780. This particular style is called Trumbell with the large center star in a square canton. In the 1850s there were a total of 31 stars.

I picked up a very cool trick from somewhere, which I wish I could take credit for, on how to make flags that look more realistic, and finally got the chance to try it.
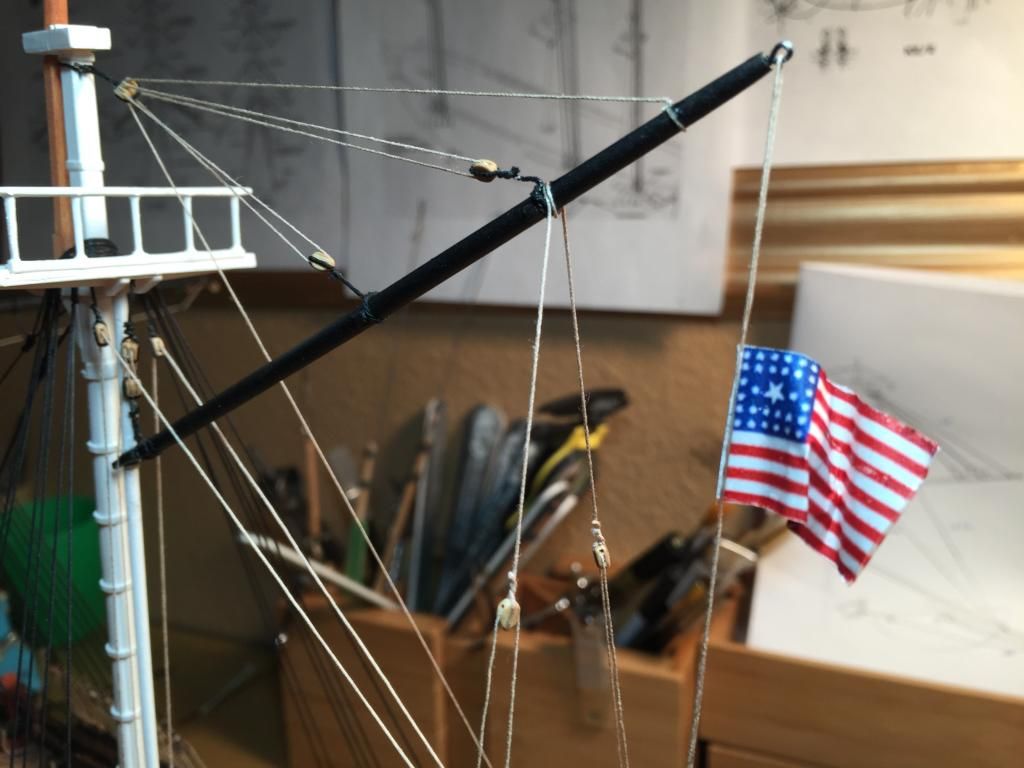
The trick here is aluminum foil if you hadn't guessed or didn't already know.

This was just sheer genius from my perspective, since it's so simple.

Make a set of mirror image decals. Attach one to each side of a piece of tin foil. Shape as you like.

Well... there was one problem that has been belabored to death. The stripes are white, and you can't print white from a printer, so you get a flag w/ red and clear stripes, which would give you red and silver stripes once attached to the foil.

Solution. Spray a light coat of white on the foil before applying the decals.

I am going to have to redo this one, since dull-coat really is not the right way to set decals for transfer, and you can see its a bit ratty.

Anyway... that's about it for now. Hope some of this may have helped and/or edified.

  • Member since
    July 2010
  • From: Tempe AZ
Posted by docidle on Saturday, January 17, 2015 10:55 AM

Arnie,

All I can say is DANG! That is some impressive scratch building.

Steve


  • Member since
    June 2013
Posted by RobGroot4 on Saturday, January 17, 2015 3:54 PM

When you redo your flag since you are printing it yourself, Testor's makes both clear and white decal paper for inkjet printers.  The white paper is pretty much solid white so you'll have to trim carefully around the edges, but it should save you a step.  

Your ship really looks awesome!

Groot

"Firing flares while dumping fuel may ruin your day" SH-60B NATOPS

  • Member since
    June 2012
Posted by arnie60 on Monday, January 19, 2015 12:25 PM

Thanks Groot! Doh! Had no idea there was white decal paper, although, the 15 seconds it took to spray the foil from a rattle can was not a big deal.

  • Member since
    June 2013
Posted by RobGroot4 on Monday, January 19, 2015 4:22 PM

Happy to help, beats watching paint dry!

Groot

"Firing flares while dumping fuel may ruin your day" SH-60B NATOPS

  • Member since
    January 2015
Posted by rdiaz on Wednesday, January 21, 2015 3:37 AM

I thought I'd use my first post to tell you that the work you're doing on this model is amazing.

I'm just starting with the "quick build" 1/150 version and plan to add as much detail to it as I can - your work will be very inspirational in the process. Congrats, she's looking great!

  • Member since
    December 2003
  • From: 37deg 40.13' N 95deg 29.10'W
Posted by scottrc on Wednesday, January 21, 2015 1:26 PM

Great tutorial on how you did the Spanker and Gaff.  I will want to look at doing it this way on my kit since I do not like the plastic booms nor how they are set per the kits instructions.

  • Member since
    June 2012
Posted by arnie60 on Wednesday, January 21, 2015 8:01 PM

I am quite pleased that others are finding my log helpful. I know I owe a lot to other modeler's logs that have helped me, so its nice to know I am giving a little back.

Scottrc;

Actually, the Revell instructions are pretty good. One could argue that they are in fact quite reliable based on the idea that the details of a ships rigging could vary substantially from one Captain to the next, and my understanding is that the entire model was based on the Hull model.  

The nice thing about "contested facts" is that no one can say definitively whose right or wrong. All we can do is form an opinion and back that up as best we can. The reason this is a good thing, IMHO, is that it offers some license in our representations, which I have taken advantage of on several occasions. And more than once in the favor of aesthetic reasons rather than adherence to accuracy.

Or put more simply, its your model. It's not going to end up on my mantel, but yours. Make it the best for you.

  • Member since
    January 2015
Posted by rdiaz on Thursday, January 22, 2015 2:58 AM

Speaking of the Hull model, one thing that I noticed in the easy build kit is that the head rails are quite simplified, but then I looked at the Hull model and realized they actually look like that. It looks as if the head rails on the 1/96 model are based on a different source...

  • Member since
    December 2003
  • From: 37deg 40.13' N 95deg 29.10'W
Posted by scottrc on Thursday, January 22, 2015 11:43 AM

Sorry, Arnie, I didn't mean the rigging layout in the Revell kit, but how the boom is attached, and its really no fault to the kit, but because I am no longer a fan of plastic masts and spars after building in wood.  

  • Member since
    February 2015
  • From: UT
Posted by ageofsail on Thursday, April 2, 2015 10:46 AM

Hi Arnie, this is my first reply to you but I have been following your build long before I even signed up here, your work is amazing! I am in the fairly early stages of my version of the Constitution ( cs.finescale.com/.../164251.aspx ), my 4th 1/96 Revell kit, and have been referencing your blog for my build as well as Force 9's EXCELLENT build and just wanted to drop you a note to say thanks for this blog, it has given me some good pointers, especially the method you used to hang cordage off the pinrails. I've tried other methods in the past with nowhere near as good a result.

Again, great job, looking forward to the finished photos!

Happy modeling!

Dan

  • Member since
    June 2012
Posted by arnie60 on Thursday, April 2, 2015 10:56 AM

Thank you Dan.

Good luck on your build, and if I can help in any way, just let me know. And yes ...(SIGH!) I am looking forward the the finished photos too.

  • Member since
    February 2015
  • From: UT
Posted by ageofsail on Tuesday, April 21, 2015 2:15 PM

I have a question Arnie, I just purchased some Syren cordage, not much, just enough to get started on some of the lower rigging and replacing the lower sheet lines I already pre-installed with some good stuff.

When I finished my Cutty Sark recently I had purchased some .050, .025, & .015 Artesania Latina thread and was VERY disappointed in the quality, and the stuff that came with my Connie kit is a joke and will no way be used. As I had told you recently I was planning on following your suggestion regarding running rigging from Syren, and will probably follow Evans suggestion regarding CIM cordage for standing.

That said, I ordered some .054 & .035 original tan which arrived yesterday. Boy was I in for a surprise! First off, the quality is amazing, it truly is some quality stuff. However, the scale difference is off the charts.I had assumed .054 From syren would be about the same size as the Artesania stuff but it's huge by comparison! The .035 is actually very slightly larger the the Artesania .050. see the photo below:

So here is my concern, I will be using probably 4-5 sizes of tan cordage and I am curious what size you are using, unless I'm off base here, this .054 is waaay out of scale for this build and I am tempted to use .045 for the lower lines but I don't want to order it and have it be too large also. The .025 looks like it would work but still looks slightly undersized. This especially becomes an issue regarding have too small a size standing rigging which needs to be at leas the same size or larger on the lower part of the ship. I am thinking for the lower rigging .045 standing and running but I'm gun shy about it being too big when it arrives.

Any thoughts? What size are you using? Oh and Evan and Professor Tilley, please feel free to weigh in on this, I want the rigging to be the highlight of the ship so I want to make sure I get it right, I've always used kit supplied cordage but never again!

Thanks in advance,

Dan

  • Member since
    June 2012
Posted by arnie60 on Tuesday, April 21, 2015 8:17 PM

First off, I think I can say w/ certainty the line from Syren will be totally accurate in measurement. Chuck has a penchant for detail and accuracy. I can't vouch for Artesania and the accuracy of their line size which may account for the discrepancy in sizes. As well it may be that Artesania is using millimeters instead of inches.  I have never used their cordage so I don't really know.

Now as to the sizes that I am using for rigging, well...I have been using the rigging plans from BlueJacket (well worth the money I spent on them!)which lays out each lines appropriate size in the rigging steps, so I haven't needed to make a list, which would be rather extensive.

Example: The fore and main shrouds call for 9.5" diameter line which equals about  .03" for 1/96 scale.  

A couple of resources you can use for this are Longridge's "The Anatomy of Nelson's Ships" which will give you a general guide for ships of that period, and Marquardt's "Anatomy of the the ship, the 44-gun frigate USS constitution" I would also recommend Lennarth Peterson's "Rigging Period Ship Models" for clear depictions of how each part is rigged.

Hope this helped some.

  • Member since
    June 2012
Posted by arnie60 on Wednesday, April 22, 2015 8:42 PM

Dan;

I forgot that I do have this chart which may help.

You have to fudge it on some of the sizes, but at that scale not really noticeable.

  • Member since
    February 2015
  • From: UT
Posted by ageofsail on Friday, December 18, 2015 3:46 PM

Sorry for the months late response Arnie but summer got in the way. At any rate, thanks for the advice, following your lead and Force9's build plan, I went ahead and ordered Blue Jackets rigging plans as well as deciding to build and rig the channels from scratch, and so ordered their dead eyes and blocks as well, they just arrived Wednesday, wow! Talk about detailed plans! That said, is your experience thus far with Syren accurate in relation ship to Blue Jackets cordage guide or is scale an issue? I'm leaning toward going with their plans as correct and ordering based on that assumption I would just like your input if you don't mind. Thanks, Dan

  • Member since
    January 2012
  • From: Atlanta Metro, Georgia
Posted by fright on Tuesday, June 7, 2016 9:14 AM

Arnie - did you install gun deck before you adheered the venner to the deck? Thank you for mentioning ScaleDecks' site. After attempting puttying seams and two attempts at coloring, I saw your deck and ordered a set for my build. I also love your hammock nettings with hammocks! Would you be willing to share your steps on that one? This is my 1st try at building a sailing ship and, like many, I thought I'd start with a piece of history. Your build is really amazing in both research and in realism! Compliments to the chef!!!  Thank you.

Robert O

  • Member since
    June 2012
Posted by arnie60 on Wednesday, June 8, 2016 4:26 PM
The steps are in my build log, but just to clarify, the gun deck was assembled and the veneer glued on before placement. The spar deck was assembled and glued to the hull and then the veneer was attached. All the steps for the hammock cranes are in the log as well.
  • Member since
    April 2016
  • From: Russia, St.Peterburg
Posted by kirill4 on Thursday, June 9, 2016 2:45 AM

Good day Arnie,

Yuor job is nice!  I like it very much!

but, looks like there is smthng big wrong with your anchors...at least, it looks like on the fotoes You posted...???Tongue Tied

pleased to hear ,why they assembled like this? all parts in one plain...

  • Member since
    January 2012
  • From: Atlanta Metro, Georgia
Posted by fright on Wednesday, September 28, 2016 9:53 AM

Arnie60 - can you tell me where did you locate your barrels and crates or were they handmade? Your work on this model is fantastic!


Robert O

  • Member since
    January 2012
  • From: Atlanta Metro, Georgia
Posted by fright on Thursday, November 10, 2016 11:28 AM

Arnie60 - really nice work! Did you use the eye bolts that came with the ship on the bulwarks for the guns? Do you remember what size drill bit used for the eye bolt holes? Thanks for your post and for any tips!

Fright


Robert O

  • Member since
    January 2012
  • From: Atlanta Metro, Georgia
Posted by fright on Monday, November 14, 2016 3:58 PM
arnie60 - can youtell me, did you make the buckets for your deck or were they purchased? If so, who from and what was the size? Your build looks very nice! Thanks for sharing these photos.

Robert O

  • Member since
    November 2016
Posted by Kilo 66 on Thursday, November 24, 2016 10:07 PM

Such superb crftsmanship as this, so cleanly executed, is always insipring.

  • Member since
    May 2018
Posted by Richwood7 on Wednesday, January 30, 2019 12:08 AM

Question:  I understand the need to pull the cannon back after a shot due to its recoil.  But I do not see any means to pull the cannon back to load the first shot!  It seems to me there neds to be some metal ring at the tail end of the cariage, attached via a rope to a pully so as to pull the cannon back to clean and reload.  Else you would need someone on the outside of the ship to load it!  Where are the attachment points, are they put in just before combat so as not to interfere with foot trffic behind the guns?  Any answers?

  • Member since
    November 2016
Posted by Kilo 66 on Wednesday, January 30, 2019 12:24 AM

 The answer to your question can be found starting at about :40 or so here:

https://www.youtube.com/watch?v=mQSBxQiLSyQ

 The video shows a simulated loading of a "cold" 24-pounder by the crew of USS Constitution, including use of the rearmost line to haul the gun inboard sufficiently to allow for initial loading, as you surmised.

JOIN OUR COMMUNITY!

Our community is FREE to join. To participate you must either login or register for an account.

SEARCH FORUMS
FREE NEWSLETTER
By signing up you may also receive reader surveys and occasional special offers. We do not sell, rent or trade our email lists. View our Privacy Policy.