SEARCH FINESCALE.COM

Enter keywords or a search phrase below:

Moebius Seaview 1:350 scale WIP

42482 views
928 replies
1 rating 2 rating 3 rating 4 rating 5 rating
  • Member since
    July 2014
  • From: Franklin Wi
Posted by Bakster on Saturday, June 24, 2017 8:50 PM

The anti-radiation coating is installed. Whistling

Below: You will notice some bare spots. Those locations were masked intentionally to save me some work. These are connection points for some of the internal structures like the light stand, observation room, and the window. Glue will be applied, and it saves me the work of scraping off the paint.  

I am also working on adding Future to the windows. I like the look of Future on clear parts but it sure is hard to coat it without getting bubbles and/or thick spots from where it pools. Anyway, more to follow as I progress.


  • Member since
    July 2013
Posted by steve5 on Saturday, June 24, 2017 10:13 PM

have you ever tried this stuff steve , so long as you don't tape over it , it's really good gear

https://www.youtube.com/watch?v=AYDHHRApV_c


  • Member since
    July 2014
  • From: Franklin Wi
Posted by Bakster on Sunday, June 25, 2017 4:52 PM

steve5

have you ever tried this stuff steve , so long as you don't tape over it , it's really good gear

https://www.youtube.com/watch?v=AYDHHRApV_c


Hey Steve-- I have not heard of this stuff. Thanks for letting me know about it, and for the link. I am reviewing it. Toast
 
Below: I glued the LED stand in place using Tamiya Extra Thin Cement. Once that set, I followed up with a slathering of melted sprue for good measure. I don't want that assembly coming loose after she is buttoned up. I also made the wire connections and then ran the main power wires back through the hull. Btw... I might have found a new use for Sprue-Goo. I slathered up the solder joins with it creating a sort of insulator. It should keep the wires from shorting against each other should they touch. 
 
I did more Future work on the windows as well. It is set aside to dry. I am pretty sure I will have to strip it and start over. The short of it is that there may be too much pooling. I'll see how it looks after it dries. The good news about this stuff is that it is easy to strip with a quick soak in Windex. Hopefully, that won't affect my Alclad work.
 
That is all for now.


  • Member since
    July 2014
  • From: Franklin Wi
Posted by Bakster on Tuesday, June 27, 2017 7:26 PM

As I suspected, I had to strip the PFC. The good news is, the Windex has not harmed the Alclad paint.


Second Time's a Charm


Below: The deep recesses on the back and the curved face on the front is a recipe for some major pooling. For this reason, I tried something different. I used a pipette verses dipping the piece. This allowed me to flow the PFC onto the window one section at a time. An added plus is that the pipette can be used to suction off any pooling. Lastly, when I noticed an area that wasn't leveling correctly, I was able to correct it by flowing on a little more into that area. I may have just stumbled onto something here. Doing this method has given me the best result yet. In the "Future," I plan to experiment with this method a little more.

Next topic: I decided that I will button up the sub after painting the hull. This means that I won't install the windows until then. No windows = no masking. It seems like this will be a less problematic way to go.

Where does this all leave me? It is time to sort out the sea sculpt.

  • Member since
    July 2014
  • From: Franklin Wi
Posted by Bakster on Sunday, July 9, 2017 4:41 PM

The gist here is that I plan to use plexigass to build my water upon. I am using clear plexiglass so that the bow light will show through.

I can think of a number of ways to accomplish the same thing. Using clear resin near the bow is one of them. Then, the rest of the base could be made from another material. I am not going this route because I don't have a proven skillset in using resin. I have worked with resin before, but there is problem that I have not worked out. The problem that I have is that it does not finish out clear. Though the product touts it as being clear, it in fact has a yellow tinge to it. Over time, it seems to yellow even more. I have a 2 year old sample piece on my WB that bears this out. Anyway, I know that there are products and processes available to solve this problem. I don't want to spend the money and time trying to figure it out. By the way. I may in fact use a small amount of resin in conjunction with the plexiglass. This remains to be seen. My plan on how I will do all this is still fairly fluid. 

Lets cut to the chase...

I found it surprisingly painstaking to mirror the shape of the ship into a stencil. I need a stencil so that I can mark the plexigass sheet on where the sub will go. I tried using all kinds of materials. I started with paper and I found it to be too floppy to be of much use. Then I tried cardboard. That is certainly more rigid but, it still didn't get me there. It was hard to cut, and to shape. I then tried styrene. Styrene got me to the point of getting the shape that I needed, but it was still too floppy and flexible to use as the master. And finally, I used the styrene piece to help make a more accurate stencil out of plexiglas.

Why the quest for accuracy? There is very little room for error. The gaps can become too great. 

Below: Using styrene.

Below: Using plexiglass. It needs finer tuning but you get the picture. In the subsequent photos you can see a fairly close representation of where the waterline will ride.


Thank goodness for a Dremel tool, and their bits.


  • Member since
    September 2012
Posted by GMorrison on Sunday, July 9, 2017 5:35 PM

Nice nice work. I haven't had a chance to catch up on this build, it's pretty ambitious.

Are you sure the Tamiya thin won't attack the LED's? I have no personal experience- I recently did a build where I attached them with Gorilla Glue.

A good way to eliminate pooling of Future. Take a scrap of paper towel and tear a ragged square corner. Lightly touch the corner to the pool and it will soak right up.

I don't like using clear resin. It costs a lot, and it creates a lot of heat when it cures. But I also dont like silicone sealant either. Another possibility is the thickest gel medium you can find. I think there's one that has the consistency of "cold cream".

What a beast!

 Modeling is an excuse to buy books.


  • Member since
    April 2016
  • From: Parsons Kansas
Posted by Hodakamax on Monday, July 10, 2017 6:44 AM

Ah, I'm starting to visualize this aquautic scene you're plotting. Cool for sure! Ambitious does apply! (And scary!)

Max

  • Member since
    June 2014
  • From: New Braunfels , Texas
Posted by Tanker - Builder on Monday, July 10, 2017 7:48 AM

Hi Bakster ;

 Sometimes I do . I am not gonna lie about that . What I do then is thin the mix with the addition of a full Small eyedropper of plastic cement . Then I sit , listen to the stereo , and stir slowly till they're all gone . Then drop in more plastic pellets .

  NEVER shake the stuff . If you do , like Vallejo paints you will get swarms of bubbles . If you get bubbles , sometimes just stirring slowly for a while will get rid of most . But , adding the Liquid cement will hasten the loss of bubbles .

 The reason I use the old cement bottle with the brush removed is the seal . It is nylon or polypropelene and you can seal it tight . I have some that over the years has managed to hit the twenty year mark .

 It will over time continue to have a Looong shelf life . That's the sweet part . Oh , I have also used it to repair nicks in t..s and other large electronic devices around the house . I replaced a whole edge of trim on the Radar-Range ( Microwave to you youngsters) repaint the whole face in appliance silver and no one knows now where the repair is .

 Yes , Bakster , My Radar - Range is an old large " Galley - Master " by Amana . I've had it in four live-aboard boats and three houses and one apartment . Still works great too . Especially for melting plastic sheet , for " Plunge Molding " ( Smash - Molding " ) is another name for it . This is where I first started using Spru-Glu .

 It worked great for putting canopies on Vac-Formed plane models . Spru - Glue can also be used ( If poured out on glass with no scratches ) to make thin sheets of plastic for unusual jobs .  T.B. 

  • Member since
    June 2014
  • From: New Braunfels , Texas
Posted by Tanker - Builder on Monday, July 10, 2017 7:50 AM

Hi ;

 To answer " G " . There is some Gesso That dries clear and Yes , it just very slightly thicker than " Cold Cream " .  T.B.

  • Member since
    July 2014
  • From: Franklin Wi
Posted by Bakster on Monday, July 10, 2017 8:21 PM

GMorrison
Nice nice work

Thanks GM.

GMorrison
Are you sure the Tamiya thin won't attack the LED's? I have no personal experience- I recently did a build where I attached them with Gorilla Glue.

Actually--I did not glue the LED, but I glued the stand that I made. The two LEDs for the graphic are still in their housings, and those are taped to the stand. The bow light will eventually be glued in though. I will probably tack that one in place with CA and then follow-up with melted sprue. The active part of an LED is deep inside the bulb. You'd have to penetrate through the housing to mess it up. A better way to damage an LED is by over-driving it with too much current, or shorting it by crossing the wires. Still, I don't think that I would use Tamiya directly on the LED. I'd be concerned about mucking up the housing so much that light would have trouble escaping. That is a good thought you had. Yes

GMorrison
A good way to eliminate pooling of Future. Take a scrap of paper towel and tear a ragged square corner. Lightly touch the corner to the pool and it will soak right up.

I agree. I have done this before as well. Paper towel wicks the stuff up like nobody's business. Too fast sometimes.

GMorrison
I don't like using clear resin. It costs a lot, and it creates a lot of heat when it cures. But I also dont like silicone sealant either. Another possibility is the thickest gel medium you can find. I think there's one that has the consistency of "cold cream".

You hit on my other concern...heat. That might not be too good for the delicate styrene. And like you said--it costs a lot. In my book, too much! And with the crummy results that I get it, it is not worth it. I sure would like to master it though. I'd love to imbed things. But, they'd have to be crystal clear and absolutely no bubbles. Maybe someday. 

I will be using gel mediums on this. 

Thanks again G.

  • Member since
    July 2014
  • From: Franklin Wi
Posted by Bakster on Monday, July 10, 2017 8:23 PM

Thanks for the tips T.B.

  • Member since
    July 2014
  • From: Franklin Wi
Posted by Bakster on Monday, July 10, 2017 8:25 PM

Hodakamax

Ah, I'm starting to visualize this aquautic scene you're plotting. Cool for sure! Ambitious does apply! (And scary!)

Max


Thanks Max. It should be pretty cool if all goes well to my vision for the project.

  • Member since
    July 2014
  • From: Franklin Wi
Posted by Bakster on Thursday, July 13, 2017 10:26 PM

A Seaview leaves its waterline footprint

As close as I thought that I had gotten it, it was not close enough. Some gaps were still a little too large. To deal with the problem I attached styrene pieces to manipulate and tighten those lines. You will also notice that I transitioned over from using plexiglass at the bow, to using styrene. I didn't seem to need the added strength as I moved back. It is a good thing because it takes some work to cut through the plexiglass.

Btw...I found another use for Silly Putty. I used it to prop up the styrene pieces at the subs waterline while I moved around connecting all the pieces. Sorry...the stuff is so versatile...I can't resist. 

I should also mention that I will need to make additional mods at the stern. Once when I had the main waterline figured out, I could see that the propulsion tubes sit pretty high. There is more fitting in store for me. I will wait on that though until I get the main cutout cut. Then I can figure things better with the PTs.

My goal for this coming weekend is to cutout the plexiglass base. I have to keep moving along, Nelson is killing me.Zip it! 

That's all for now.


  • Member since
    September 2012
Posted by GMorrison on Friday, July 14, 2017 1:39 AM

"Desparate affairs require desparate measures"

Horatio Nelson


 Modeling is an excuse to buy books.


  • Member since
    July 2014
  • From: Franklin Wi
Posted by Bakster on Friday, July 14, 2017 8:45 AM

GMorrison

"Desparate affairs require desparate measures"

Horatio Nelson


Right you are GM...  Yes

  • Member since
    November 2005
  • From: Formerly Bryan, now Arlington, Texas
Posted by CapnMac82 on Saturday, July 15, 2017 12:20 AM

I always thought that the surfaced trim on the tv show looked a bit odd--the hull riding nearly out of the water in frontal views, but nearer to "hull down" in side and rear views.

Now, using pesky logic, it would make sense, with the manta ray bow, to have a surfaced ride about 10º up angle, whoch would keep the propulsion neatly submerged, yet keep the bow windows out of the water.

But, that's pedantic and picayune, and is a distraction from just how cool this build is.

  • Member since
    July 2014
  • From: Franklin Wi
Posted by Bakster on Saturday, July 15, 2017 12:01 PM

CapnMac82
I always thought that the surfaced trim on the tv show looked a bit odd--the hull riding nearly out of the water in frontal views, but nearer to "hull down" in side and rear views.

Capn--I totally agree.

CapnMac82
Now, using pesky logic, it would make sense, with the manta ray bow, to have a surfaced ride about 10º up angle, whoch would keep the propulsion neatly submerged, yet keep the bow windows out of the water.

That makes sense. Your suggestion for a 10 degree angle is an interesting option to consider. I considered something similar but I opted not to. Mainly, because it would be a deviation from the show; not that this would be a terrible thing. Also, I was not sure that aesthetically I would get the look that I was going for. I tried to balance the two as best as I could. Unfortunately, the sub has to ride a bit high to keep the bow windows out of the water. 

I can think of a few options to deal with the problem. I can bury what is exposed in a sort of waterline froth. Another option is to warp the plexiglass into a bowing wave that rolls over the PTs. I have successfully done so on a scrap piece of plexiglass. I did this by heating the piece using a heat gun and then by applying some pressure. I suspect that I will do a marriage of the two options. I can do some warping and add some froth. From what I could tell, most of the PTs will be submerged. We will see how much of a problem it will be when I get there.

Below: I found this image that I think is from the TV show.


CapnMac82
But, that's pedantic and picayune, and is a distraction from just how cool this build is.

Thanks Capn.

  • Member since
    November 2005
  • From: Formerly Bryan, now Arlington, Texas
Posted by CapnMac82 on Sunday, July 16, 2017 12:23 AM

Bakster
image that I think is from the TV show

Jibes with my memory. 

Though, I have a memory, which may be from the movie, of an interior shot with water washing half over the frontal windows (which would kind of spoil the view :) )

But, that's just the sort of ride that annoyed, yes.

Sounds like you have it sorted, though.

  • Member since
    July 2014
  • From: Franklin Wi
Posted by Bakster on Sunday, July 16, 2017 11:02 AM

CapnMac82
Though, I have a memory, which may be from the movie, of an interior shot with water washing half over the frontal windows (which would kind of spoil the view :) )

Capn--that is my recollection as well. I think that it was in the movie. 

Thanks for your input on all of this... Yes 

  • Member since
    July 2014
  • From: Franklin Wi
Posted by Bakster on Sunday, July 16, 2017 12:58 PM

Regarding the base

Some of you may recall my post to this WIP about the base. I was struggling to find a suitable platform to build my diorama on. I am not a woodworker, so making one from scratch was out. I had to find something that I could use straight up, or that I could manipulate by using equipment that I already have. Using a shadow box seemed like a good idea but I could not find one near to the size that I wanted. I then looked at ordering a custom box, but the cost of ordering one was out of sight. Finally, I came to the realization that I will have to make one. This brings me to my solution...

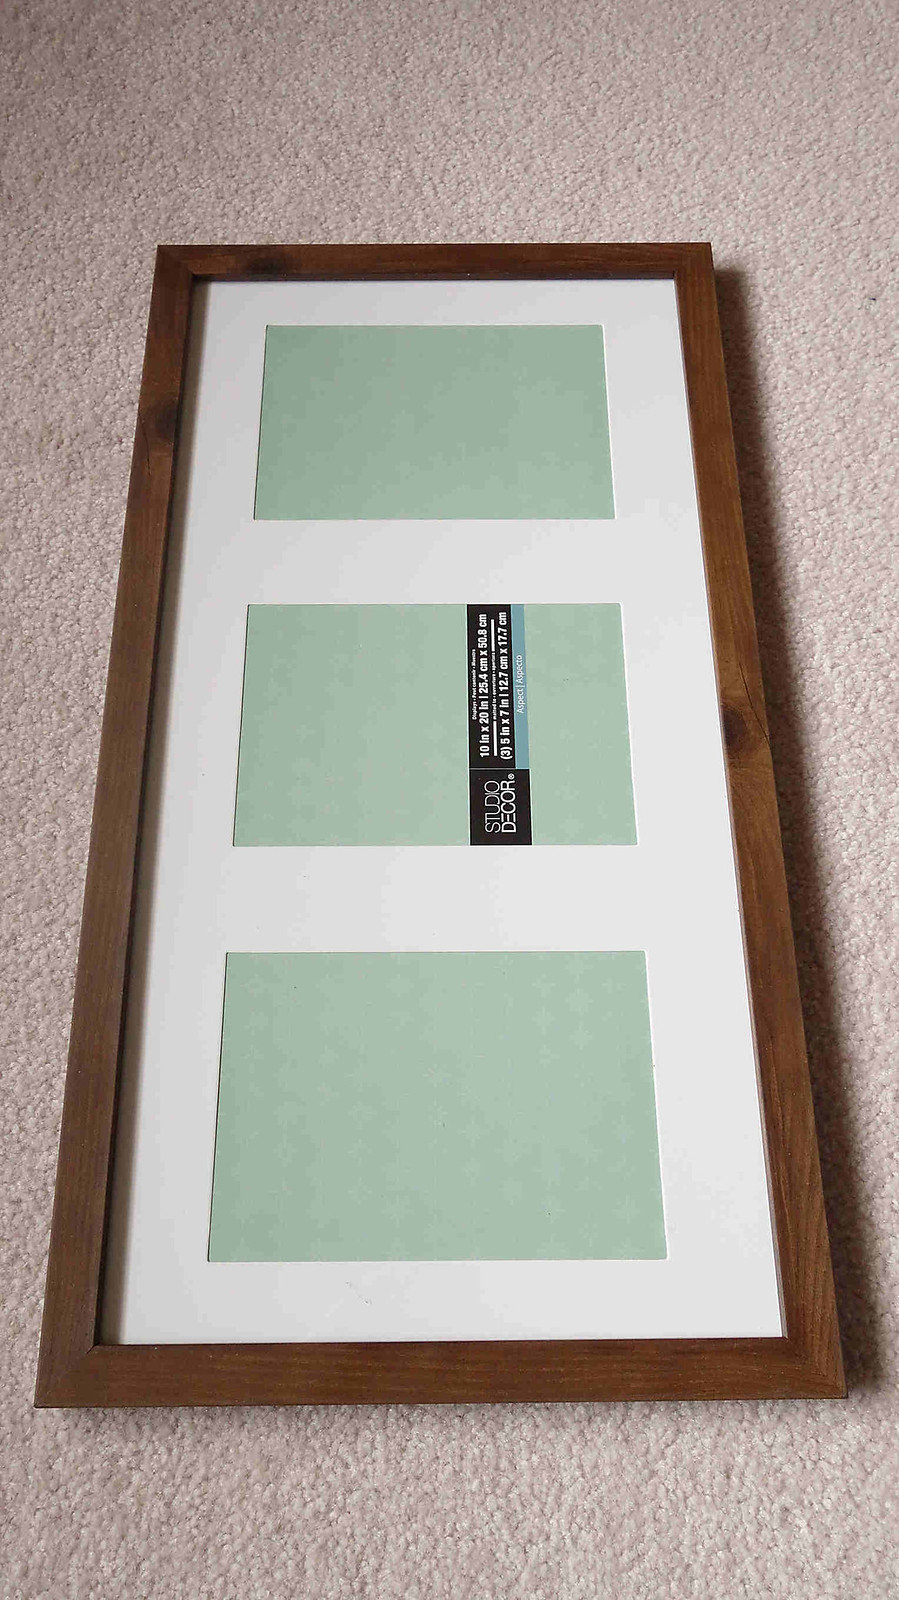
Below: Using a 40% off coupon I purchased this picture frame from Michaels for around $8. I laugh about the price when I consider the other options that I was looking at. This frame has the look and the dimensions that I want. The problem? It is far too shallow. The belly of the beast will hang too low. In fact, it will hang so low that it becomes its own stand. I have no choice but to do a serious Macgyver on this...

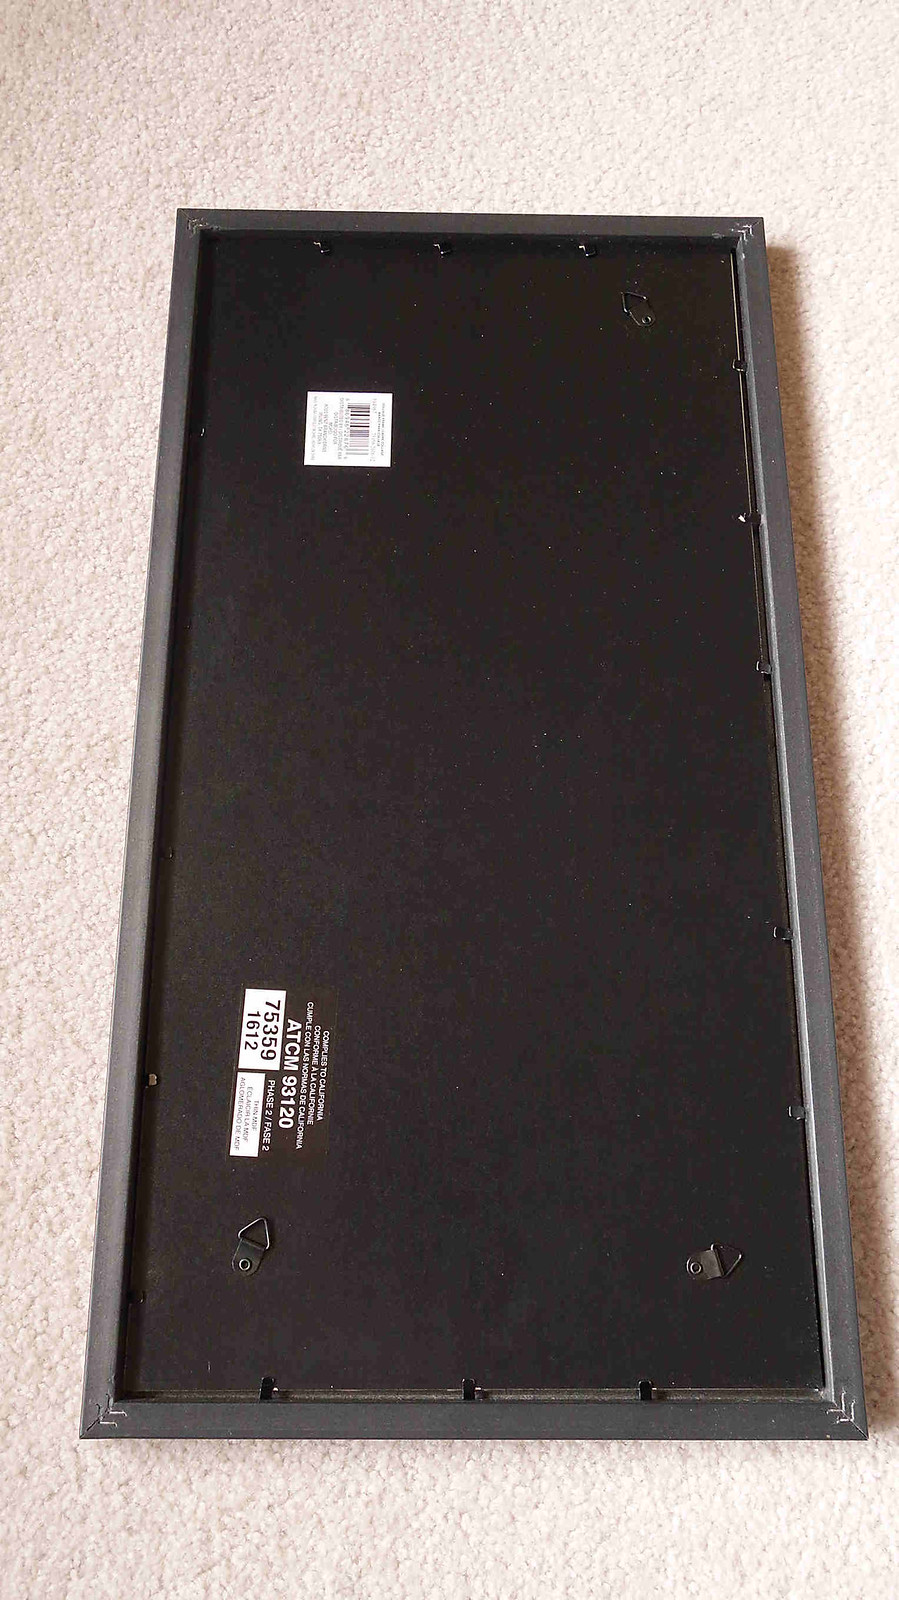
1. I will add feet to each corner. These will not only dress it up, but they will act as spacers, thusly raising the beast up off of the seafloor.

2. I will need to make a second sort of frame to enclose the bottom of the sub. This is not a functional requirement, but solely to pretty it up. It will be dang ugly underneath the base, and that won't do.

A side comment about this option. When I purchased this frame I had thought that it came with plexiglass. I thumped it a few times and it sure sounded like plastic. Um....WRONG! It is a nice big piece of glass. Drats... It's not a terrible problem, it's just more work. I already had some plexiglass, it just needed to be fitted. In truth, if the frame came as such, I would have had to trim theirs too. Theirs would have been less cutting though.

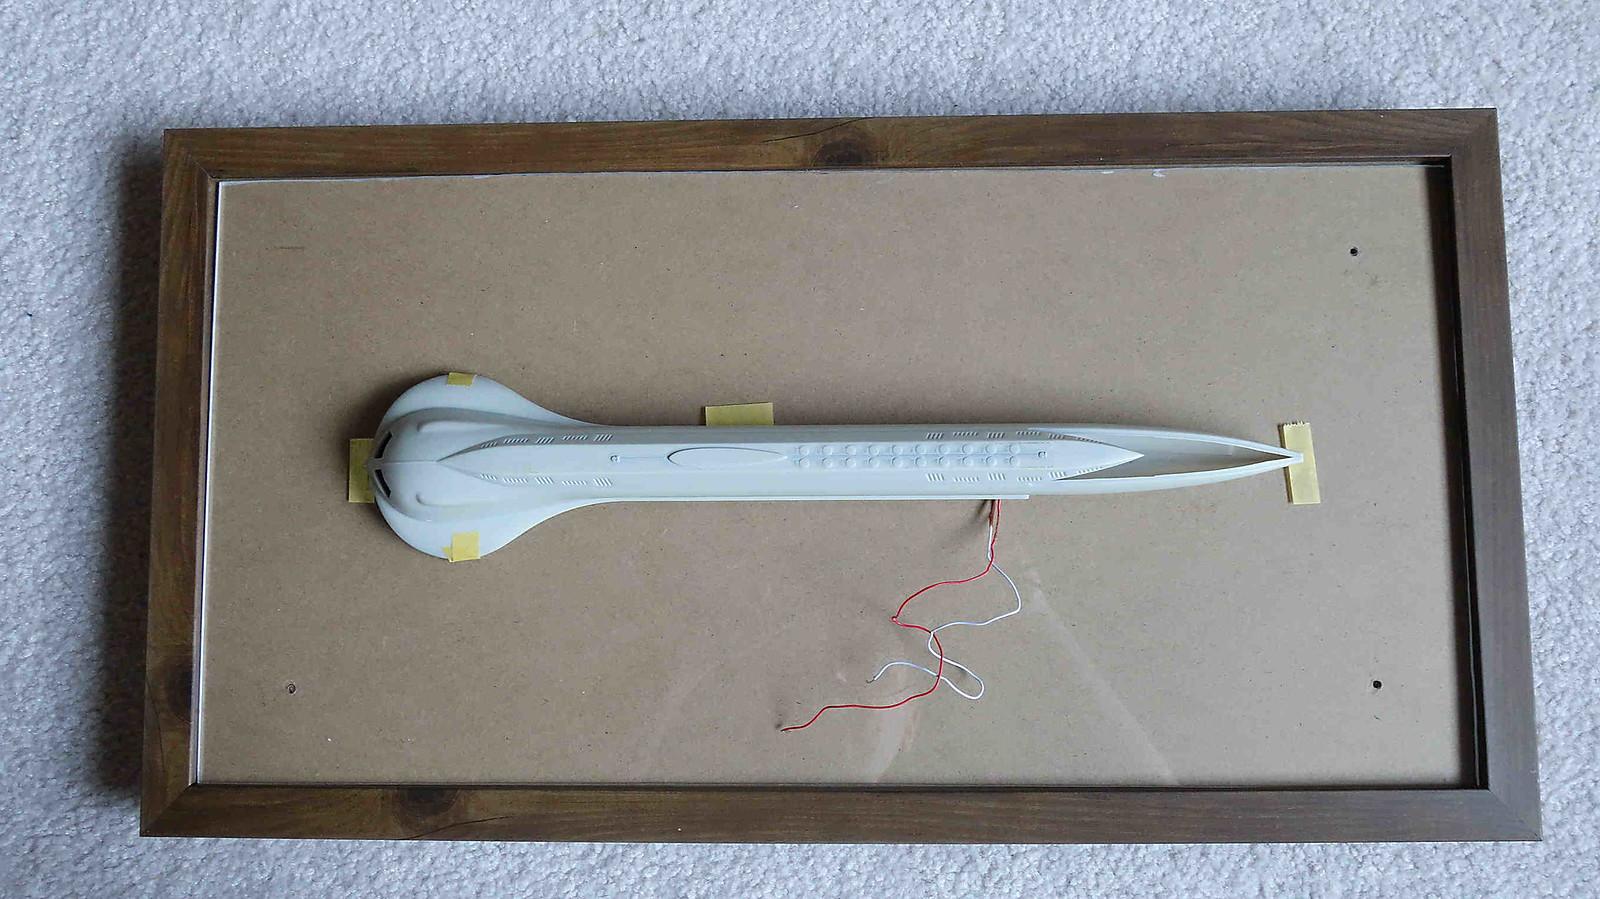
The reason for the cutting is that I am positioning the plexiglass piece above both the backboard and the lip that the glass and backboard sit under. I want the waterline higher up in relation to the frame. There will be more on this once when I start making the waves. So...the plexiglass had to fit within the frame, not under it, hence the cutting.


Finding its berth


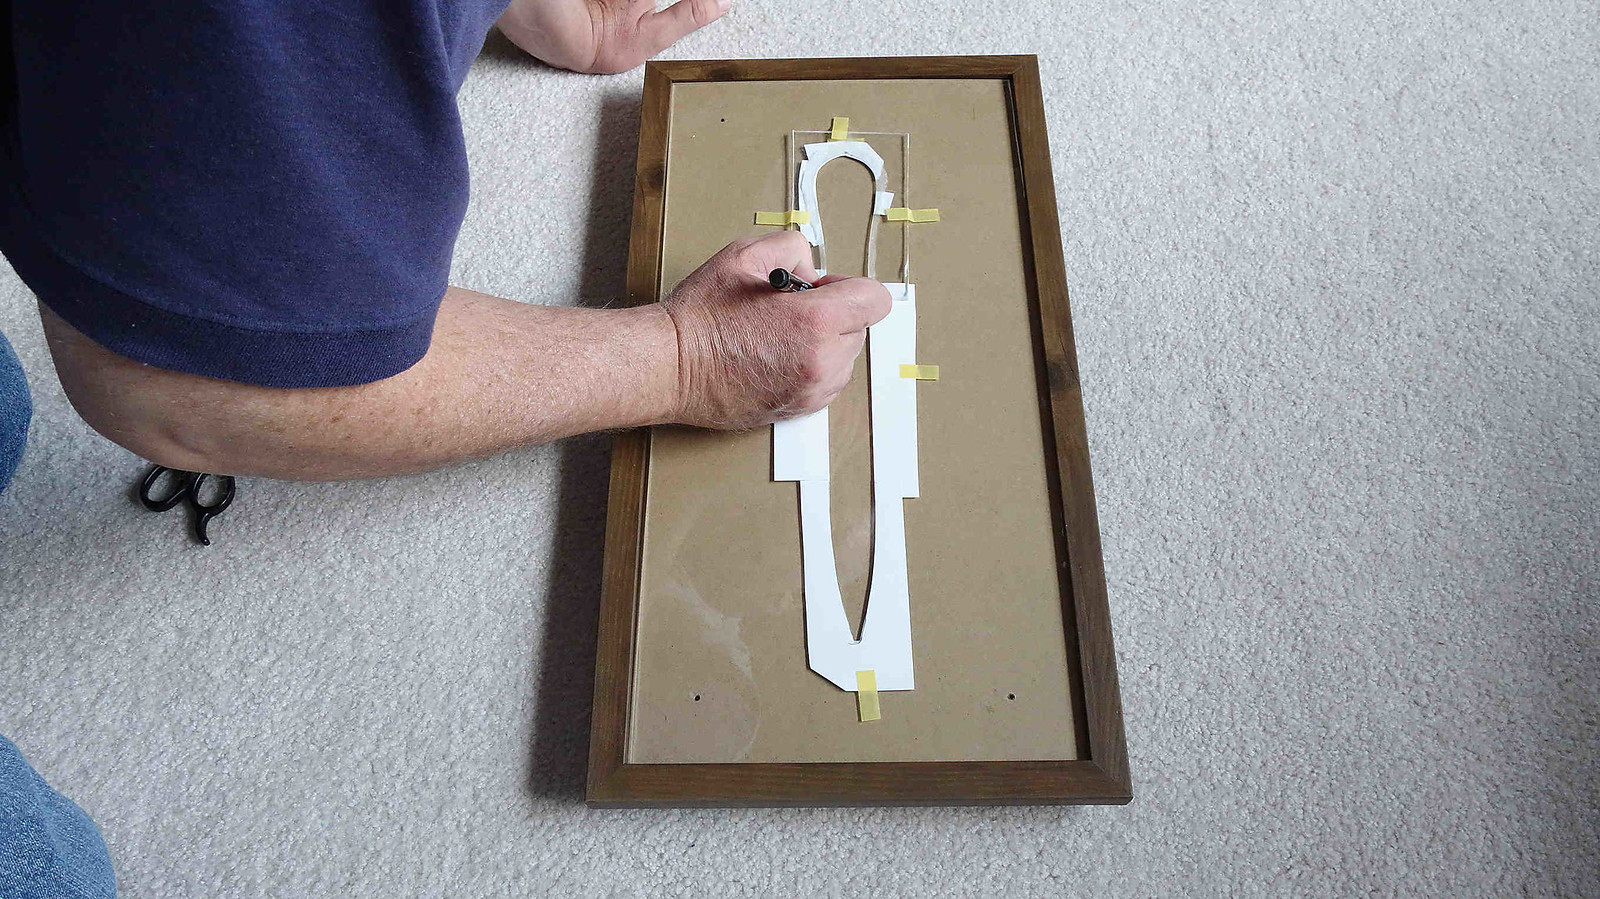
Notice the melted plastic as I cut. It occurred to me that this might be another way to make foamy water. It's just a thought. 

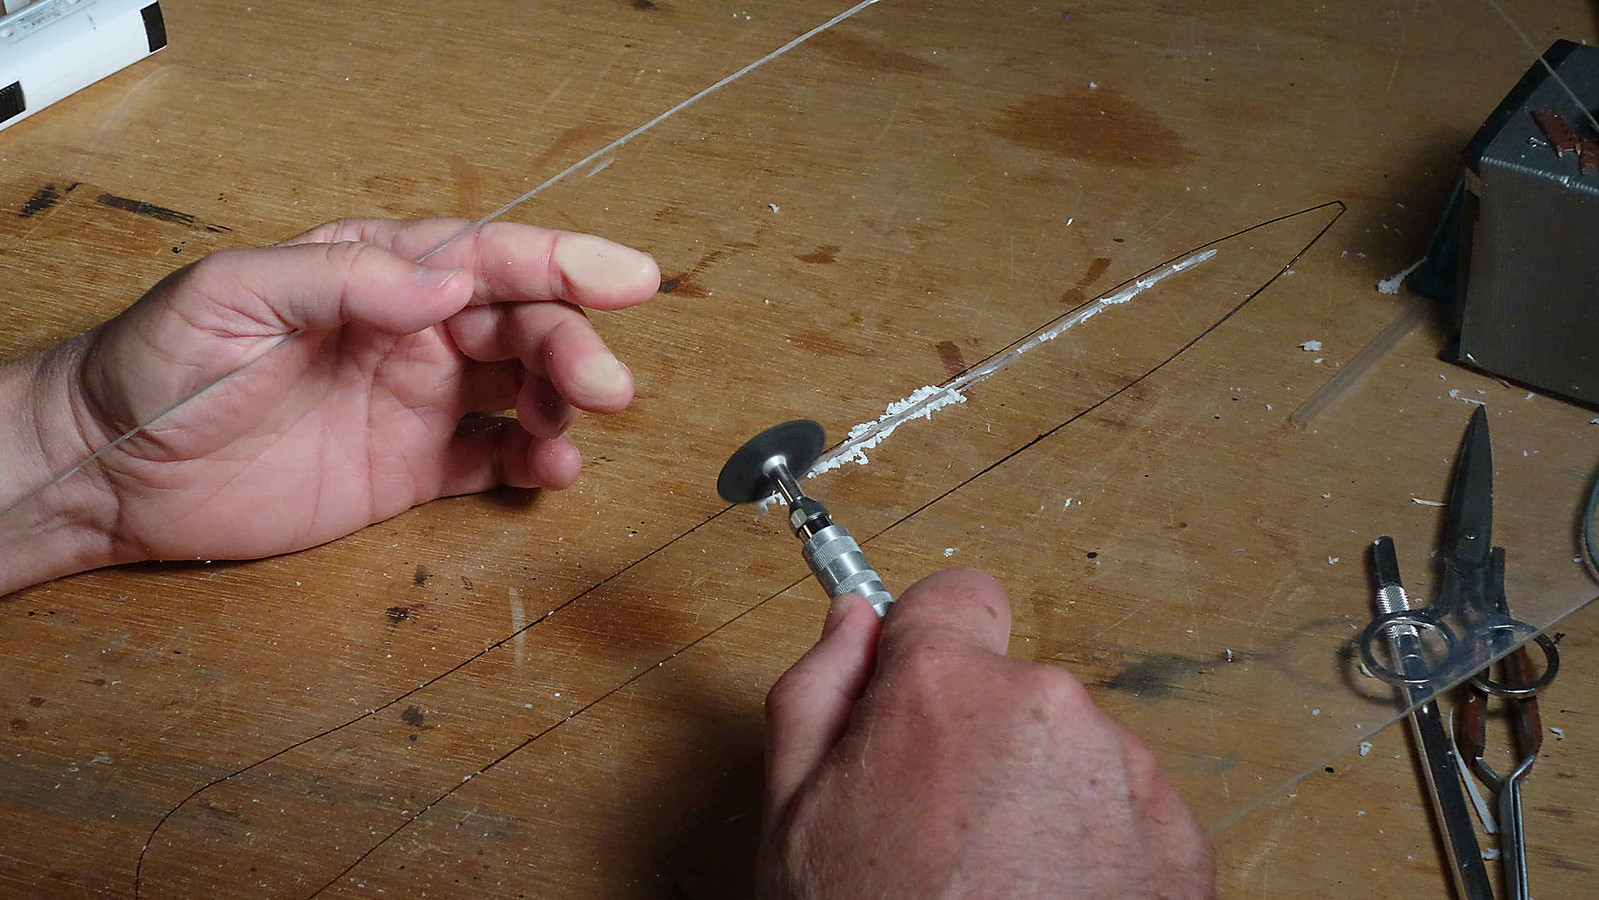
That cutout would make one killer shank.

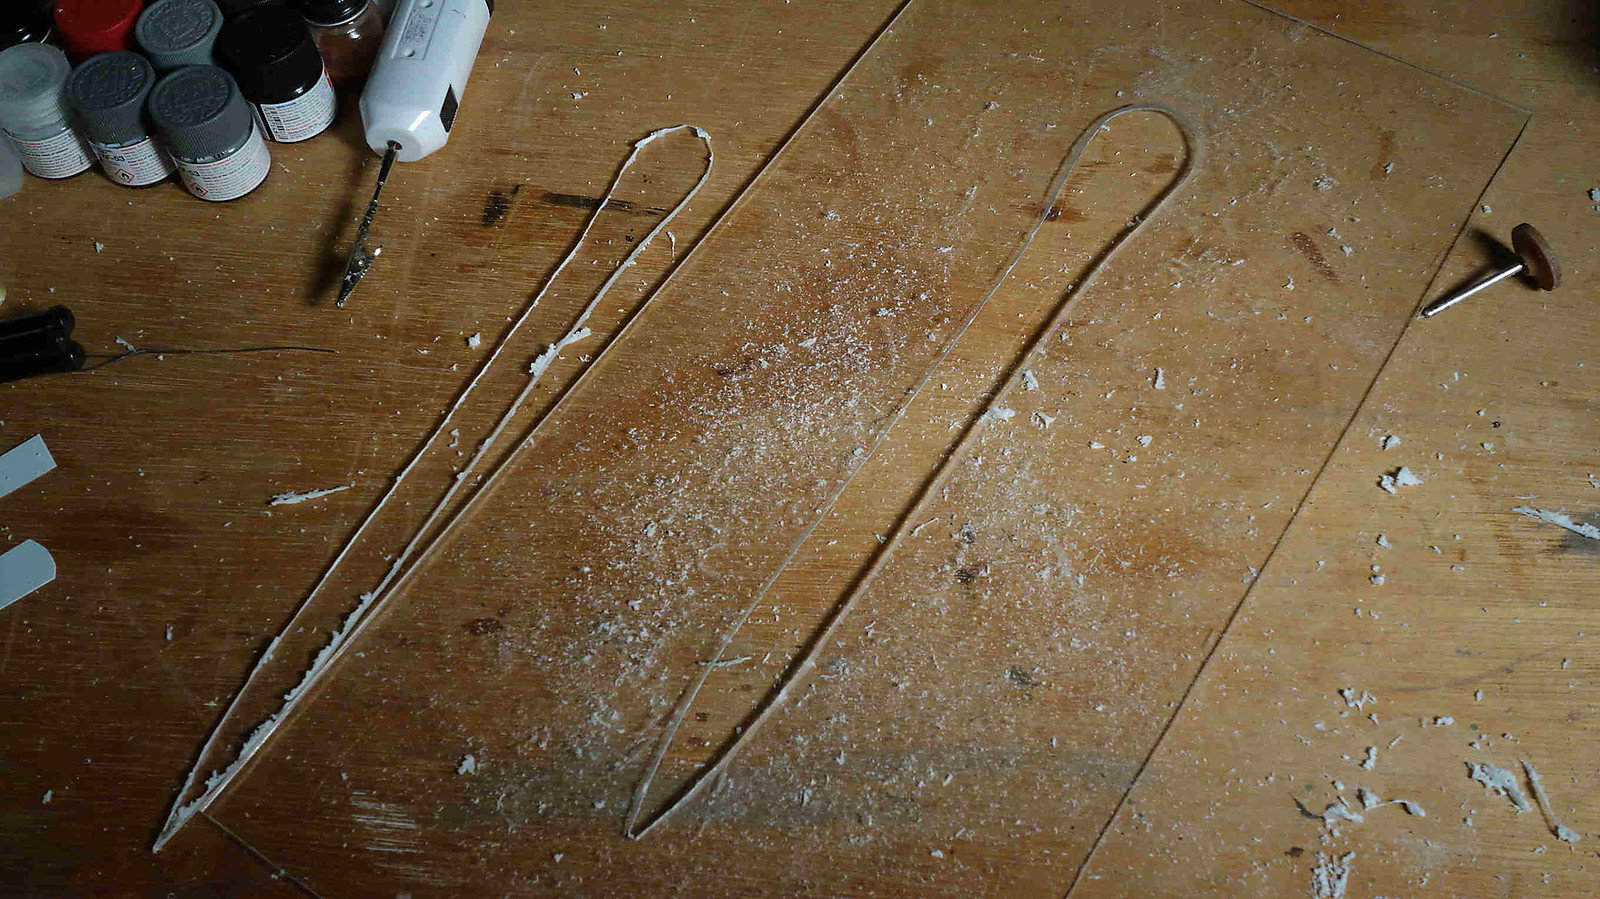
Overall, I am pleased with the fit. The extra work that I did on the template paid off. Phew...

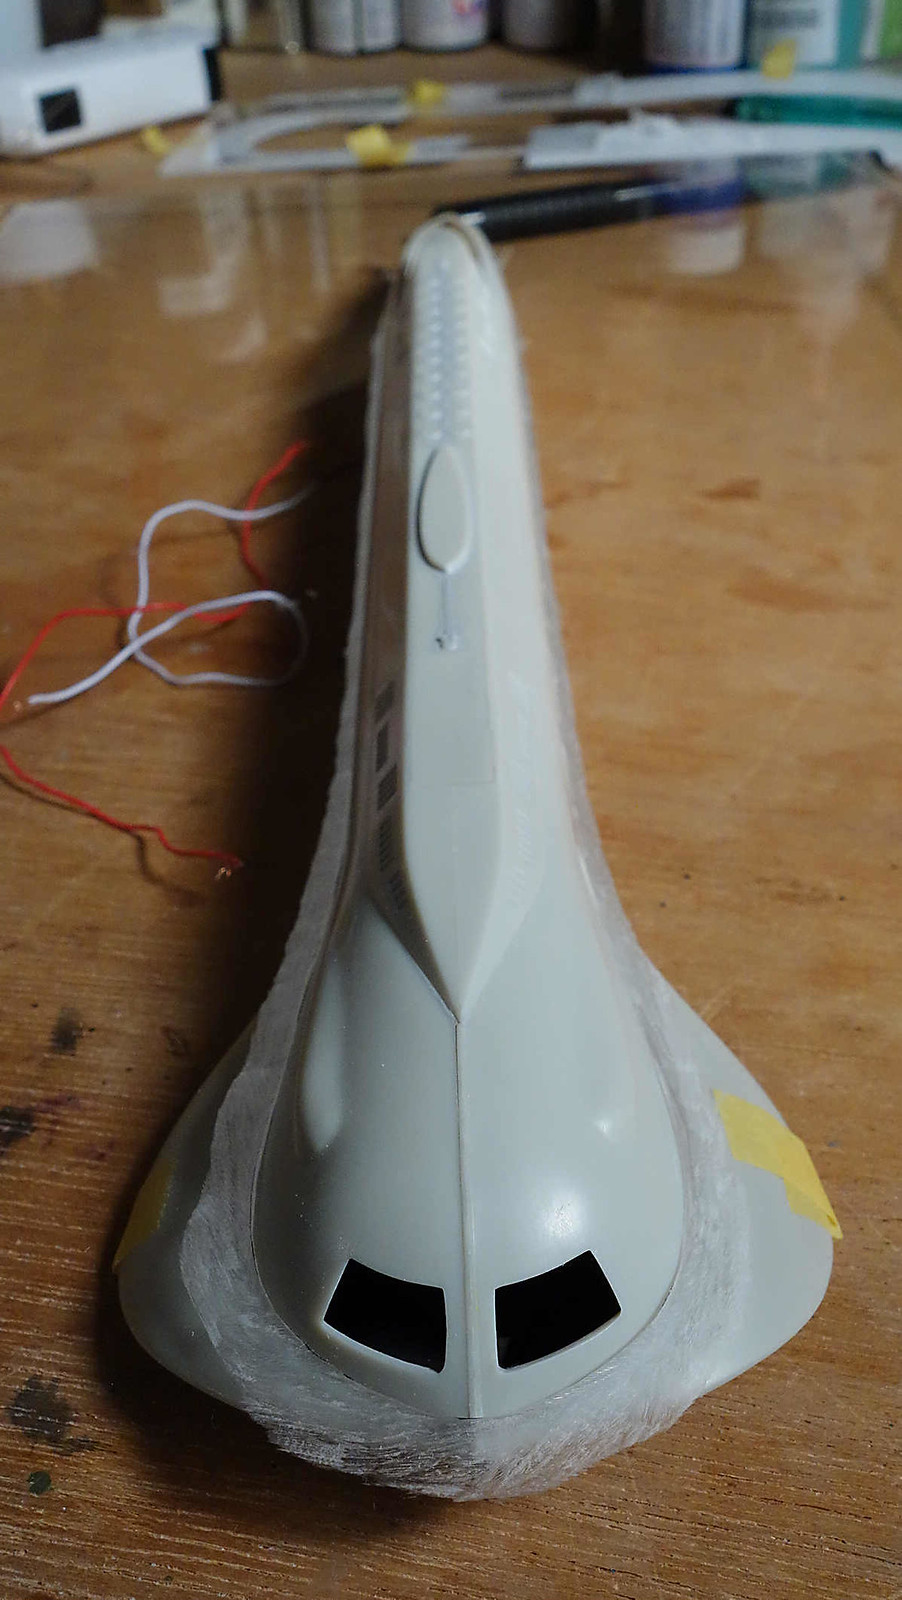
Why the scuffing? To get a tight fit I had to shape the leading edges so that the plexiglass positions flat on the hull, and not only on one edge of the sheet. To bring back some clarity to the section at the bow it will be sanded and polished. 

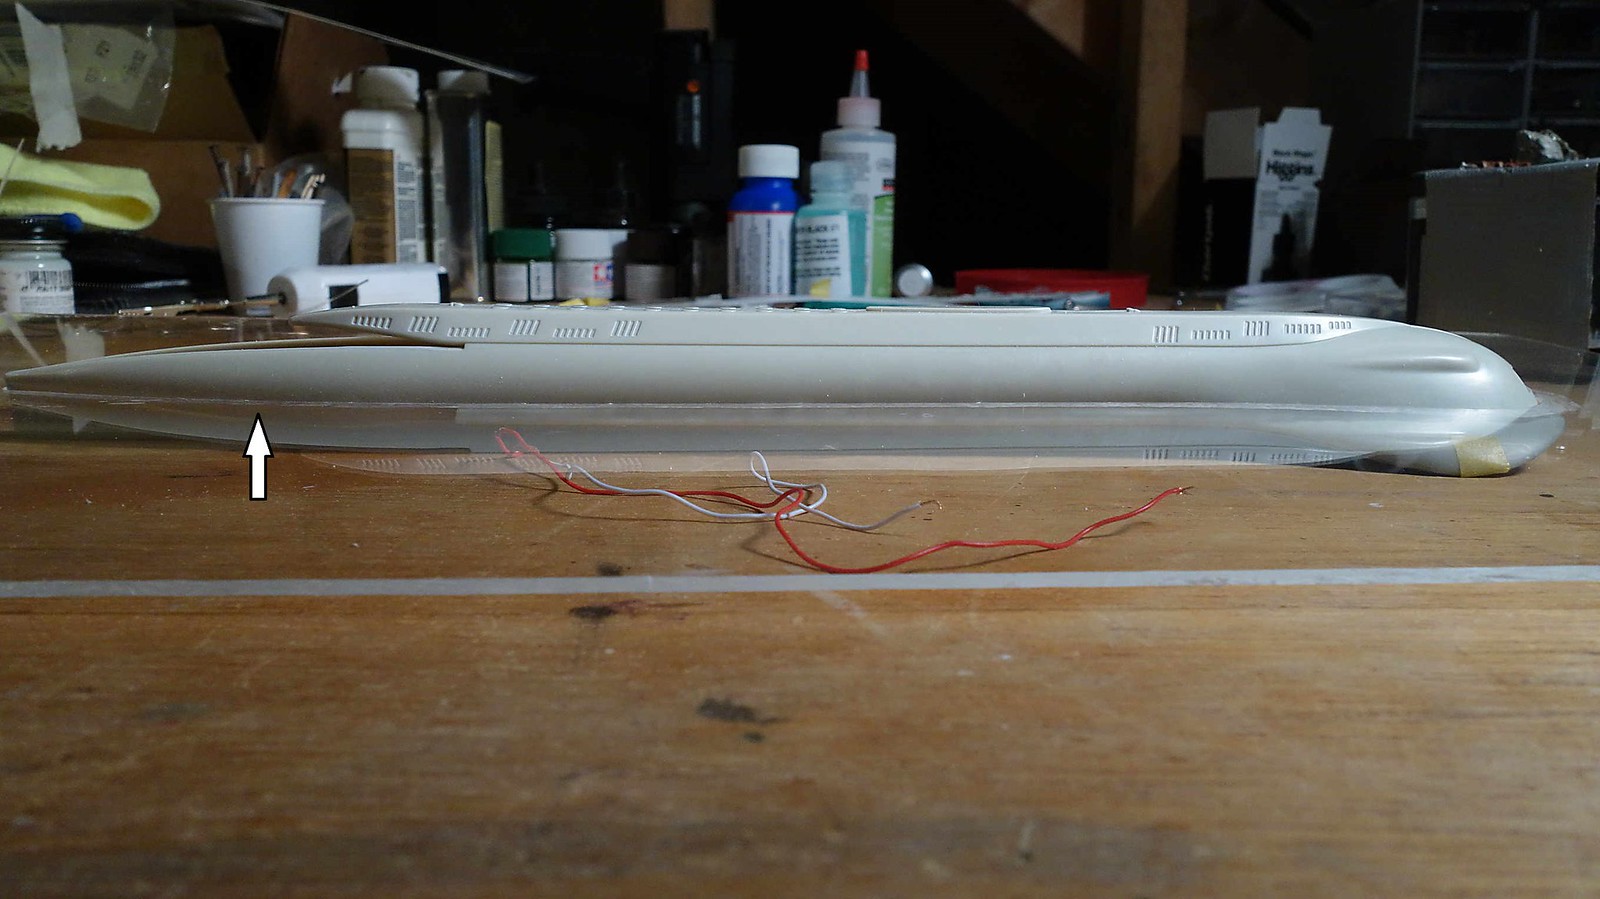
The arrow points to where the PTs sit. You can see the PTs attachment location by where it appears darker. I think that the waterline needs to be raised up some at the back, but it seems pretty certain that I will need to make some mods.

That is all for now.

  • Member since
    July 2014
  • From: Franklin Wi
Posted by Bakster on Monday, July 17, 2017 9:23 AM

After further review the plexiglass was too low at the subs stern. Once when I raised it to where I think it should be, it seems to clear those PT locators.

It's sucks getting old eyes because the magnifiers that I have tend to distort things. The end result is that you lose visual perspective. Cameras distort as well, I can't trust their images either. As of now, I "might" be ok to move forward without any major modifications at those locations. My whining moment is over.

Next up: I need to cut a hole in the backboard. This will allow the sub to sit correctly and it will provide access to it from below. At the same time, I need to sort out the bottom enclosure. 


  • Member since
    April 2016
  • From: Parsons Kansas
Posted by Hodakamax on Monday, July 17, 2017 11:49 AM

Keep after it! Watching  Geeked

Max

PS--I'm immersed in the Hodaka project, too hot to paint!

  • Member since
    July 2014
  • From: Franklin Wi
Posted by Bakster on Wednesday, July 19, 2017 8:26 PM

There isn't much to see with this post, and it sure isn't very pretty. But, it's part of the process, so I'm posting it.

As you can see I cut an opening for the sub into the backing board. What had been a little tricky in all this was reattaching the board to the frame. Unfortunately, when I tried to reuse the clips that came with it, they didn't want to go back in. There is a special tool for these, and it's not cheap. Getting one was not an option for a one-off project. So, browsing around in our local hardware store I found something called double point tacks. This seemed like the ticket. I predrilled the frame and shoved them in by using pliers. The backing board is now stowed.


Below:  Just for reference I set the plexiglass into place.

Next on the docket is to make the lower enclosure. 

  • Member since
    September 2012
Posted by GMorrison on Thursday, July 20, 2017 12:57 AM

To start with, you made a basic error.

To end with, it can be fixed.

Never make a display where the model and the display frame line up. It just looks wrong.You'll probably say that GMorrison represents the last good excuse for learning to aim assault rifles, but...

Looks like a display of that bass you caught in the derby.

Now, this is not too hard to fix. Cut down the plex about 1/2 all the way around and skew it a little in your frame. make a simple "matte" out of thin styrene sprayed black; a sheet the size of the inside of your frame about 3/4" wide or so to hide the edges of your crooked plex.


 Modeling is an excuse to buy books.


  • Member since
    July 2014
  • From: Franklin Wi
Posted by Bakster on Thursday, July 20, 2017 9:25 AM

GMorrison

You'll probably say that GMorrison represents the last good excuse for learning to aim assault rifles, but...

I read this at the office and blurted out laughing. A coworker goes, "what's so funny?" Answer? Um..........nothing. Just working here.

Buddy...where were you when I needed you? Just kidding of course. To be honest, I have not noticed other people doing what you are saying. Maybe I didn't look close enough, hence why I had no clue.

I will give this some thought. I have to be honest though... I probably won't revamp all this now. It might have to remain a learning moment. We'll see. How about this though. I did plan to have the waves roll at an angle to both the sub and the frame. This in effect changes the perspective as well

Thanks for the input, it's always welcome.

  • Member since
    July 2014
  • From: Franklin Wi
Posted by Bakster on Monday, July 24, 2017 6:19 PM

More construction

I am staying with the cutout oriented as it is. I am pretty confident that I'd have to modify the backing board as well, and that makes changing the orientation too much work. With some of the things that I have planned for it, it ought not to look too bad as is. Of course, that is if I can make it all happen. I have learned to never say never when it comes to unexpected surprises. Thanks for your input, GM. I will consider it sooner on future builds.

The bottom enclosure: Here is what I came up with. I went to Michaels and purchased another picture frame. This time I got it for $6 and some change. I am still laughing about the price, you have to love a deal. Anyway, I pulled it apart and cut the frame to the lengths that I needed. I made the miter cuts using my rotary cut off wheel. The cuts are not perfect, that is for dang sure. In doing all of this I had come to learn that the frame is made out of plastic, and not out of wood. I tell ya...it is amazing what manufacturers are able to do.

Below: This image will give you an idea of what I am going after.

Below: As you can see I settled on these brass corner pieces as a way to hold things together. I am so-so with how it came out. By using them I was not able to get as tight a join as I would have liked. I am not sure that I like the look of them either. But--when you are macgyvering--it is what it is. 

Below: The enclosure is not secured to the base yet. I need to sort that out. I also need to attach the battery compartment, aka nuclear reactor.

As things so often go--my plan has changed. I probably won't be adding feet/spacers to the corners of the base. This bottom enclosure gives me the space that I need to clear the sub, and, it acts as its own stand. It is a sort of pedestal. I like this idea better.

Lastly, it was time to run the reactor through its paces.


  • Member since
    April 2016
  • From: Parsons Kansas
Posted by Hodakamax on Monday, July 24, 2017 8:18 PM

Whoa! Big amps! I'm impressed, the part I've been waiting for! Holy Somolly! LOL!

Max

  • Member since
    July 2014
  • From: Franklin Wi
Posted by Bakster on Monday, July 24, 2017 11:00 PM

Hodakamax

Whoa! Big amps! I'm impressed, the part I've been waiting for! Holy Somolly! LOL!

Max


Max, it can knock you on your can. Lol...

  • Member since
    April 2017
Posted by Mark Steele on Tuesday, July 25, 2017 11:41 AM

Bakster
 
GMorrison
Funny you mentioned how you and your brother had to be in front of the set at a given time. Folks don't realize that now.


So true. I remember when VCRs came about and how liberating that was. And now we have DVRs. What I remember most though was having to get up to change the channel. This was before remote controls, or at least it was in our house. They were around, but a pretty expensive adder on new TV sets. Anyway, we'd take turns on who gets up to change the channel. Advertisers had a captive audience because channel surfing was too much work... 


I bought my first VCR in 1980 from Montgomery Ward.

You had to tune the individual channels with little wheels and the damned thing cost about $700.

It had a wired remote that allowed you to start and stop the tape!

On the Workbench:

Tamiya 1:350 USS Enterprise (CVN-65)

Kinetic 1:48 C-2A(R) Greyhound

Kitty Hawk 1:32 T-28B

  • Member since
    July 2014
  • From: Franklin Wi
Posted by Bakster on Tuesday, July 25, 2017 2:35 PM

Mark Steele
I bought my first VCR in 1980 from Montgomery Ward. You had to tune the individual channels with little wheels and the damned thing cost about $700. It had a wired remote that allowed you to start and stop the tape!

Hey Mark...that is so funny. I can relate. We bought our first VCR around the same time for about the same amount of money. It was a JVC. It was heavy as all heck. It had the little wheels and wired remote too. By today's standards, crazy stuff. Back then...cool stuff.

JOIN OUR COMMUNITY!

Our community is FREE to join. To participate you must either login or register for an account.

SEARCH FORUMS
FREE NEWSLETTER
By signing up you may also receive reader surveys and occasional special offers. We do not sell, rent or trade our email lists. View our Privacy Policy.