SEARCH FINESCALE.COM

Enter keywords or a search phrase below:

Fw 190 Butcher Bird 2013 (extended to June 2014) Group Build

564937 views
5865 replies
1 rating 2 rating 3 rating 4 rating 5 rating
  • Member since
    April 2013
  • From: Minnesota City, Minnesota, U.S.A.
Posted by FlyItLikeYouStoleIt on Wednesday, June 19, 2013 12:14 AM

Gettin quiet in here lately. I've been busy with some stuff round the house so not much building happenin. My putty job went fair. Painting is slowly coming along. Creating a nicely messed up bird aint easy, especially when your primer turns out to be worth every penny of $3.47. Not so crazy about  Ace Hardware paint anymore. My generic "Now" primer is much better. Live n learn, right?

Bill.

On the bench:  Lindberg 1/32 scale 1934 Ford Coupe and a few rescue projects.

In queue:  Tamiya 1/35 Quad Tractor or a scratch build project.

  • Member since
    December 2006
  • From: N. Georgia
Posted by Jester75 on Wednesday, June 19, 2013 7:15 AM

Live and learn it is! I am waiting on a few more items and I will put my 109 build on hold and kick off a dual 190 build using Eduards D9 and A8. Could someone find me an old priest and a young priest??

Eric


  • Member since
    October 2008
  • From: Georgia
Posted by Rigidrider on Wednesday, June 19, 2013 2:34 PM

LOL... Thats funny Eric! Hey, is your 109for a GB or just taking a break? Cant wait to see your "dual" build take shape. I have an Eduard 1/48 D-9 on ice right now until I finish (haven't started yet) a 109.

Doug

When Life Hands You A Bucket Of Lemons...

Make Lemonade!

Then Sell It Back At $2 Bucks A Glass...

  • Member since
    December 2006
  • From: N. Georgia
Posted by Jester75 on Wednesday, June 19, 2013 2:41 PM

The 109 is just an ordinary build not attached to any GB. It's the Cyber-Hobby 32nd E4 kit and I've really been wanting to build it for a long time. Putting it on hold is actually probably a good thing as I am having tons of trouble deciding on markings. I wanted to build Wolfgang Lippert's mount that he was shot down in, but I think he was flying a F4 at the time.

Eric


  • Member since
    March 2010
  • From: MN
Posted by Nathan T on Wednesday, June 19, 2013 8:33 PM

2 Eduard 190s??!! Holy Jester, break out the Xanax!!


  • Member since
    August 2009
  • From: MOAB, UTAH
Posted by JOE RIX on Wednesday, June 19, 2013 11:25 PM

OK Compadres, I have actually made some degree of progress. I applied the initial silly putty mask and sprayed the RLM 84. I'll be applying another light coat for touch up and then mask off the 84 in order to shoot the RLM 75 followed by some more putty and finally the RLM 83. Although I like masking with silly putty the issue is that of being able to handle the model without smooshing the putty. Thus, I utilize a wood dowel with blu tac to hold the model.  It feels good to actually get going again although what has taken me a couple of weeks to do Doug would have done in 5 minutes. Anyhoo, on to a couple of pics.

 photo 128b6a24-9977-408a-add6-8f4728aa5481_zpsaec890ee.jpg

 photo 6c147536-bc1b-499d-8b1a-03f9ecf2047d_zpsfc0f8474.jpg

"Not only do I not know what's going on, I wouldn't know what to do about it if I did". George Carlin

  • Member since
    March 2012
  • From: Corpus Christi, Tx
Posted by mustang1989 on Thursday, June 20, 2013 6:28 AM

Ok guys. Sorry I've been out for a little bit. Things have gotten a little crazy around here but back on board.

Joe Rix: Good progress. Lots of masking for you I see!

Archangel: Man thats some good stuff going on in that engine/ gun bay!

Bill: Bill! You are the wildman! That engine looks super!

Jester: I'll get with you on the make and model and post them in the intro buddy! Good to see you back in here.

Will get back on here and check on everybody's progress. Good to be back in here amongst fellow modellers.


 Forum | Modelers Social Club Forum (proboards.com) 

  • Member since
    December 2006
  • From: N. Georgia
Posted by Jester75 on Thursday, June 20, 2013 7:09 AM

That masking looks good Joe, let see some paint on her!!

Eric


  • Member since
    October 2012
  • From: Mt. Washington, KY
Posted by Geezer on Thursday, June 20, 2013 12:27 PM

Okay Mustang1989,

You talked me into it. Assuming this goes long enough, I may get something done. Hobby room has been drywalled, mudded and is awating paint, electric finishing work and floor. I can live w/o the flooring for a bit.

I've ordered two kits, Eduard 8187 Profipack Fw 190A-9 and the Eduard 84101 Fw 190D-9 Weekend Edition (both in 1/48), along with a couple of decal sheets that were on sale. Hope they arrive soon,  I'd hate to sick "killer" (aka Doodle) on them.

Probably start with the D-9 since in theory, it should be a bit simpler. Unh huh, sure, right....


www.spamodeler.com/forum/index.php 

Mediocraties - my favorite Greek model builder. 


  • Member since
    March 2012
  • From: Corpus Christi, Tx
Posted by mustang1989 on Thursday, June 20, 2013 1:28 PM

Geezer. Youre in pal! Welcome to the Group Build and youre in good company here bud.


 Forum | Modelers Social Club Forum (proboards.com) 

  • Member since
    December 2006
  • From: N. Georgia
Posted by Jester75 on Thursday, June 20, 2013 1:52 PM

Welcome geezer!! Looks like we may be building 2 similar kits at the same time! This should get interesting!! Reading all the reviews I think the D-9 is the lesser of the 2 evils but we shall see...

Eric


  • Member since
    October 2012
  • From: Mt. Washington, KY
Posted by Geezer on Thursday, June 20, 2013 2:07 PM

Eric,

I about croaked when I read your call for a priest and alcohol. I have two more trusty side-kicks to go along with Killer, so the dropped parts should not be around too long. Looking forward to it in a root-canal-appointment sort of way!

Lyle.

www.spamodeler.com/forum/index.php 

Mediocraties - my favorite Greek model builder. 


  • Member since
    March 2012
  • From: Corpus Christi, Tx
Posted by mustang1989 on Thursday, June 20, 2013 2:15 PM

I don't know about all the reviews but I can sure tell you frm watching your build and what I'm building its sure the lesser of the two evils!!


 Forum | Modelers Social Club Forum (proboards.com) 

  • Member since
    April 2013
Posted by SchattenSpartan on Thursday, June 20, 2013 5:00 PM

I will continue work on my 190 this weekend. It's very hot here in Vienna atm, so I don't felt like working on my projects at all, but it promises to cool down a bit over the weekend.

My project is Eduard's A8/R2, which should be similar to the A9. It is a nice litle kit with lots of details, but it has so much detail on the inside that it is a challenge to get the major airframe parts glued together nicely (at least my kit has those problems...)

Cheers, Clemens

  • Member since
    October 2008
  • From: Georgia
Posted by Rigidrider on Thursday, June 20, 2013 6:25 PM

Lyle(Geezer) I have a Filipina daughter, and she has a little pooch like yours, She gets real upset when I call it "Killer" (ha!) Hers also has coloration around his eyes/mouth area and she gets real upset when I tell people that the fur is blood stained! (LOLOLOL) . Cool little dog though...When I return to the build I'm planning on an Eduard D-9 too. Welcome aboard and I don't think you could ever put together a better bunch of guys to build with! Great guys each and every one...

Doug

When Life Hands You A Bucket Of Lemons...

Make Lemonade!

Then Sell It Back At $2 Bucks A Glass...

  • Member since
    October 2008
  • From: Georgia
Posted by Rigidrider on Thursday, June 20, 2013 6:47 PM

When Life Hands You A Bucket Of Lemons...

Make Lemonade!

Then Sell It Back At $2 Bucks A Glass...

  • Member since
    April 2013
  • From: Minnesota City, Minnesota, U.S.A.
Posted by FlyItLikeYouStoleIt on Thursday, June 20, 2013 10:13 PM

mustang1989

Ok guys. Sorry I've been out for a little bit. Things have gotten a little crazy around here but back on board.

Joe Rix: Good progress. Lots of masking for you I see!

Archangel: Man thats some good stuff going on in that engine/ gun bay!

Bill: Bill! You are the wildman! That engine looks super!

Jester: I'll get with you on the make and model and post them in the intro buddy! Good to see you back in here.

Will get back on here and check on everybody's progress. Good to be back in here amongst fellow modellers.

I think you meant "Scott" is the wildman. He's the one whose engine will need oil changes. My engine ended up getting buttoned shut. Looked pretty decent but not ready to turn over, like Scott's.

Bill.

On the bench:  Lindberg 1/32 scale 1934 Ford Coupe and a few rescue projects.

In queue:  Tamiya 1/35 Quad Tractor or a scratch build project.

  • Member since
    December 2006
  • From: N. Georgia
Posted by Jester75 on Thursday, June 20, 2013 10:42 PM

Alrighty, I am off on this dual nightmare build...The bench has been cleared and the kits...

The D-9 will be done as the mount of Werner Hohenburg as seen here on the bottom,

and the A-8 will be done up in Dortenmanns red 1 to compliment the D-9 black 1 of his I just completed for this group build,

I started out with the D-9. Most likely this one will be completely buttoned up including the canopy so I am not spending a ton of time on the pit. Got it all primed and ready for some 66. I will use the kit decals for the IP's.

Also, learning from my previous build, I used the fuselage sides as a template to glue together the firewall and mg shelf. The firewall and mg shelf were glued together and immediately squeezed between the two halves which were then taped. After working the two parts into a satisfactory position, I then carefully glued the small bulkhead  behind the mg's into place. While the seams were still wet, I used a bit of pressure and snugged the bulkheads are far into their resting places as the would go. If done carefully, the pieces should be easily removed and not glued to the sidewalls yet.

Thankfully, it looks like the wings and fuselage are straight and not warped like the last kit. This is quite a relief!!

I am much more satisfied with this fit than my last D-9. On another note, the instructions tell you to leave off the ammo containers, parts W3 and W27, if you plan on closing this bird up. I strongly disagree as they are very prominent when looking inside the wheel well. The reason they have you omit them is because the feed chutes for the mg's will interfere with the closed hood. I recommend simply cutting off the chutes on top of these as marked by the red lines below and installing them anyway.

From there, I went on to quickly assemble the engine. Just going to build it, paint it, and pick out some items to highlight since most of it wont be seen anyway,

And thats where I will leave it tonight. I will probably start on the  A-8 pit and such tomorrow. Cant wait to see some more Eduard kits being built up in here!!

Oh and on another note, I do believe that Eduards molds are getting a bit rough on the Dora. The profipak kit I just built I have had in the stash for quite some time and saw hardly any flash at all. However, this weekend edition kit was just purchased and there was a surprising amount of flash on the parts as well as many of the locator holes completed filled over. Hopefully though QC just slipped a little and its not wear on the molds.

Eric


  • Member since
    April 2013
  • From: Minnesota City, Minnesota, U.S.A.
Posted by FlyItLikeYouStoleIt on Thursday, June 20, 2013 11:53 PM

Doug, if that's your daughter, how can you possibly find so much time to build models. I would think you'd be guarding the door with a shotgun most of the time. Cute puppy, but don't let it fool you. Those little ones somehow grow up to think they're 10 feet tall and bullet proof.

Gettin closer to the finish with this build. Here's just a taste of how it's going to look.  Surprisingly, it really is turning out how I had envisioned it at the start. Go figure.

First up is a close up of the undercarriage wheels. Simply done in Testors enamels and artists acrylic. Tires painted in flat gray then black washed. Rims painted flat black then dry brushed with flat steel.

Next is an image of the fuselage side after scuffing with steel wool to reveal some of the black primer under the gray (my method to achieve that mottled look). The fuselage will receive further color treatments and probably a wash. 

Well, I'm off to begin masking for the fuse and the wing camo.  Ummm, and maybe look into that warehouse job (funny I did not see that while working on the plane).

Bill.

On the bench:  Lindberg 1/32 scale 1934 Ford Coupe and a few rescue projects.

In queue:  Tamiya 1/35 Quad Tractor or a scratch build project.

  • Member since
    October 2008
  • From: Georgia
Posted by Rigidrider on Friday, June 21, 2013 4:55 AM

LOL! Thanks Bill... I have 3 daughters and a son, the first two girls and son are from my first wife (American) and even though very partial, the girls are both lovely young ladies now with famlies of their own, My son is grown and is a Naval airman for 6 years now, my second wife (a Filipina) has instilled traditional values in our daughter, I had my moments though... She competed in beauty contest until she was 22' the bikini compatitions were a bit hard to be there for, and I am just glad I couldnt read minds at the time!LOLOL.

Jester... Great work and valuable info! Looking forwart to more great paint work from you! Loved your first D-9.

When Life Hands You A Bucket Of Lemons...

Make Lemonade!

Then Sell It Back At $2 Bucks A Glass...

  • Member since
    March 2010
  • From: MN
Posted by Nathan T on Friday, June 21, 2013 10:08 PM

Good start Jester. Couldn't have chosen a better scheme on the Dora. I got some real shots of Hohenburg's bird if your interested.

Bill- Nice looking tires, and nicely weathered too.


  • Member since
    April 2013
  • From: Minnesota City, Minnesota, U.S.A.
Posted by FlyItLikeYouStoleIt on Saturday, June 22, 2013 12:05 AM

Spent the early morning hours masking my bird and hit the wing camo and bottom with the lighter gray. There will be some weathering and other abuses done to achieve my target beat-to-hell condition and help accurize the overall appearance.

Did anybody else's kit have the landing gear that required attaching before the upper wing portions could be glued on. It's been a pain working around the finished and masked landing gear struts and I hope they've fared well through all the handling. Just another oversight of this old kit's designers. I'm still leaving them masked due to more paint work. 

Bill.

On the bench:  Lindberg 1/32 scale 1934 Ford Coupe and a few rescue projects.

In queue:  Tamiya 1/35 Quad Tractor or a scratch build project.

  • Member since
    December 2006
  • From: N. Georgia
Posted by Jester75 on Saturday, June 22, 2013 8:33 AM

Coming along nicely Bill, I like  the look you achieved on the tires and wheels.

Heck yeah Nate, you can never have too many refs on a plane your building, that would be awesome!!  I only have the one that comes in the decal pamphlet which is about a rear 3/4 view of it crashed with a bunch of soldiers standing around it.

Eric


  • Member since
    August 2009
  • From: MOAB, UTAH
Posted by JOE RIX on Saturday, June 22, 2013 8:50 AM

Oh Yeah, nice growth spurt going on here.

Joe - I might suggest that you get control of your GB as it appears to be going to the dogs.Wink

Bill - Nice stuff. I knew you would be able to pull it off. I have to admit I am quite interested in seeing how your mottling technique turns out.

Eric- The dual build is a nightmare? C'mon give us a break. You absolutely love it, you desire it, you crave it.           

"Not only do I not know what's going on, I wouldn't know what to do about it if I did". George Carlin

  • Member since
    March 2012
  • From: Corpus Christi, Tx
Posted by mustang1989 on Saturday, June 22, 2013 9:56 AM

JOE RIX

Joe - I might suggest that you get control of your GB as it appears to be going to the dogs.Wink

Yeah .....smarty! Life wasn't kind last week but I'm back in the game now. Really looking forward to get back crankin' on my bird and really looking forward to being done with these gun bays so I can get this thing on wheels!


 Forum | Modelers Social Club Forum (proboards.com) 

  • Member since
    March 2010
  • From: MN
Posted by Nathan T on Saturday, June 22, 2013 9:05 PM

Jester75

Heck yeah Nate, you can never have too many refs on a plane your building, that would be awesome!!  I only have the one that comes in the decal pamphlet which is about a rear 3/4 view of it crashed with a bunch of soldiers standing around it.

Jester- All these are believed to be Werner Hohenburg's Dora Wrk. No. 210194


  • Member since
    December 2006
  • From: N. Georgia
Posted by Jester75 on Saturday, June 22, 2013 9:23 PM

That first one is a great shot!! I have been contemplating the spinner spiral which the decal plates show it does not have one, but in that first pic near the back plate, it almost looks like the beginning of one. What do you guys think?

Eric


  • Member since
    December 2006
  • From: N. Georgia
Posted by Jester75 on Sunday, June 23, 2013 1:36 AM

Well here goes another small update on the Dora. Seems I am coming down with a cold so it may be a bit before I can squeeze another one in. Been working on the internal wing structure. Eduard really put the detail in this area for sure!!
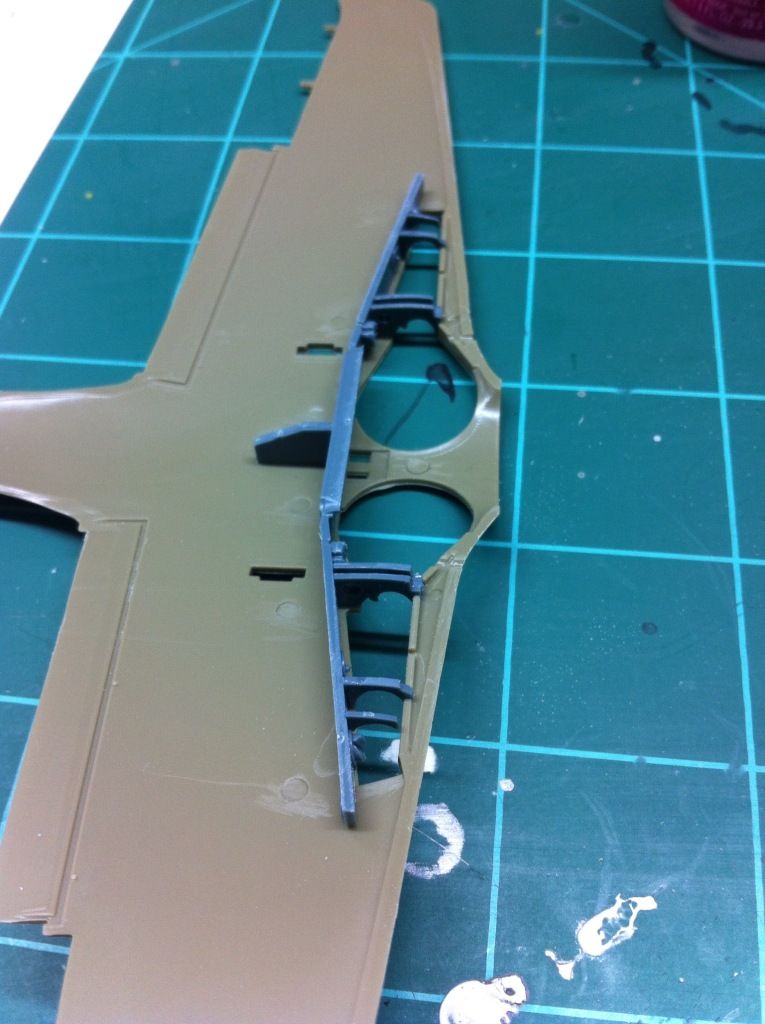
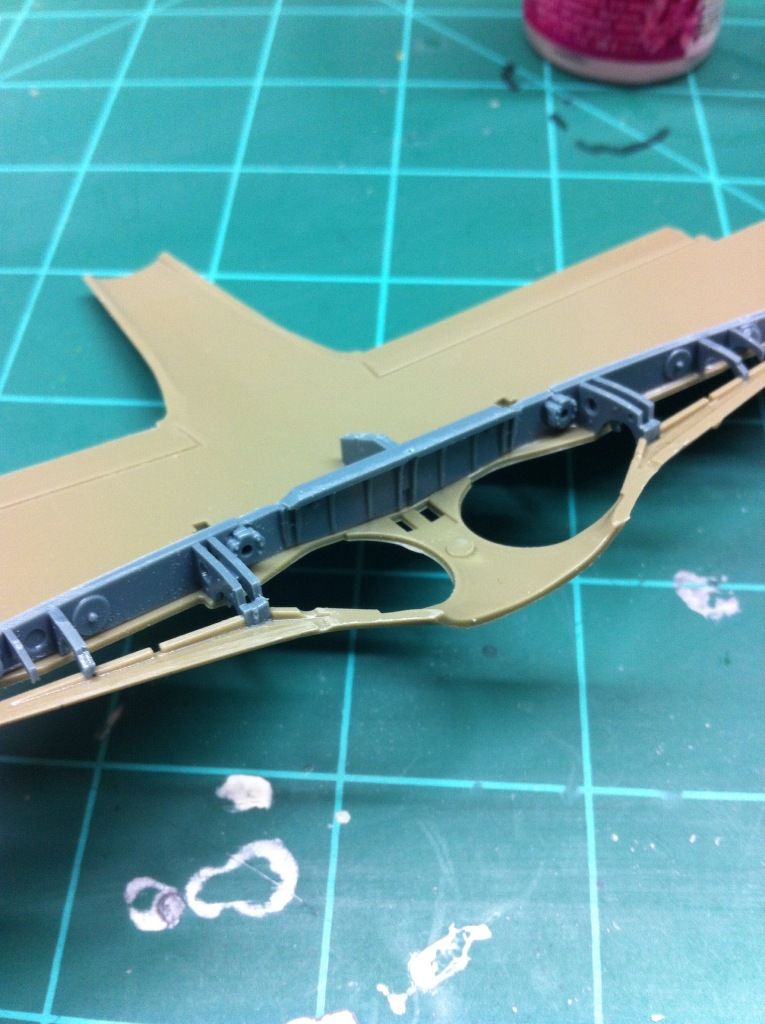
Also, since I didn't have any brass barrels for this build, I decided to make some from some brass tubing I had laying around. The kit barrels are a real drag on this one as they aren't slide molded at all. Began by hacking off the very end of the barrel and drilling a hole for a pin.
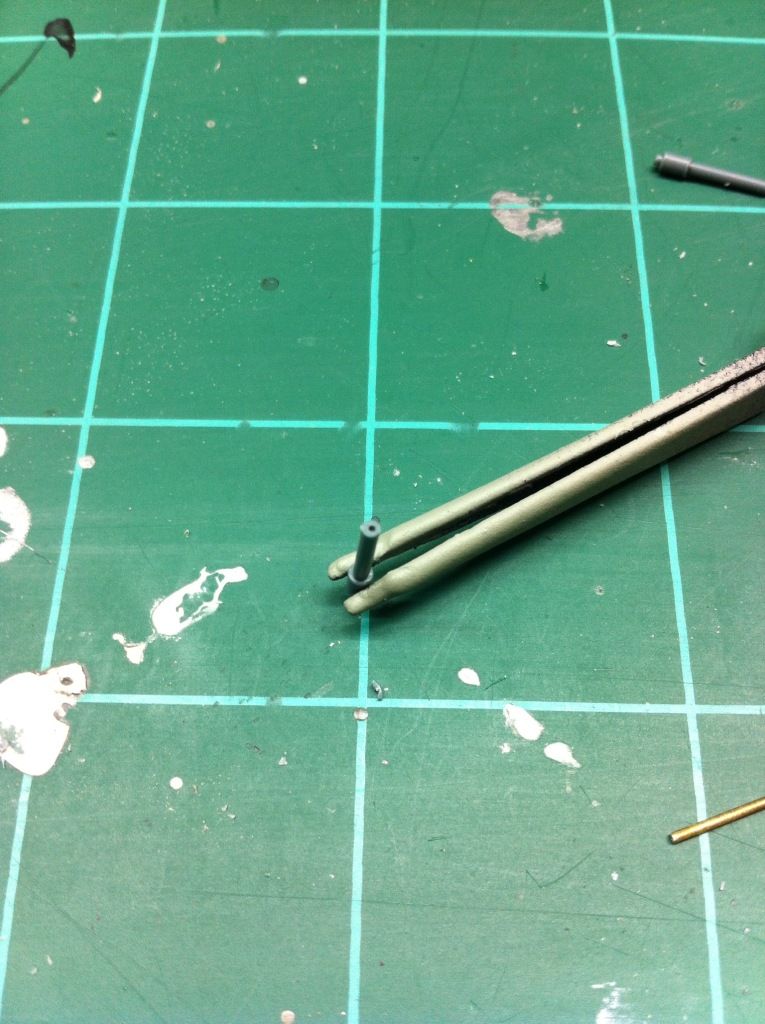
then the pin, made from some old broken pin vise drill bits.
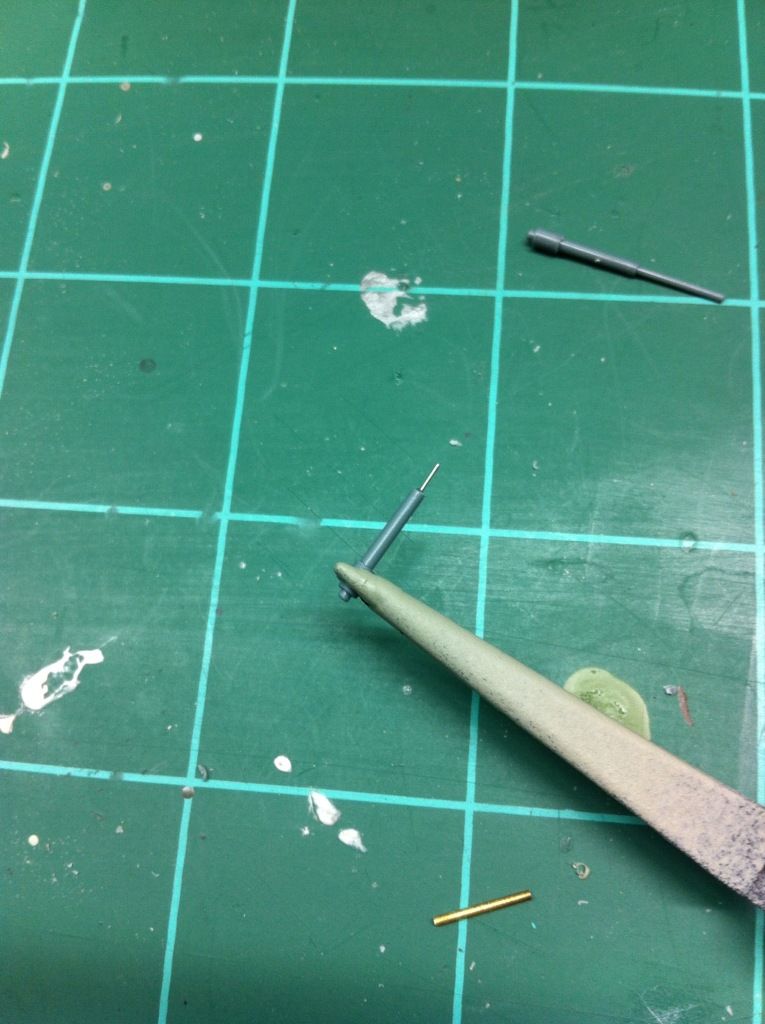
then I slid the hollow brass barrel onto the pin and fixed it with some superglue.
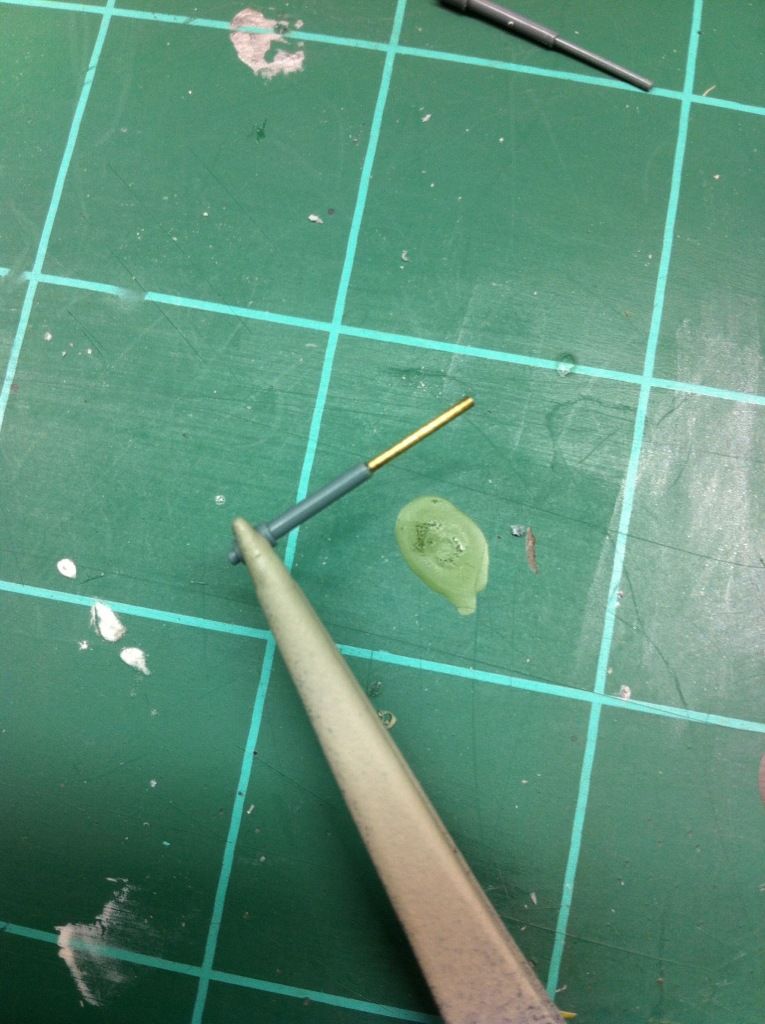
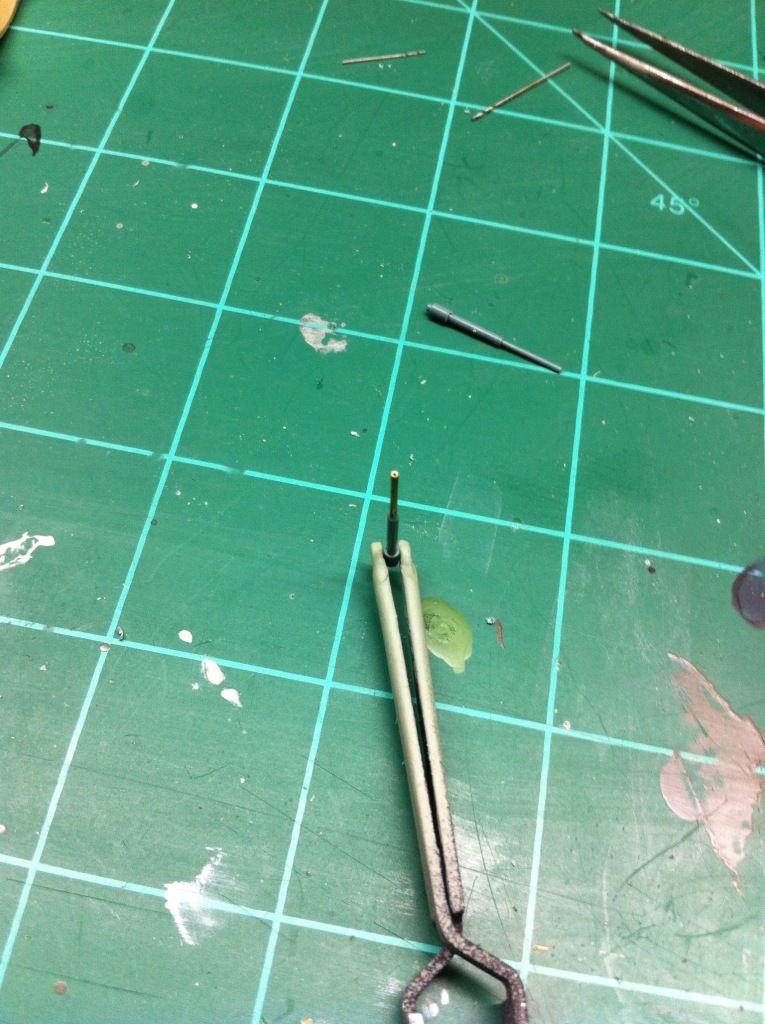
Not bad if I do say so myself!!

Moving on to the wing MG bays. Since this kit will be closed up, you have to modify the opening to account for the closed hoods. Turning the wing over, you can see the area of thinner plastic that needs to be cut out. I just use a sharp blade and follow along the sides several times till the piece comes loose.

A little sanding and clean up of the cut and this is what you get.
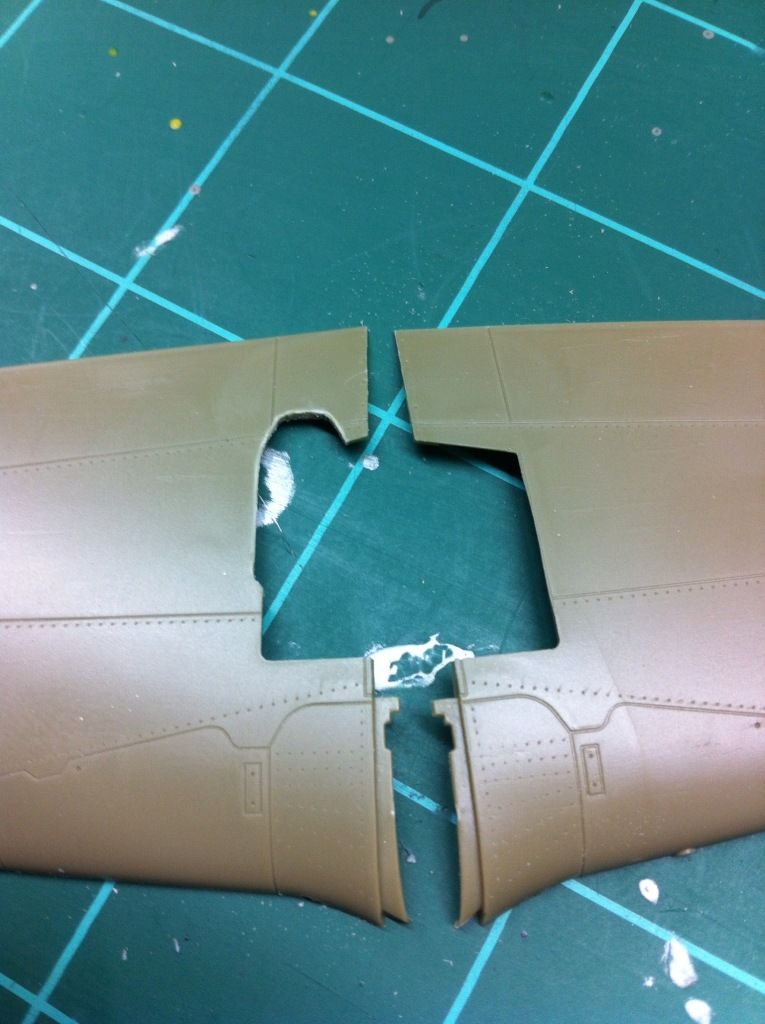
A test fit of the hood reveals...
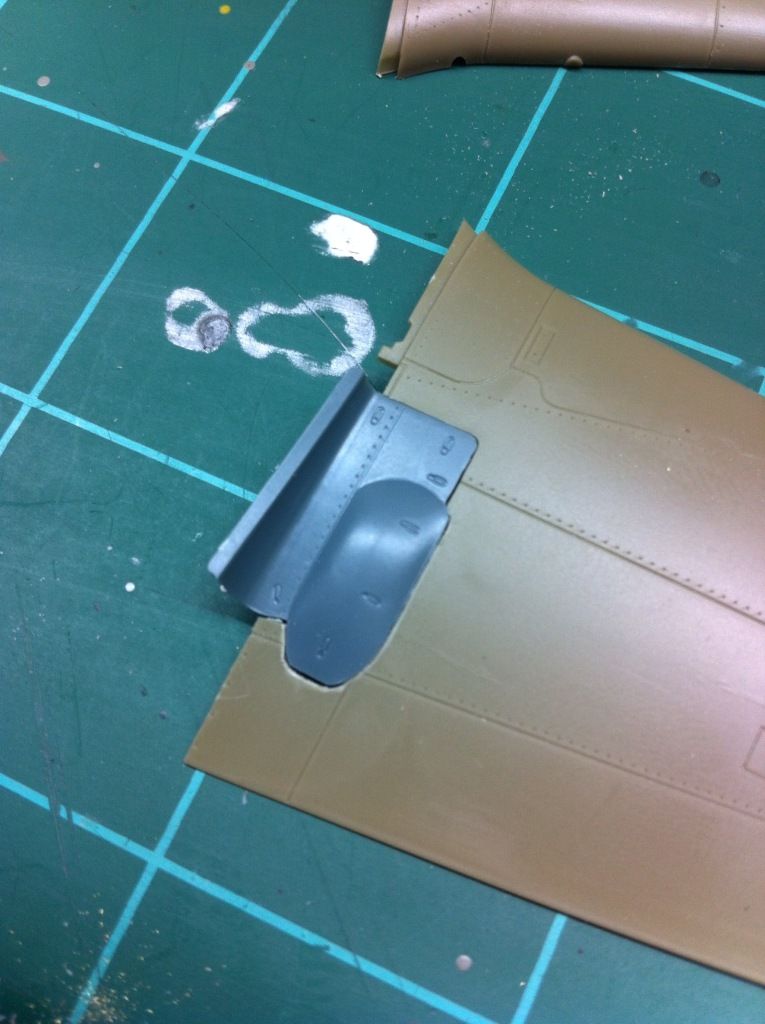
..not a bad fit at all. Any gaps visible now are easily filled with some Mr. Liquid Putty.

A test fit of all the components so far revealed a few areas that will need to be addressed later but by no means should pose any great problems. One area is the rear bulkhead behind the cowl mgs. As you can see in the pic, the pit spread this area out and the bulkhead is no longer a snug fit. I will have to break out the mg hood and do some test fitting to see if fuse sides will need to be trimmed or not. (The pit is still in primer by the way)
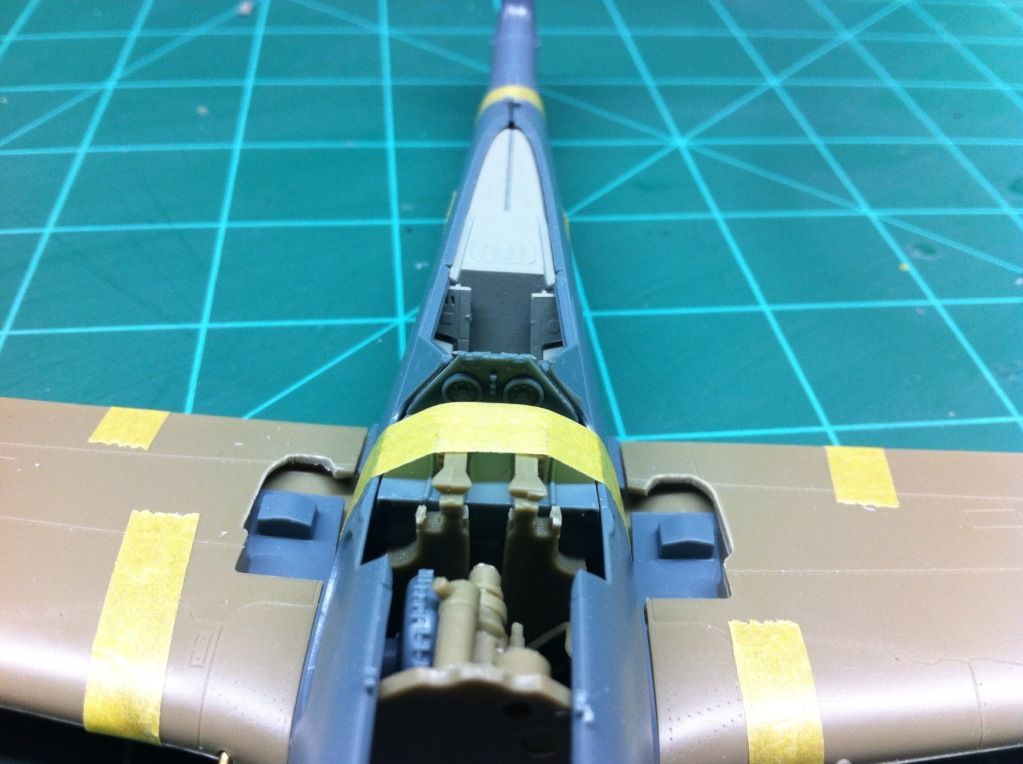
Also, a slight gap at the rear of the wing root. I found on my last build that a small spreader bar directly beneath the rear of the cockpit virtually eliminated any gap here so we will give it another shot on this one.
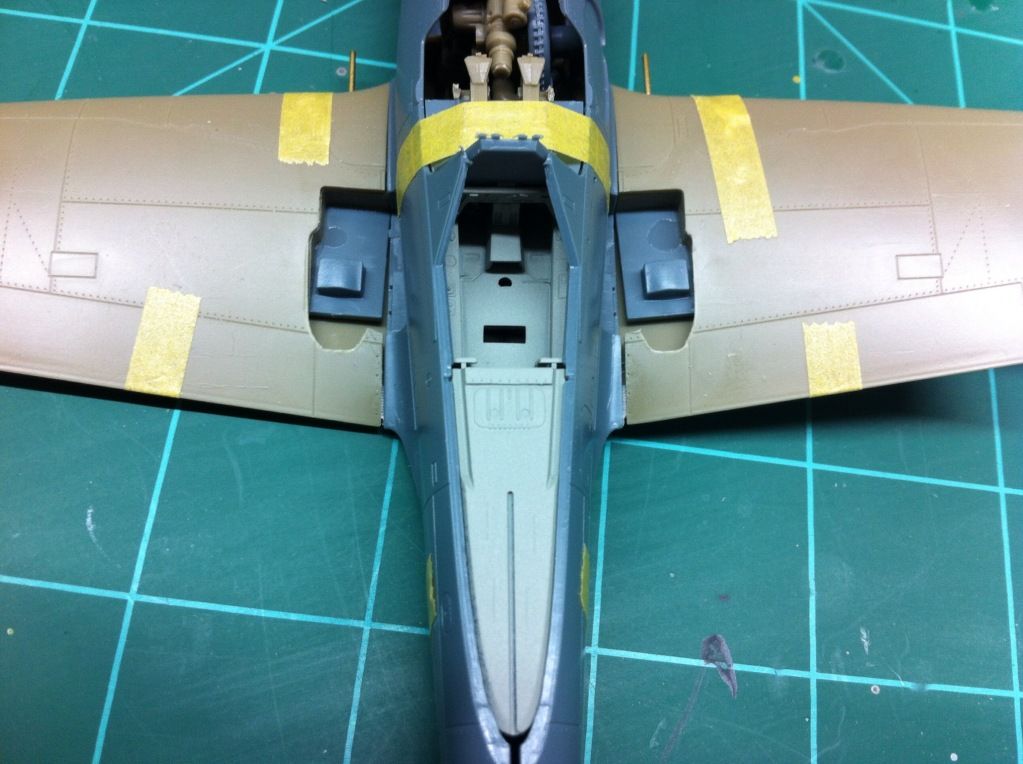
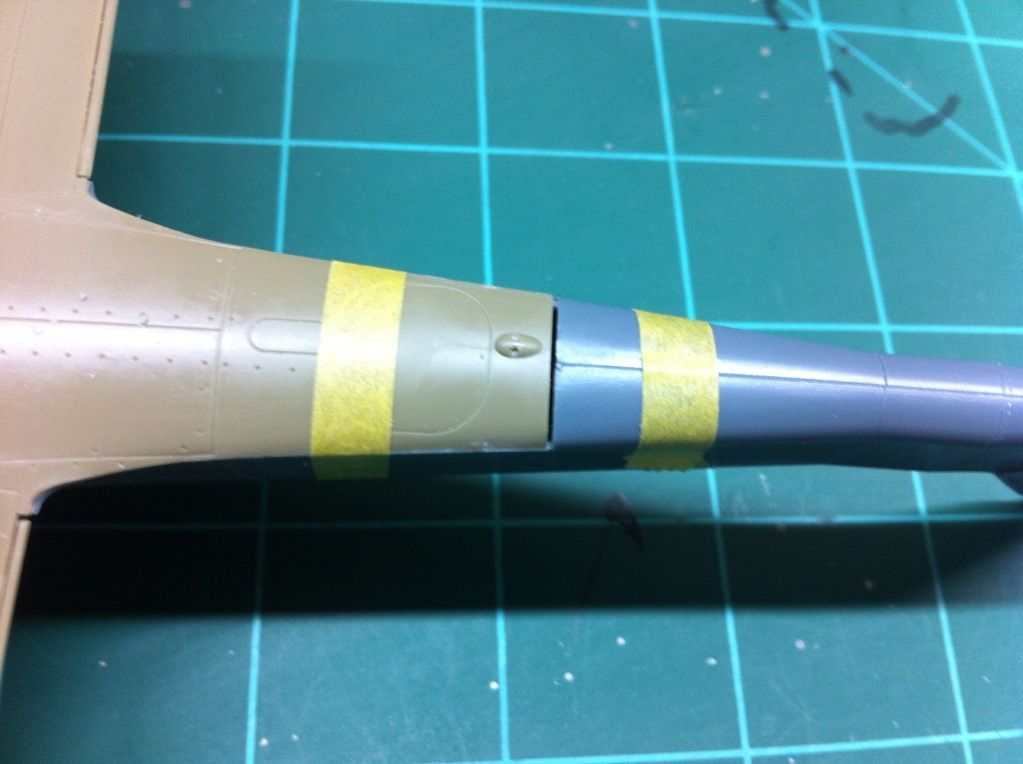
And one more gap that interestingly enough was not present at all on my Profipak build. This one should be easily managed with a strip styrene shim.
And that is that. One other note, and I didn't take any pictures, if you are building the wing root gun bays closed, do not use the base plates for the mg bays that the instructions call out. The weekend kit instructions omit the alternate part numbers if building these closed and I believe they are X3 and X10. They have a prominent 'tent' shaped hump on them which I believe helps keep the covers the proper height to match the wing surface. I'll try and get some pics next time I am at the bench. 

Eric


  • Member since
    October 2008
  • From: Georgia
Posted by Rigidrider on Sunday, June 23, 2013 5:08 AM

Excellent work Eric... Watching with interest, as this will likely be my next kit to build...Thanks for all the detail!

Doug

When Life Hands You A Bucket Of Lemons...

Make Lemonade!

Then Sell It Back At $2 Bucks A Glass...

  • Member since
    April 2013
Posted by SchattenSpartan on Sunday, June 23, 2013 3:39 PM

That's looking really nice, Eric! I'll post some pics of my 190 tomorrow.

JOIN OUR COMMUNITY!

Our community is FREE to join. To participate you must either login or register for an account.

SEARCH FORUMS
FREE NEWSLETTER
By signing up you may also receive reader surveys and occasional special offers. We do not sell, rent or trade our email lists. View our Privacy Policy.