SEARCH FINESCALE.COM

Enter keywords or a search phrase below:

Fw 190 Butcher Bird 2013 (extended to June 2014) Group Build

564936 views
5865 replies
1 rating 2 rating 3 rating 4 rating 5 rating
  • Member since
    December 2006
  • From: N. Georgia
Posted by Jester75 on Sunday, June 23, 2013 3:44 PM

Thanks guys! Looking forward to it SS!!

Eric


  • Member since
    August 2009
  • From: MOAB, UTAH
Posted by JOE RIX on Sunday, June 23, 2013 11:33 PM

Eric, Your build is looking great. I especially like how you scratched the gun barrels. Those came out excellent.

"Not only do I not know what's going on, I wouldn't know what to do about it if I did". George Carlin

  • Member since
    February 2011
  • From: Bent River, IA
Posted by Reasoned on Monday, June 24, 2013 7:18 AM

Some very impressive scratch work Eric!

Science is the pursiut of knowledge, faith is the pursuit of wisdom.  Peace be with you.

On the Tarmac: 1/48 Revell P-38

In the Hanger: A bunch of kits

  • Member since
    December 2006
  • From: N. Georgia
Posted by Jester75 on Monday, June 24, 2013 3:25 PM

Thanks Joe and Reasoned! I have begun work on the A8 and I can already tell this is going to be a fun ride....

Eric


  • Member since
    March 2012
  • From: Corpus Christi, Tx
Posted by mustang1989 on Monday, June 24, 2013 3:46 PM

I can certainly tell you that it is.......

It certainly makes you use your imagination to the fullest. I will say this though. So far all of the work is paying off.


 Forum | Modelers Social Club Forum (proboards.com) 

  • Member since
    April 2013
Posted by SchattenSpartan on Monday, June 24, 2013 5:16 PM

Eric, Joe: The A8 is indeed fun, but I lack your amount of imagination and skill, so mine won't turn out even half as good as your builds...

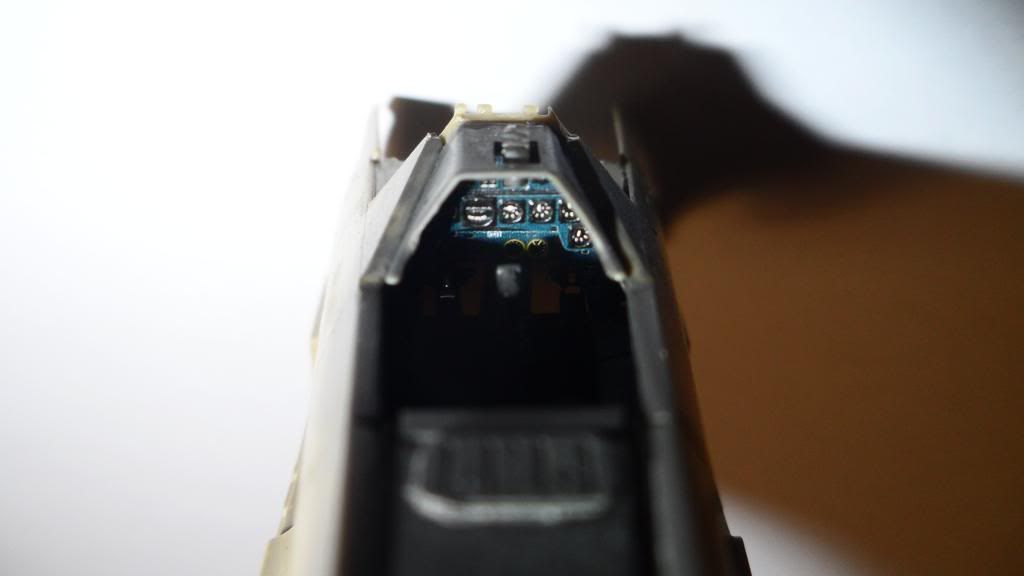
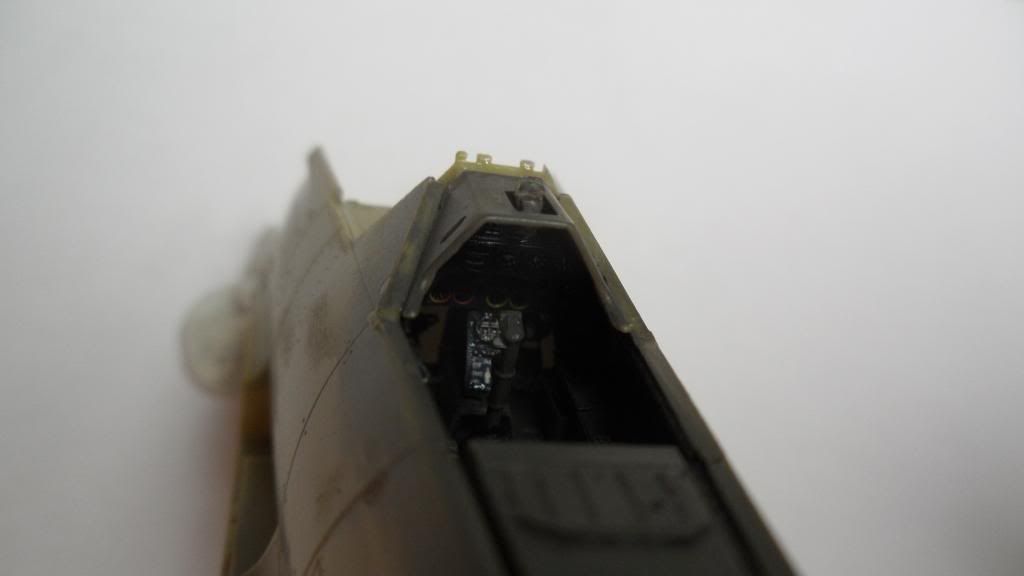
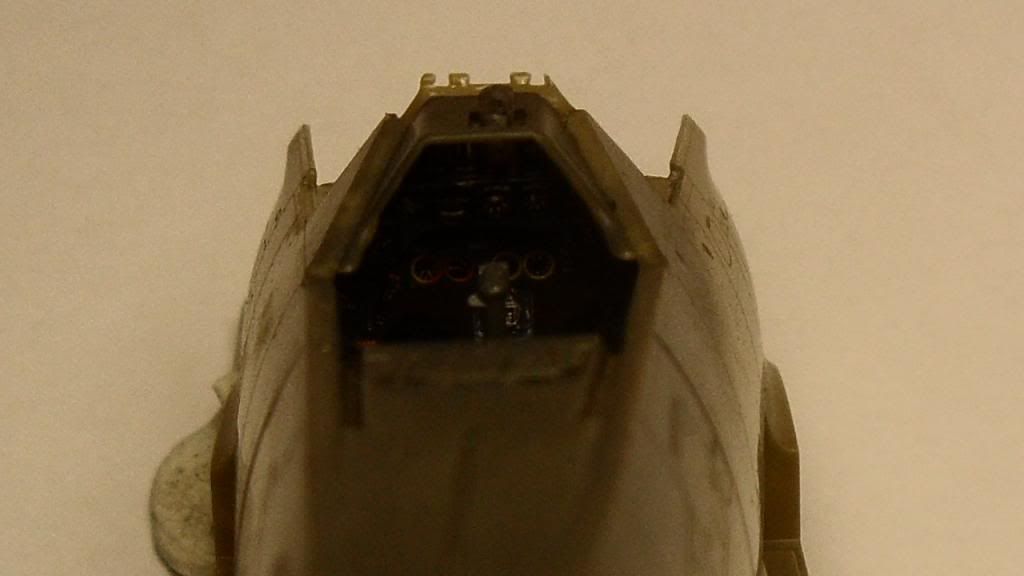
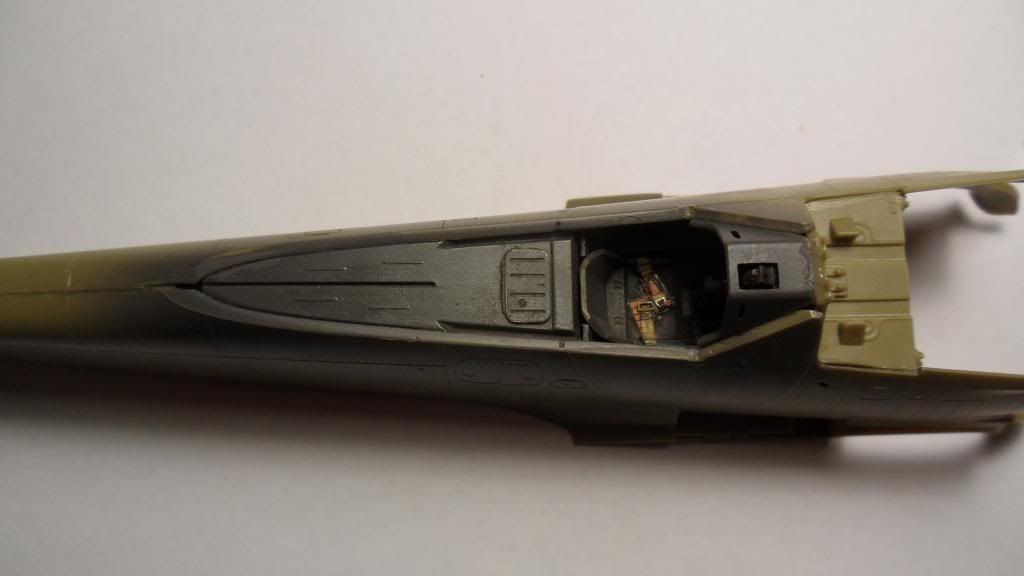
That aside, I made some progress. The cockpit is now completed. There would be much more PE to add, but I don't want to ruin the whole pit by trying to add it...

I'll glue the throttle lever and the remaining seatbelts in there, but nothing more (the PE I used adds enough detail IMO)

So here are some pics:

Cockpit (with different lighting):
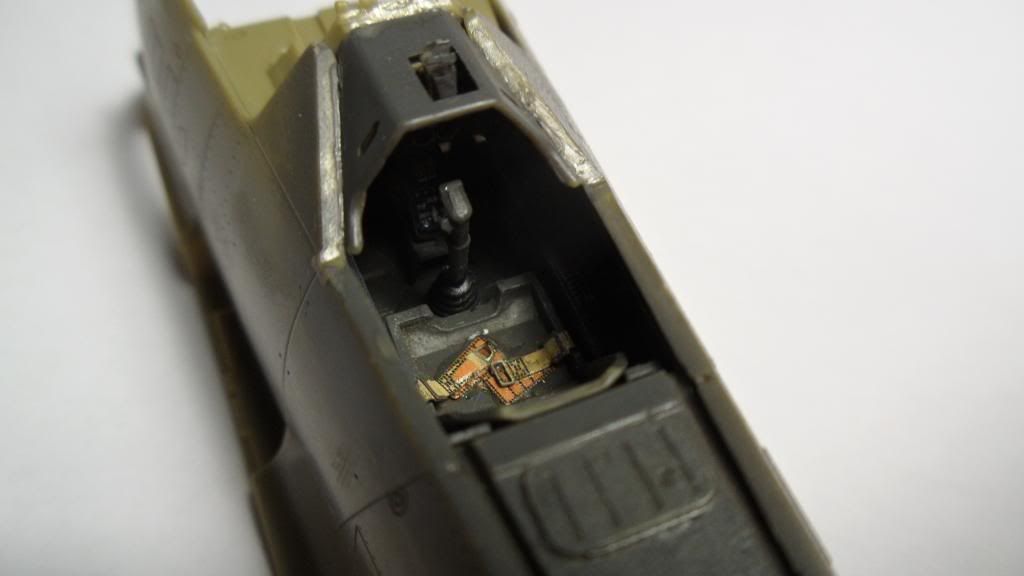
Don't let the blue fool you, it's just my camera...
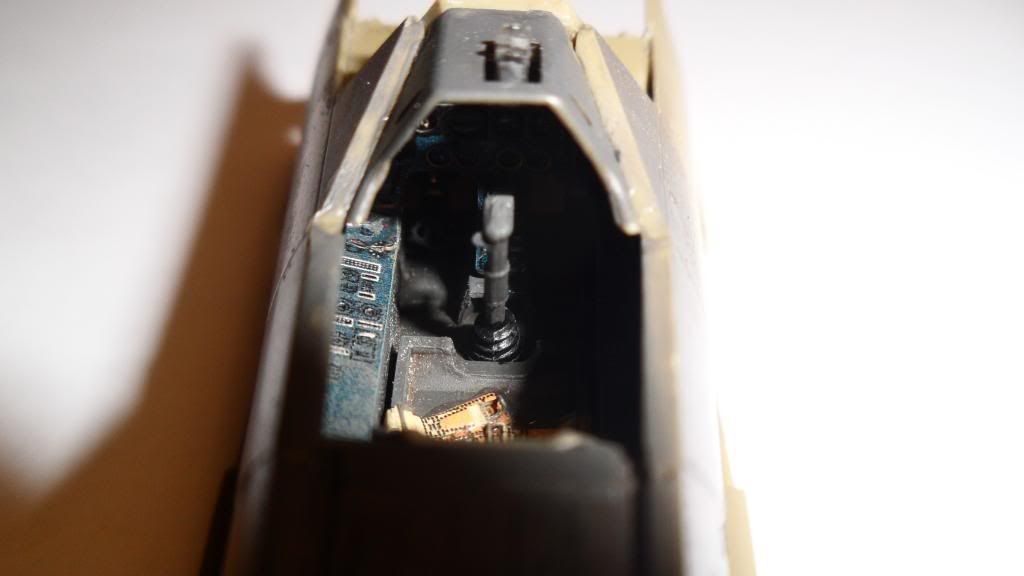
  

This is how it really looks:
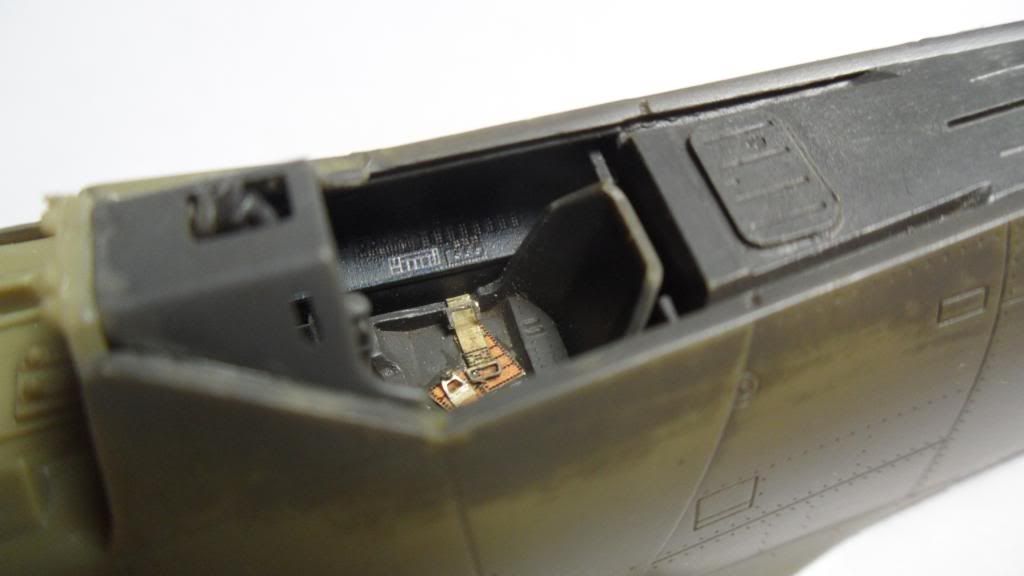
Wings attached (just stuck on, no glue applied yet):
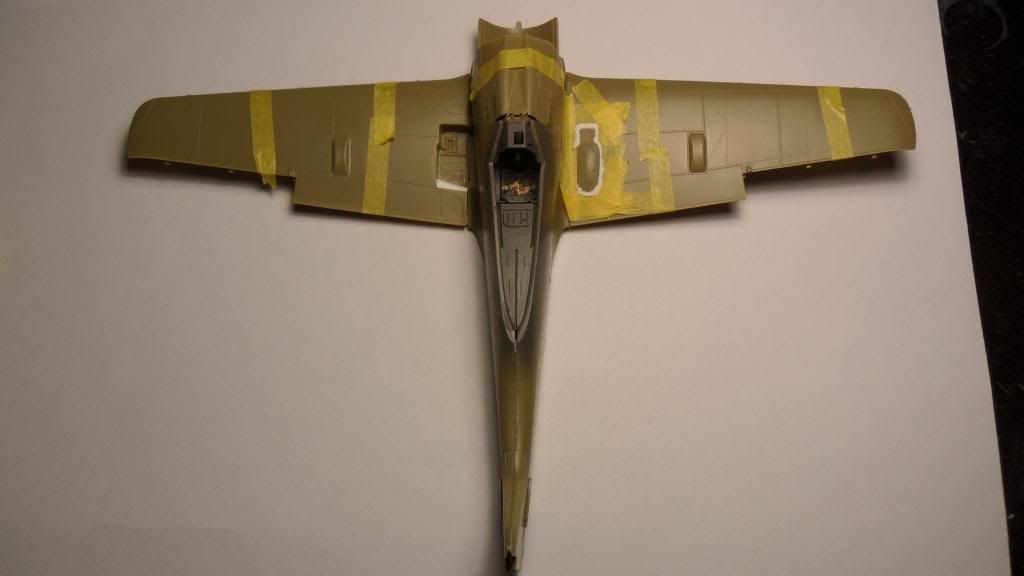
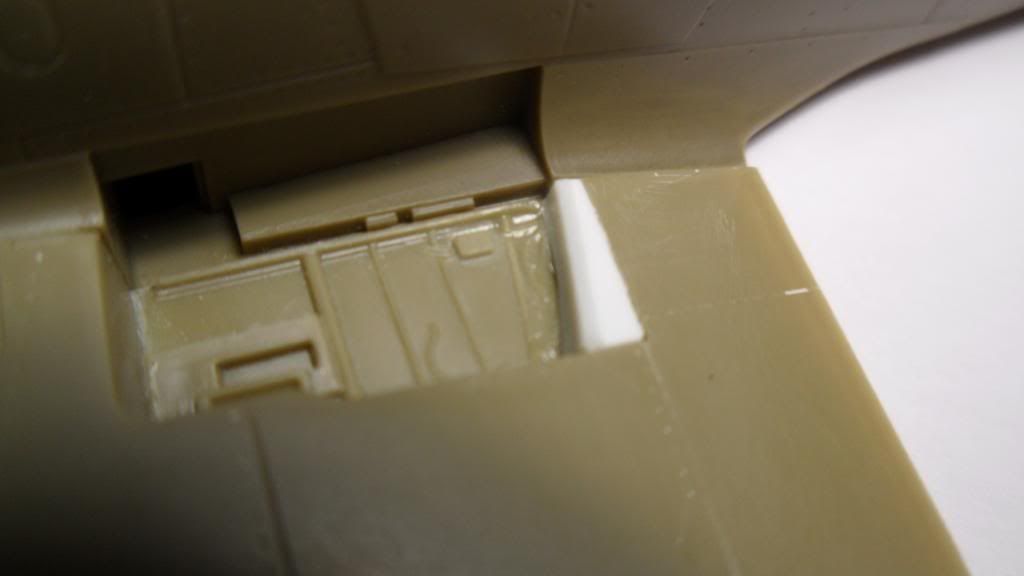
There are some nasty gaps to fill on the gun-bay hatch:
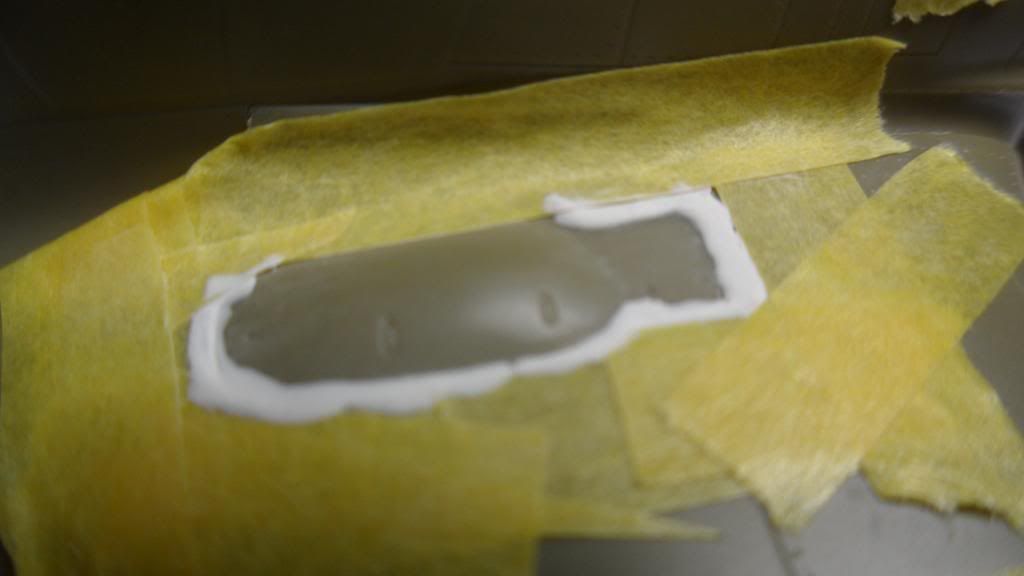
I think I managed to repair the damage on the left gun-bay:
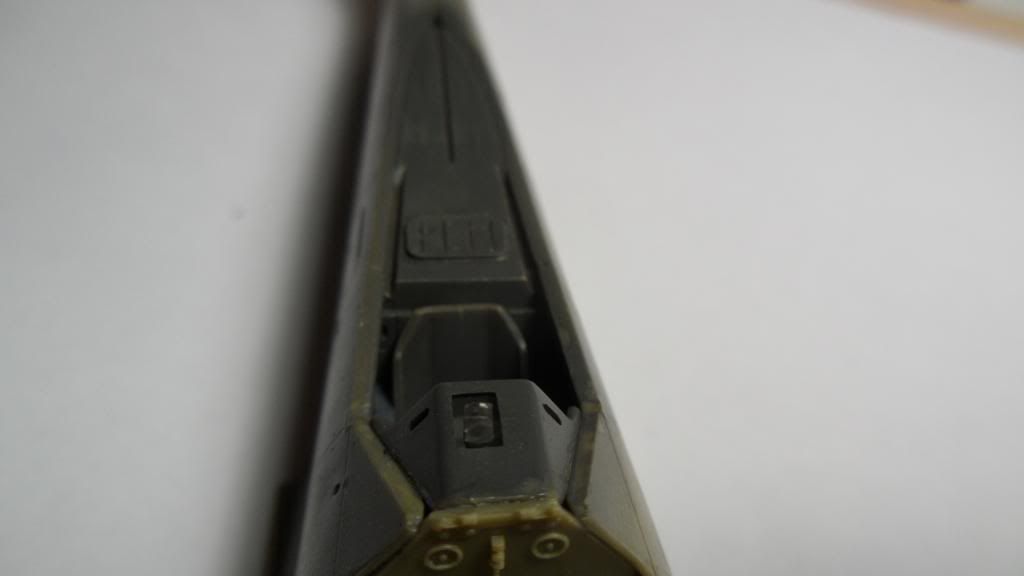
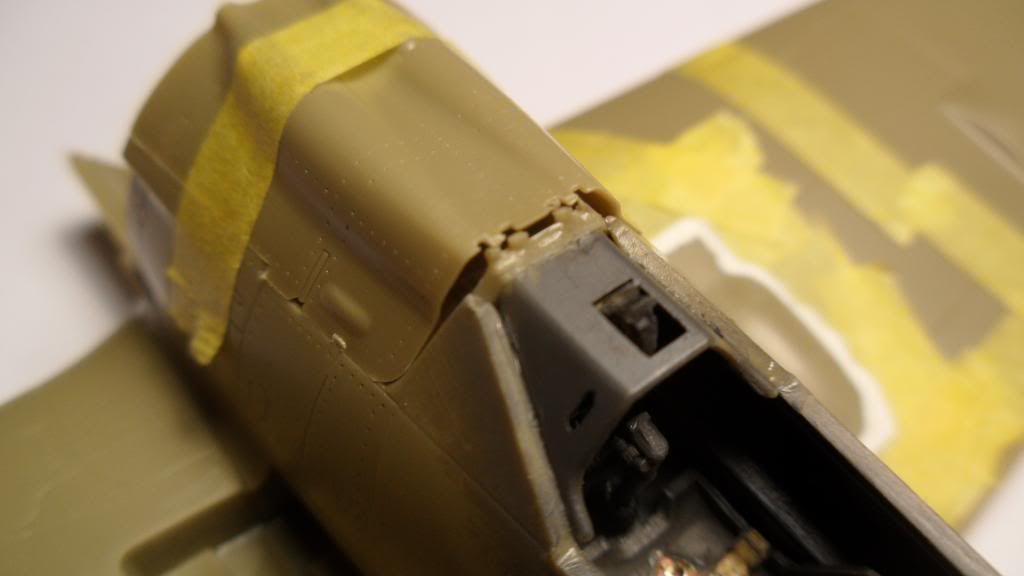
Any ideas on how to get that stupid MG-cover to fit properly?
There are much better models in this GB, but I hope you guys are not too disappointed with my try on this kit. I am in no way an experienced modeller and getting the parts of those Eduard kits to fit together properly is a real pain (and sometimes even imposssible) for me because of said lack of experience...

If you have any tips on how to get a decent A8/R2 for my display-case out of this, please let me know... Any help is much appreciated.

Cheers, Clemens

  • Member since
    December 2006
  • From: N. Georgia
Posted by Jester75 on Monday, June 24, 2013 5:35 PM

You are right on the imagination part! I think I have came up with curse words that dont even exist yet!! This kit can bring engineers to their knees! So before crashing last night, I hit the bottle (they Nyquil bottle that is) and after a long hard sleep I think I'm on the mend!

Got some bench time in today mostly on the A8 since the PE came it, but some stuff got done on the Dora. To begin with, I decided to conquer that slight gap in the rear wing root. I accomplished this with a simple piece of sprue cut measured and cut from one of the trees

Which was strategically placed here..

Some adjustments to the width was made and in the end the gap looks like this.

I dont think that its goign to get much better!! I went ahead the and attached the wings. This was a "fun" process on my last Dora and this one contained no less "joy". The biggest problem is always getting the front of the lower wing mated and level with the lower part of the front cowling. After many adjustments and test fits, I went ahead and committed and glued it up. At that point, it was inserted into what looks like an ancient medieval torture device until it gave me the answers I was looking for the glue set up.

SO, this was set aside and let cure while work began on the A8. I skipped around a bit and went ahead and glued the firewall and mg shelf to the fuse here as this looks to be a critical alignment in order to get the engine straight and the cowlings attached. The fuse itself is not glued at all so once the pit is done, I will open the fuse from the rear and install the pit. This may come back and bit me in the rear but so far after several trial runs, everything is looking good.

Once again, I installed the ammo containers and snipped to feed chutes so the hood will clear properly since this one too will be closed up.

Next I started on the wing spar and all the detail that comes in there. A little different here since its enclosed unlike the Dora. Test fit of the guns.

At this point, the only things glued on the A8 are the firewal and mg bulkhead and the inner detail in the lower wing. Everything else in the pic is just taped up and test fitted. We shall see where this road takes us!!

Eric


  • Member since
    December 2006
  • From: N. Georgia
Posted by Jester75 on Monday, June 24, 2013 5:40 PM

Clemens dude, that bird is coming along nicely!! I think you recovered well on the left side gun tub, should work just fine. The pit looks great as well! That bulkhead behind the mg hood almost looks like its pushed too far back in that last pic, but it looks like its in the right position in others? Can you possible get a full on side shot of it and post that?

Eric


  • Member since
    April 2013
Posted by SchattenSpartan on Monday, June 24, 2013 6:00 PM

Thank you Eric. There is one bad mistake I could've prevented: I think you can't see it that well on the pics, but where the lower IP (the larger one) meets the side console, I managed to rip the paint of the PE off. I glued it back in place, but you can see it a bit sadly. (I'll leave the canopy open though).

Here are some pics of the bulkhead. It is not glued in perfectly atraight, but it was either the bulkhead or the cockpit tub (even after 1 hr of test-fitting and careful sanding on both of them). I chose the tub to be straight, as it is much more visible than the bulkhead (the cover will be closed, as the bird I'm trying to replicate had no MGs mounted in there)

  The canopy is just taped in place to get an idea of how it will look (the only part that fits nicely so far LOL). Just a little help for me to decide if I want to display it open or closed. Open it shall be BTW...

Cheers, Clemens

  • Member since
    April 2013
Posted by SchattenSpartan on Monday, June 24, 2013 6:05 PM

Your two 190s look awesome, Eric! I hope I can learn some things from your build for my next A8/R2 (the best-looking Fw IMO).

Just one question: is the fuselage a different color than the wings (on the Dora) or did you tint the image wit some editing program? (i think you did that in some of your previous posts on the Dora as well?)

I can't wait to see more!

Cheers, Clemens

  • Member since
    December 2006
  • From: N. Georgia
Posted by Jester75 on Monday, June 24, 2013 6:11 PM

Thanks Clemens! For some reason, the Dora was kitted with different colored sprues. It is also the one that had the most flash and poorer quality moldings in general.

That bulkhead looks fine. Remembering mine, I dont think its suppose to be glued the the 'shelf' at exactly 90 degrees but at an angle. I hate to be a pain, but is there any way you can snap the hood on and get a side on pic?

Eric


  • Member since
    April 2013
Posted by SchattenSpartan on Monday, June 24, 2013 6:19 PM

I'll post a pic tomorrow after I get home. I'll go to bed now, 'cause it's already 1:17 am here in Austria... Sorry...

  • Member since
    March 2012
  • From: Corpus Christi, Tx
Posted by mustang1989 on Monday, June 24, 2013 8:29 PM

Holy crap! Both of you guys gun platform/ firewalls are matching up perfectly with the fuselage sides from the top to bottom. I had to go through hell and back to get mine to do that! Of course my kit has been in the box since 07 in the garage. I'm convinced that has alot to do with my warpage woes. I'm getting through it though.

Clemens: You are doing great! Nice job on the cockpit and on the firewall area.

Eric: Youre making this look way too easy pal!


 Forum | Modelers Social Club Forum (proboards.com) 

  • Member since
    August 2009
  • From: MOAB, UTAH
Posted by JOE RIX on Monday, June 24, 2013 10:41 PM

Clemens - Hey Friend, do not be so hard on yourself. It appears to me, especially on the cockpit, that you are demonstrating some very excellent skills.  Your doing some really nice work and I'm enjoying you sharing your processes.

Eric - With all the brilliant tricks your pulling off you are no doubt going to be the "Go To" guy for building Eduard FW 190s. Simply great work on your part so far.

 I'm slowly "molding" the silly putty camo mask on to my F-8. For this complex pattern, coupled with using Gunze-Sangyo Mr. Color for the first time, I took out my test model and masked and sprayed a small copy test pattern. I have to admit I am falling in love with the Mr. Color paint. Thinned with Mr. Leveling Thinner this stuff goes on beautifully and behaves very nicely through my Badger Patriot.  

"Not only do I not know what's going on, I wouldn't know what to do about it if I did". George Carlin

  • Member since
    April 2013
Posted by SchattenSpartan on Tuesday, June 25, 2013 3:05 AM

Thanks for the kind words, folks!

Eric: hat length should the spreader bar be? I have the same gaps on the wing roots at my A8 (they are a bit larger)

Does someone of you guys know what I have to do to the engine covers, other than cutting them off? (what detail to add on the inside for example)? I want the one on the left cowl side to be open. I don't want it to be perfectly right, it just should look "right"...

Cheers, Clemens

  • Member since
    March 2012
  • From: Corpus Christi, Tx
Posted by mustang1989 on Tuesday, June 25, 2013 6:24 AM

Clemens: The only way of opening up a panel with the basic kit is to do just what you are saying. Cut the panel off. After that you have two options: 1) use the panel you cut from the kit in displaying the panel open or use the photo etch panels provided in Eduard PE kit 48-556. That kit comes with a slew more PE than you will wanna use at this point though. I thought the same thing though. Eduard supplies a nice looking engine only to build it covered up in the build sheet!????


 Forum | Modelers Social Club Forum (proboards.com) 

  • Member since
    April 2013
Posted by SchattenSpartan on Tuesday, June 25, 2013 6:41 AM

Thank you, Joe. I'll most likely go with the kit parts, as I want to keep this build OOP except for some gun barrels (Eduard put enough goodies in the box IMO). I'll just try to scratch-build some basic detail on the inside of the panel, so if anyone has some nice pics of it, please post them here. It would be a great help.

Cheers, Clemens

  • Member since
    December 2006
  • From: N. Georgia
Posted by Jester75 on Tuesday, June 25, 2013 7:23 AM

Clemens, I started out at 19 mm or so with my spreader. I measured the width of the fuse where the spreader was going to be placed while it was at rest with no pressure being exerted on it. From there it was sanding down accordingly after several test fits of the wing to make sure that it wasn't pushing out too far.

Eric


  • Member since
    April 2013
Posted by SchattenSpartan on Tuesday, June 25, 2013 8:45 AM

Thank you very much, Eric! I'll post the pic of the MG-cover in 1-2 hours (when I'm home again).

  • Member since
    March 2012
  • From: Corpus Christi, Tx
Posted by mustang1989 on Tuesday, June 25, 2013 8:48 AM

Jester75

Clemens, I started out at 19 mm or so with my spreader. I measured the width of the fuse where the spreader was going to be placed while it was at rest with no pressure being exerted on it. From there it was sanding down accordingly after several test fits of the wing to make sure that it wasn't pushing out too far.

Well Eric that is one area that all of the warpage helped me out. My  fuselage was "pre spread" by the warpage so I didn't have to worry about that one. Say, there IS a silver lining in the clouds after all...lol.


 Forum | Modelers Social Club Forum (proboards.com) 

  • Member since
    March 2010
  • From: MN
Posted by Nathan T on Tuesday, June 25, 2013 8:57 AM

Jester, that's some wild progress you're making. You'll have some stunning looking models in the end.

Clemens, looks like you're doing a better job on this tough kit than you think. It'll look good in the end too.


  • Member since
    March 2012
  • From: Corpus Christi, Tx
Posted by mustang1989 on Tuesday, June 25, 2013 9:47 AM

Nathan T
Clemens, looks like you're doing a better job on this tough kit than you think. It'll look good in the end too

I couldn't agree more with Nathan on that! These Eduard kits look Bad A as the progress continues. Speaking of which I'm jumping on mine tomorrow morning!!


 Forum | Modelers Social Club Forum (proboards.com) 

  • Member since
    April 2013
Posted by SchattenSpartan on Tuesday, June 25, 2013 10:23 AM

Thanks for all the kind and motivating words, guys!

Eric, here are some pics with the cover taped in place the:

The sides of it align pretty good with the rest of the fuse and also with the windscreen. The only problem is the alignment with the bulkhead and the hinges. Are those gaps at the rear end of the cover supposed to be there? (3rd pic).

Cheers, Clemens

  • Member since
    December 2006
  • From: N. Georgia
Posted by Jester75 on Tuesday, June 25, 2013 10:59 AM

Clemens, mine looks like it is going to align identically to yours. With the windscreen attached though it looks pretty good other than the missing hinges. I may just put some styrene bits in the gaps on mine to simulate hinges and be good with it.

Eric


  • Member since
    April 2013
Posted by SchattenSpartan on Tuesday, June 25, 2013 11:09 AM

Ok, thank you for your help! I think some stretched sprue should solve the problem...

  • Member since
    March 2012
  • From: Corpus Christi, Tx
Posted by mustang1989 on Tuesday, June 25, 2013 12:17 PM

I have to mention that the gun panel looks friggin awesome opened up! Theres alot of detail in that cowl gun bay!!


 Forum | Modelers Social Club Forum (proboards.com) 

  • Member since
    April 2013
Posted by SchattenSpartan on Tuesday, June 25, 2013 4:26 PM

It sure does, Joe, but the R2 has no guns in there nor the ammo boxes for them, so it is kinda empty under the hood. The second reason for me to close it up is the following: I want the aircraft to remain closed up on the whole right side and some hatches opened on the left side, so you can see all the beautiful details Eduard provides us with!

  • Member since
    March 2010
  • From: MN
Posted by Nathan T on Tuesday, June 25, 2013 5:06 PM

Yes, those gap openings on the rear upper sides of the cowl gun cover are supposed to be there.


  • Member since
    March 2012
  • From: Corpus Christi, Tx
Posted by mustang1989 on Tuesday, June 25, 2013 7:32 PM

SchattenSpartan

It sure does, Joe, but the R2 has no guns in there nor the ammo boxes for them, so it is kinda empty under the hood. The second reason for me to close it up is the following: I want the aircraft to remain closed up on the whole right side and some hatches opened on the left side, so you can see all the beautiful details Eduard provides us with!

Thats fair enough on wanting to leave it closed up. Just love displaying detail. Will add that the R2's did in fact have a pair of MG131's in the cowl.  You had me second guessing myself but I bounced it off of my references.


 Forum | Modelers Social Club Forum (proboards.com) 

  • Member since
    March 2010
  • From: MN
Posted by Nathan T on Tuesday, June 25, 2013 7:57 PM

I think he means his particular A-8/R2 had the cowl mg's removed, as many did to save weight.


JOIN OUR COMMUNITY!

Our community is FREE to join. To participate you must either login or register for an account.

SEARCH FORUMS
FREE NEWSLETTER
By signing up you may also receive reader surveys and occasional special offers. We do not sell, rent or trade our email lists. View our Privacy Policy.