SEARCH FINESCALE.COM

Enter keywords or a search phrase below:

Fw 190 Butcher Bird 2013 (extended to June 2014) Group Build

564940 views
5865 replies
1 rating 2 rating 3 rating 4 rating 5 rating
  • Member since
    April 2013
Posted by SchattenSpartan on Sunday, October 6, 2013 2:10 PM

Yep, it sounds exacly like resin: Soft and brittle, but great for casting detailled stuff in one piece! What are all the resin bits for?

  • Member since
    May 2013
  • From: Indiana, USA
Posted by Greg on Sunday, October 6, 2013 12:56 PM

Oh yes, I'm sorry Nathan, your question about Clemens' paint slipped my mind. As Clemens said, I asked him not to mostly because I had recently spent a small fortune of Vallejo paints and I really don't want to fall in love with another paint brand right now. :) That said, I am beginning to learn a bit about different paints for different purposes so I  won't be too stubborn on the Vallejo bit.

Joe and Nathan, ok, I think I've got it. Wash the hubs now, while they are still fairly glossy. Flat coat it all, then go from there.

My experience with pastels is pretty limited. I do need to learn how to use them. I recall having them figured out to point of some limited success years ago (HO stuff), don't remember much about them now. Probably will have some questions. Lucky you. :)

Clemens, thanks for the nice comments, mate! The PE fins are included with the Hasegawa kit (the only PE). Plus about 6 resin (I presume) detail parts, and also the torpedo body is resin. Never worked with resin before. I'd always assumed it was rather hard. But this stuff is really soft. Does that sound like resin?

  • Member since
    April 2013
Posted by SchattenSpartan on Sunday, October 6, 2013 12:41 PM

Greg: She looks awesome! I hope my kit of that torpedo F-8 arrives soon. Those Hasegawa kits look way better than Tamiya's offering to me! (and I think the Tamiya kit is great!) Are the PE fins supplied in the kit? Any other goodies in there? Your working area is dust free compared to mine BTW.

Nathan: No, I didn't send greg any colors. He asked me not to do it, so I didn't force him to take them...

Joe: That's a nice mini-vid! I love the sound of those huge radials!

  • Member since
    August 2009
  • From: MOAB, UTAH
Posted by JOE RIX on Sunday, October 6, 2013 12:40 PM

Looking Good Greg. I'm there with Joe. Shoot a  a flat coat and then apply a some pastel powder along the the line. Not sure if pastels are something new for you also but, I tell you, they are a must for modeling.

"Not only do I not know what's going on, I wouldn't know what to do about it if I did". George Carlin

  • Member since
    May 2013
  • From: Indiana, USA
Posted by Greg on Sunday, October 6, 2013 12:37 PM

Great advice! Thanks Nathan and Joe!

I'll keep ya posted on this.....

  • Member since
    March 2012
  • From: Corpus Christi, Tx
Posted by mustang1989 on Sunday, October 6, 2013 12:23 PM

I generally leave the spinner a bit flat. Flat to me is ALOT easier to apply than a gloss coat. Just a fine misting is all that is needed with a thinned flat clear. After that cures out you could consider a brownish/grey mix of ground up pastel brushed onto the spinner. The pastel will hang in that almost non existent panel line you were talking about.


 Forum | Modelers Social Club Forum (proboards.com) 

  • Member since
    March 2010
  • From: MN
Posted by Nathan T on Sunday, October 6, 2013 12:22 PM

Sounds like a good plan on the spinner Greg. Don't forget to get a wash on the aluminum hubs of the prop blades though. It will really look good against that shiny aluminum. You could always flat coat the spinner, wash it, then follow with a satin coat if you want.


  • Member since
    May 2013
  • From: Indiana, USA
Posted by Greg on Sunday, October 6, 2013 11:51 AM

Thanks, Nathan! I was kinda wanting to leave the spinner a slight satin, but if that is just wrong** I could sure give that a go. Or heck, I could try it over the slight satin, it's a lot less glossy that it was. I will try that!

Bear in mind what is a sloppy spray job to you is still a nerve wracking task to me! Big Smile

**If a slight satin on the spinner is wrong, somebody let me know, please?

  • Member since
    March 2010
  • From: MN
Posted by Nathan T on Sunday, October 6, 2013 11:44 AM

Looks Good Greg. Try another wash over that spinner once its flat-coated. Maybe it will hold better. No sweat of the overspray on the decals. Looks like its supposed to be just a radom sloppy overspray.

So I heard Clemens sent you some Gunze colors?? Have you tried them?


  • Member since
    May 2013
  • From: Indiana, USA
Posted by Greg on Sunday, October 6, 2013 11:39 AM

That is a cool mini-video, Joe. Thanks for posting it.

Time to post what I'm up to......

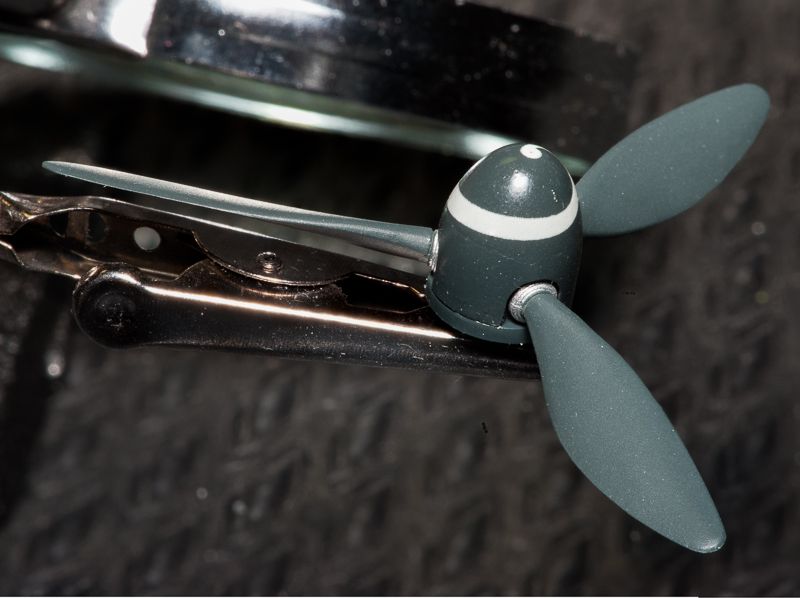
Where my prop/spinner assy is at. I'm afraid I failed spinner weathering 101, even after Nathan posted his informative how-to several pages back. Sorry, professor! I think I just laid down too many coats of gloss experimenting, almost no seam line left and my wash removal techniques don't seem to be refined enough yet to deal with an almost nonexistent seam line. I tried, though. May mess with it some more, may leave it alone.

All this macro shooting is telling me my work area is a lot dustier than I thought!!!!
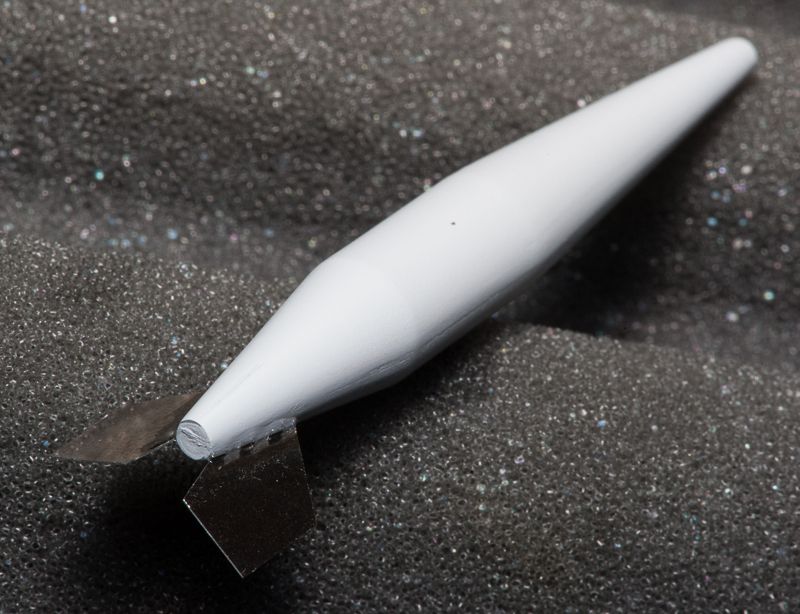
Started attacking the PE fins on the bomben torpedo last night. First PE fins for me, challenging but fun. Happy with the first two, the third one will be more challenging, it appears to be folding fin, presumably for ground clearance??? Looks like I have some more filling/sanding to do too. :)

Fins difficult to see, bad lighting job, sorry.
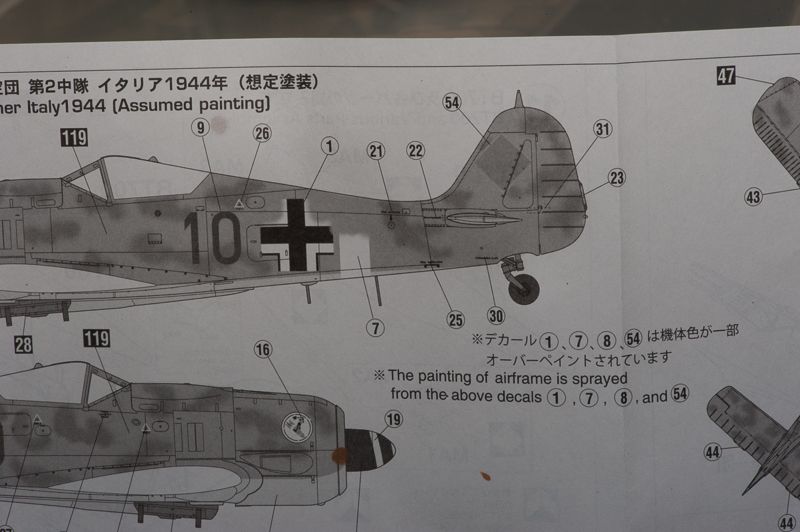
And lastly, an upcoming something new for me. Paint callout shows some painting after decal application.

So I'm thinking about the dissimilar base thing you gents have been trying to pound into my head, laid down a coat of Alclad Kleer coat gloss (the mineral spirit based one, not the acrylic one), thinking that if I mess up the acrylic spray over the decals, should be able to remove it. Yes, I will test first! That's next.

Here's the prepared area...
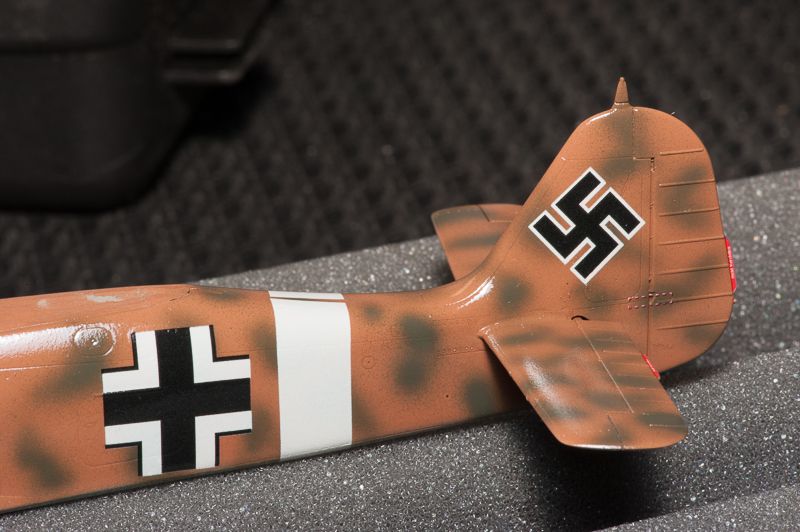
The little red decals on the trim tabs (I assume they are) were fun once I got the hange of them, btw. :)

  • Member since
    March 2012
  • From: Corpus Christi, Tx
Posted by mustang1989 on Saturday, October 5, 2013 8:39 PM

That is friggin cool Joe!!!!


 Forum | Modelers Social Club Forum (proboards.com) 

  • Member since
    February 2003
  • From: Cameron, Texas
Posted by Texgunner on Saturday, October 5, 2013 5:23 PM

Very cool footage. Thanks!

Gary


"All you mugs need to get busy building, and post pics!"

  • Member since
    August 2009
  • From: MOAB, UTAH
Posted by JOE RIX on Saturday, October 5, 2013 4:20 PM

Ok, this is a test for me in posting a video from Photobucket to the forum. Never tried it before. Anyway, here is a short, and I mean real short, video my wife took at  the Heritage of Flight Museum on their Luftwaffe day.

"Not only do I not know what's going on, I wouldn't know what to do about it if I did". George Carlin

  • Member since
    October 2008
  • From: Georgia
Posted by Rigidrider on Saturday, October 5, 2013 4:07 PM

Man... you guys are just too kind... I'm just doing what I enjoy doing with the people I like to be with...thats all.

Take care

Doug

When Life Hands You A Bucket Of Lemons...

Make Lemonade!

Then Sell It Back At $2 Bucks A Glass...

  • Member since
    March 2012
  • From: Corpus Christi, Tx
Posted by mustang1989 on Saturday, October 5, 2013 2:46 PM

Rigidrider

I looked packaging over and couldnt find any referance to Dragon, UNTIL... I saw the small sticker on the part bag that does indeed state "made by Dragon" ...And I want to do one more 190 before build ends , so , why not. It wont be for a week or two yet , but I'll start asap.

Doug

That's funny about the "made by Dragon" sticker. I had an old Revell 1/48 Stuka that I  bought a while back. I think it was a Pro Modeler. Any how years later I bought a Hasegawa Stuka to "up the ante" and build a better kit. Wouldn't you know that the instructions for both are EXACTLY the same except for the heading. One says Hasegawa and the other Revell. LOL . Looks like that kit is gonna get opened up and I'll have a box of spares in case I mess it up!!! Big Smile


 Forum | Modelers Social Club Forum (proboards.com) 

  • Member since
    May 2013
  • From: Indiana, USA
Posted by Greg on Saturday, October 5, 2013 1:04 PM

Great to have you back indeed, Doug!

  • Member since
    April 2013
Posted by SchattenSpartan on Saturday, October 5, 2013 12:17 PM

I second Joe's comment, Doug! It's great to see what a skilled modeller like you can make out of those old kits!

  • Member since
    August 2009
  • From: MOAB, UTAH
Posted by JOE RIX on Saturday, October 5, 2013 12:14 PM

Doug - Welcome back old friend. You know Doug I like the fact that you build kits that are not mainstream and that you demonstrate what can be done with them so very well.

John - In my rush to get caught up I forgot to send some well deserved kudos your way for those two excellent 190's you've built. You did a magnificent job on both of them.

"Not only do I not know what's going on, I wouldn't know what to do about it if I did". George Carlin

  • Member since
    March 2012
  • From: Corpus Christi, Tx
Posted by mustang1989 on Saturday, October 5, 2013 12:12 PM

Hey Doug you're on the roster!


 Forum | Modelers Social Club Forum (proboards.com) 

  • Member since
    December 2006
  • From: N. Georgia
Posted by Jester75 on Saturday, October 5, 2013 12:05 PM

Welcome back Doug!!

Eric


  • Member since
    March 2012
  • From: Corpus Christi, Tx
Posted by mustang1989 on Saturday, October 5, 2013 8:11 AM

Friggin cool! Dougs back!!!! Awesome! Can't wait to see this build too Doug. I'll put you down on the roster!


 Forum | Modelers Social Club Forum (proboards.com) 

  • Member since
    October 2008
  • From: Georgia
Posted by Rigidrider on Saturday, October 5, 2013 6:20 AM

Hey Nathan...Yup they do,

I looked packaging over and couldnt find any referance to Dragon, UNTIL... I saw the small sticker on the part bag that does indeed state "made by Dragon" ...And I want to do one more 190 before build ends , so , why not. It wont be for a week or two yet , but I'll start asap.

Doug

When Life Hands You A Bucket Of Lemons...

Make Lemonade!

Then Sell It Back At $2 Bucks A Glass...

  • Member since
    September 2013
Posted by blackdog62 on Saturday, October 5, 2013 12:00 AM

Well I just joined this gb so I don't have that long it I want mine done in time.

  • Member since
    March 2010
  • From: MN
Posted by Nathan T on Friday, October 4, 2013 11:20 PM

Rigidrider

I'm in for that one... Couldnt help myself, just bought an Italleria 1/48 D-9 off Ebay... Bad Doug!!!

Italeri makes a Dora? Must be the Dragon Rebox? You gonna start it now?? Please....


  • Member since
    September 2013
Posted by blackdog62 on Friday, October 4, 2013 10:00 PM

That quit abit cheaper then 200$ I have a small library on ww2 a/ircraft / armor but nothing but general reference for the fw-190.

A's far as the group build gos I did get the cockpit finnished today.

The the kit has the gages and other detail but there is no detail in the gages.it took 3 cotes of micro set to melt them in. Looks good.

I'm taking pics so soon I get my tek. Issues takin cair of ill post. For now this is how I'm staying involved with the gb.

  • Member since
    May 2013
  • From: Indiana, USA
Posted by Greg on Friday, October 4, 2013 9:59 PM

And I'm already thinking about another 190 after this one. This GB is just too much fun. And the 190's really are neat little aircraft. They do grow on a guy. Bet they were sweet to fly.

I've been yacking so much because I started some decaling, and the Hasegawa decals apply funny and I need frequent breaks. I know, I know, you guys warned me! :)

  • Member since
    September 2013
Posted by blackdog62 on Friday, October 4, 2013 9:40 PM

Mustang. Yep I was asking you bout how long the builds take. Your detail is amazing.  The 190 is one I don't have any specific books on so I'm using the net. For info on my 190d.

The hobby boss kit doesn't come with a motor. But it dose mount the back of one with the turbo.

So you can see it through the open wheel wells.

  • Member since
    April 2013
Posted by SchattenSpartan on Friday, October 4, 2013 7:45 PM

Welcome back to the club, patient Doug. We'd be ready to start the lesson if you may take a seat...

  • Member since
    October 2008
  • From: Georgia
Posted by Rigidrider on Friday, October 4, 2013 7:27 PM

I'm in for that one... Couldnt help myself, just bought an Italleria 1/48 D-9 off Ebay... Bad Doug!!!

When Life Hands You A Bucket Of Lemons...

Make Lemonade!

Then Sell It Back At $2 Bucks A Glass...

  • Member since
    April 2013
Posted by SchattenSpartan on Friday, October 4, 2013 7:15 PM

You are very welcome, patient Greg.

I think it's time to get back to the class where we learn how to not buy every single 190 kit we see... Wink

JOIN OUR COMMUNITY!

Our community is FREE to join. To participate you must either login or register for an account.

SEARCH FORUMS
FREE NEWSLETTER
By signing up you may also receive reader surveys and occasional special offers. We do not sell, rent or trade our email lists. View our Privacy Policy.