SEARCH FINESCALE.COM

Enter keywords or a search phrase below:

Monogram Mafia III

106932 views
1369 replies
1 rating 2 rating 3 rating 4 rating 5 rating
  • Member since
    November 2003
  • From: State of Mississippi. State motto: Virtute et armis (By valor and arms)
Posted by mississippivol on Sunday, January 11, 2015 6:04 PM

MK,that is a beautiful Crusader!

Nice work on your Typhoon, Stik!

  • Member since
    July 2004
  • From: Sonora Desert
Posted by stikpusher on Sunday, January 11, 2015 1:33 PM

MK, you are now a made man in this family... go forth and show your family pride... your Crusader has been added to the front page... and she is a beauty...  I really like the squadron kill marks on the lower fuselage strakes...

BD, you are added to the roster of family applicants... I have you down for the Hellcat. When you decide on your second build, let me know... Nice to see a new boost of activity here lately... must be weather for quality family time...


F is for FIRE, That burns down the whole town!

U is for URANIUM... BOMBS!

N is for NO SURVIVORS...

       - Plankton

LSM


  • Member since
    July 2004
  • From: Sonora Desert
Posted by stikpusher on Sunday, January 11, 2015 1:17 PM

BD, f the only work done is painting the pilot figure, I will allow that. As long as no assembly work at all is done, painting the pilot is a go.

Ok, my final update for this weekend before I return to work in a couple of hours...

Looking up thru the rear of the chin radiator during test fitting, I saw that there was some serious empty space in there... to borrow from Pink Floyd's "The Trial", "This will not do..." so first I looked up some cutaway views and saw that the oil cooler fills most of that void... then I cut some scrap sheet plastic to shape to match the kit part and glued it to the rear of the kit part. Then some fine mesh super glued on for that radiator texture and there we have it... on test fitting, it fills the void just right...

after that I wanted to busy up the bottom of the wing in the area that is visible thru the feet troughs, that will be empty when the guys at IPMS with their little penlights peek in there... so I added a couple of wing spars and a crossmember for the bottom of the cockpit framing...

Oh yeah, I sanded the wing gluing seams as well...

and finally I hollowed out the bores a bit for the wing guns... yikes!

Now it is all ready for interior paint over the next several days...


F is for FIRE, That burns down the whole town!

U is for URANIUM... BOMBS!

N is for NO SURVIVORS...

       - Plankton

LSM


  • Member since
    December 2011
  • From: Alabama
Posted by Big_Dog on Sunday, January 11, 2015 12:30 PM

stikpusher
Yes I am...

Cool deal. One more question. I have an F6F-5 that I have painted "Gutshot Gus" (my name for the pilot figure that is fiddling with his throat mike). While the rules state no started kits I wonder if that would be OK? Why I am asking is currently I am modeling at two different locations and would like to do some "mirror" builds. That F6F-5 is at my sons place and will be out of box. The one I do here may get a bit of jazzing up. I also have P-38s at both places and would do those as a second. So that would be 2 F6F-5s and 2 P-38s. Don't want to let the family down if ya know what I mean. Heck I still have a P-400 that I am slowly slogging away on left over from the 2nd Mafia build.

  • Member since
    December 2002
  • From: Coldwater, Mich
Posted by MKelley on Sunday, January 11, 2015 11:50 AM

With your permission Don Stik, I present my second build for the family. The F-8E from VF-211 Checkmates, the highest scoring Naval F-8 squadron in Vietnam. The markings are the kit decals, which were excellent and conformed very well. True Details after market ejection seat, SAC landing gear. I also took the extra exhaust from the Monogram F-100 kit, sanded it down an placed in the F-8. This makes the exhaust more like my references shows, instead of the hollow maw that the kit portrays. 

I did post shade the panel lines but, the photos do not show it very well. So if you feel that I have met the criteria I will proudly display the MM III badge.


  • Member since
    July 2004
  • From: Sonora Desert
Posted by stikpusher on Sunday, January 11, 2015 1:16 AM
Big_Dog

Hey stik, are you still accepting entries in this group build?

Yes I am...


F is for FIRE, That burns down the whole town!

U is for URANIUM... BOMBS!

N is for NO SURVIVORS...

       - Plankton

LSM


  • Member since
    May 2004
  • From: Land of Lakes
Posted by cbaltrin on Sunday, January 11, 2015 12:15 AM

Finishing up the 'nose job' on this P-51 this weekend... Also started scribing some panel lines...

On the Bench: Too Much

  • Member since
    December 2011
  • From: Alabama
Posted by Big_Dog on Saturday, January 10, 2015 8:18 PM

Hey stik, are you still accepting entries in this group build?

  • Member since
    July 2004
  • From: Sonora Desert
Posted by stikpusher on Saturday, January 10, 2015 11:19 AM

Pyr, life happens. I understand, and yes, go ahead. Start over with two new kit builds with a new timeline commencing on day 1 when you start the first new build.

SB, as bothersome as the PE can be, it really kicks up the level in the cockpit a few notches. I also have a gunsite that I will be adding once the fuselage is together and I am getting close to the point of painting.


F is for FIRE, That burns down the whole town!

U is for URANIUM... BOMBS!

N is for NO SURVIVORS...

       - Plankton

LSM


  • Member since
    February 2014
  • From: Michigan
Posted by silentbob33 on Saturday, January 10, 2015 8:20 AM

That PE is looking nice

On my bench: Academy 1/35 UH-60L Black Hawk

  • Member since
    May 2005
Posted by pyrman64 on Saturday, January 10, 2015 4:03 AM

Stik: I come bearing bad news.....and begging the family's forgiveness.  I missed the 6-month deadline for my original builds.  With the Godfather's blessing, I'd like to shelve those kits and start over with the Revell 2013 Challenger SRT8 and the Monogram Ford Bronco.

Mea culpa

Greg H

"There is many a boy here today who looks on war as all glory, but, boys, it is all hell." Gen. Wm T. Sherman (11 April 1880, Columbus, Ohio)

  • Member since
    July 2004
  • From: Sonora Desert
Posted by stikpusher on Friday, January 9, 2015 7:35 PM

Well here is the afternoon/evening update...
I used this Reheat generic RAF/FAA set to spiff up the cockpit a bit

added a compass to the IP

and some rudder pedals to the floor troughs. I also added a brass wire connecting rod for the pedals based upon some photos I came across, as well as some styrene rod structure work to add what I saw in those photos... those pedals were a challenge as first you had to bend them to shape, then add the upper crossbar...

I also added another layer of armor (sheet styrene) to the cockpit rear bulkhead, the seat, some framework, as well as a retaining bar for the harness. I have some Eduard RAF late war Harnesses that I will use on this after painting


it may not look like much but those little PE things drove me a bit crazy... but nowhere near as bad as my last PE experience...


F is for FIRE, That burns down the whole town!

U is for URANIUM... BOMBS!

N is for NO SURVIVORS...

       - Plankton

LSM


  • Member since
    July 2004
  • From: Sonora Desert
Posted by stikpusher on Friday, January 9, 2015 4:40 PM

Thank you SB. Your F-80 is taking shape nicely there now...Wink

Last night after dinner I sanded the rocket rail mounting holes smooth and this morning I rescribed the lost panel line detail

after that, I test fitted the upper wings to the lower and noticed a bit of a gap there where the landing light openings are located... so I set about creating some wing spar there to fill the opening

This morning I glued the upper wing halves on the lower wing

and as you can see, the spar is visible...

kinda plain now, but not to worry... I am gonna mount one of these in each opening for landing lights... now I am glad I found them.. I can do a whole bunch of fighters with this package...

and finally I got some work done in the cockpit...

seat separated from the armor plate and resin replacement seat from it's pour stub

and the IP and floor troughs ready for some generic RAF PE detail stuff from Reheat that I have had for ages...

tp://i1319.photobucket.com/albums/t671/stikpusherII/rcaf%20tiffy/100_1304_zpsc19808d9.jpg

I should have some more progress to show in a few hours...


F is for FIRE, That burns down the whole town!

U is for URANIUM... BOMBS!

N is for NO SURVIVORS...

       - Plankton

LSM


  • Member since
    February 2014
  • From: Michigan
Posted by silentbob33 on Friday, January 9, 2015 3:40 PM

I can't wait to see what you do with her Stik, your builds always impress me.

We've had a lot of snow here the past few days, and I haven't had to go into school so I managed to squeeze in some bench time.  Main assembly is done, now I have to start the paint job.  I decided not to show the engine.  I didn't like how the rear fuselage fit over it, and it would have been a significant amount of work to get it to look right.  I ended up just gluing it on.

On my bench: Academy 1/35 UH-60L Black Hawk

  • Member since
    July 2004
  • From: Sonora Desert
Posted by stikpusher on Thursday, January 8, 2015 7:58 PM

cbaltrin

One of the few monogram kits I have never seen. Good luck and keep the pics coming!

you got it cb...

Between bad weather and holiday celebrations, I missed out on a couple weeks worth of my longest distance bike rides... so today I paid the piper ... but I am feeling better now 

So in the mid afternoon today I began work on my Tiffy. Of course this is not gonna be straight OOB, so I began with modifications...

As you can see, this kit is old... 1969, the same year as the first Apollo Moon Landing... but the surface detail is not bad at all. Nice petite raised panel lines and some rivets here and there...

since RCAF 439 Sqdn was a "Bombphoon" unit, I had to first fill the rocket rail mounting holes...

I used some strip styrene filed ti fit and a good amount of Plastruct liquid cement for each one, then nipped off the excess... I will sand them smooth later...

then I had to sand away the kit's exhaust stacks to make way for the Ultracast exhaust stacks

The kit's pilot seat is kinda weak - it's made for a seated pilot figure

so I found a possible resin replacement in my spares' drawer

then a test fit of the Ultracast dust filter...

since it is designed for this kit, it drops right in place with no fuss.... nice!

that's all for now...


F is for FIRE, That burns down the whole town!

U is for URANIUM... BOMBS!

N is for NO SURVIVORS...

       - Plankton

LSM


  • Member since
    May 2004
  • From: Land of Lakes
Posted by cbaltrin on Thursday, January 8, 2015 6:33 AM

One of the few monogram kits I have never seen. Good luck and keep the pics coming!

On the Bench: Too Much

  • Member since
    July 2004
  • From: Sonora Desert
Posted by stikpusher on Wednesday, January 7, 2015 1:21 PM

Helpful bump... 

my second build... with a little help from Superscale and Ultracast...


F is for FIRE, That burns down the whole town!

U is for URANIUM... BOMBS!

N is for NO SURVIVORS...

       - Plankton

LSM


  • Member since
    July 2004
  • From: Sonora Desert
Posted by stikpusher on Monday, January 5, 2015 2:16 PM

Ok guys, the front page roster is updated. If I have missed any completions, please let me know!

Excellent work, lets keep it rolling!


F is for FIRE, That burns down the whole town!

U is for URANIUM... BOMBS!

N is for NO SURVIVORS...

       - Plankton

LSM


  • Member since
    June 2003
  • From: Rowland Heights, California
Posted by Duke Maddog on Monday, January 5, 2015 11:25 AM

That's a great idea using the drill press to sand the spinner! Way to go!  Everything else is looking good too.

  • Member since
    May 2004
  • From: Land of Lakes
Posted by cbaltrin on Sunday, January 4, 2015 4:15 PM

On the Bench: Too Much

  • Member since
    January 2011
  • From: Commonwealth of Virginia
Posted by Tal Afar Dave on Saturday, January 3, 2015 8:41 AM

Wow, Gary.

That's some pretty serious step and seam work to be done.  I've built that kit at least twice back in the 80s/90s and I don't remember the fit issues being so pronounced.  Could be the age of the molds, or it could be the quality control that may have declined since manufacturing moved from the USA to mainland (Communist?) China.  

Stick, any ideas, oh Great One??

TAD

2022 New Year's Resolution:  Enter 1 group build and COMPLETE a build this year!!  Why Photobucket did you rob me of my one Group Build Badge???  Must be part of the strong anti-Monogram cartel!!!

 ]

  • Member since
    February 2014
  • From: Michigan
Posted by silentbob33 on Friday, January 2, 2015 9:56 PM

Thanks!

On my bench: Academy 1/35 UH-60L Black Hawk

  • Member since
    May 2004
  • From: Land of Lakes
Posted by cbaltrin on Friday, January 2, 2015 9:29 PM
Looking good!
silentbob33

Finally got a start on my F-80.  I have the cockpit assembled and I'm working on the gun bay as well

On the Bench: Too Much

  • Member since
    February 2014
  • From: Michigan
Posted by silentbob33 on Tuesday, December 30, 2014 8:19 PM

Finally got a start on my F-80.  I have the cockpit assembled and I'm working on the gun bay as well.  I've put a few fishing sinkers into it to keep it from being a tail-sitter, and I'll probably need to put a few more in just to be sure.  I test-fit the cockpit into the fuselage, and I'm pretty sure the instrument panel is way too far forward, but I don't feel like doing too much surgery on the kit so I'll leave it as it is.  I also drilled out the gun barrels.  It's kind of weird that the F-80 had six guns, but the kit only gave me four barrels plus the gun that's in the gun bay.  Not a big deal to scratch build another one though.

On my bench: Academy 1/35 UH-60L Black Hawk

  • Member since
    September 2006
  • From: Bethlehem PA
Posted by the Baron on Monday, December 29, 2014 1:19 PM

cbaltrin

Is there a list of Revell USA kits? Just curious

Thomas Graham's "Remembering Revell Model Kits" is a good reference, for the pre-merger catalog.  After Monogram and Revell were merged by a holding company that bought them both, the trail of kits gets muddied, because kits would be re-issued under the other label, eg, the Monogram P-40B appearing in a box with the Revell label on it.  But the book is still a very good reference.  I got his books on Monogram and Aurora, too.

The bigger the government, the smaller the citizen.


  • Member since
    July 2004
  • From: Sonora Desert
Posted by stikpusher on Sunday, December 28, 2014 7:46 PM

No, we do not have a list on here. But you can ask about a particular kit and more than likely, somebody here will know the pedigree of the kit.


F is for FIRE, That burns down the whole town!

U is for URANIUM... BOMBS!

N is for NO SURVIVORS...

       - Plankton

LSM


  • Member since
    May 2004
  • From: Land of Lakes
Posted by cbaltrin on Sunday, December 28, 2014 7:11 PM

Is there a list of Revell USA kits? Just curious

On the Bench: Too Much

  • Member since
    March 2005
  • From: Lancaster, South Carolina
Posted by Devil Dawg on Saturday, December 27, 2014 5:34 PM

My latest update since 13 November 2014...... Sorry that I haven't been adding much to the thread, but ever since I signed up for this group build, work has just gone bonkers!! Unfortunately, I can't take my builds with me when I'm on the road, as I'm usually working at a hospital somewhere in NC from around 0800 til usually 2200 - 2300 daily. Oh well......

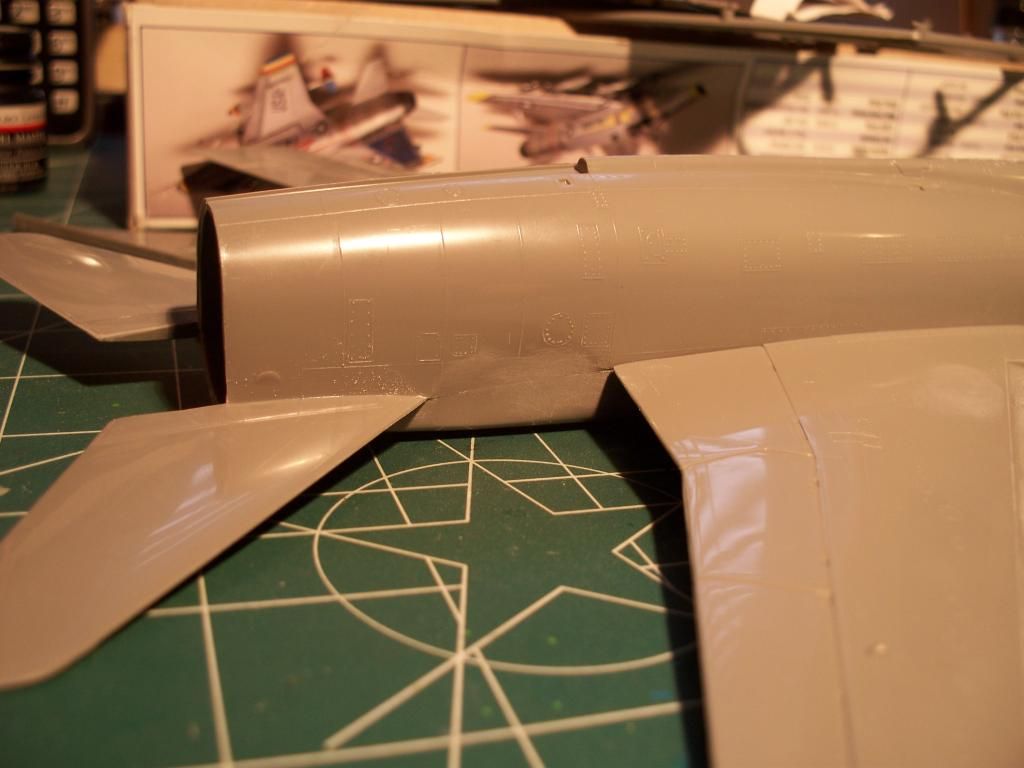
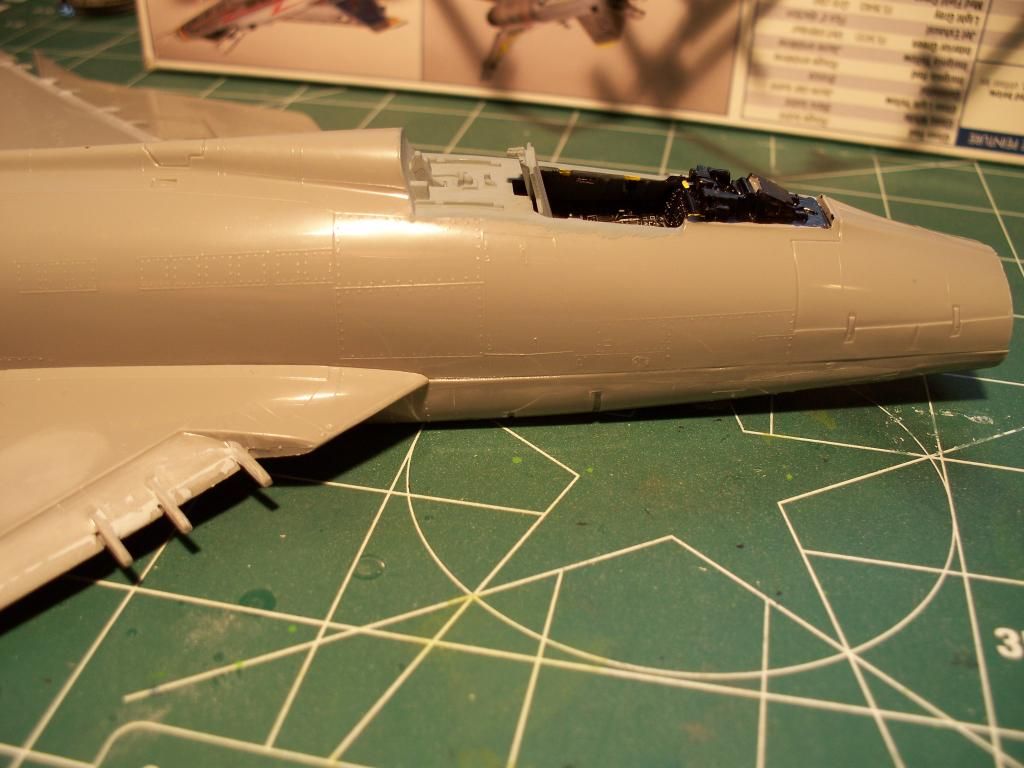
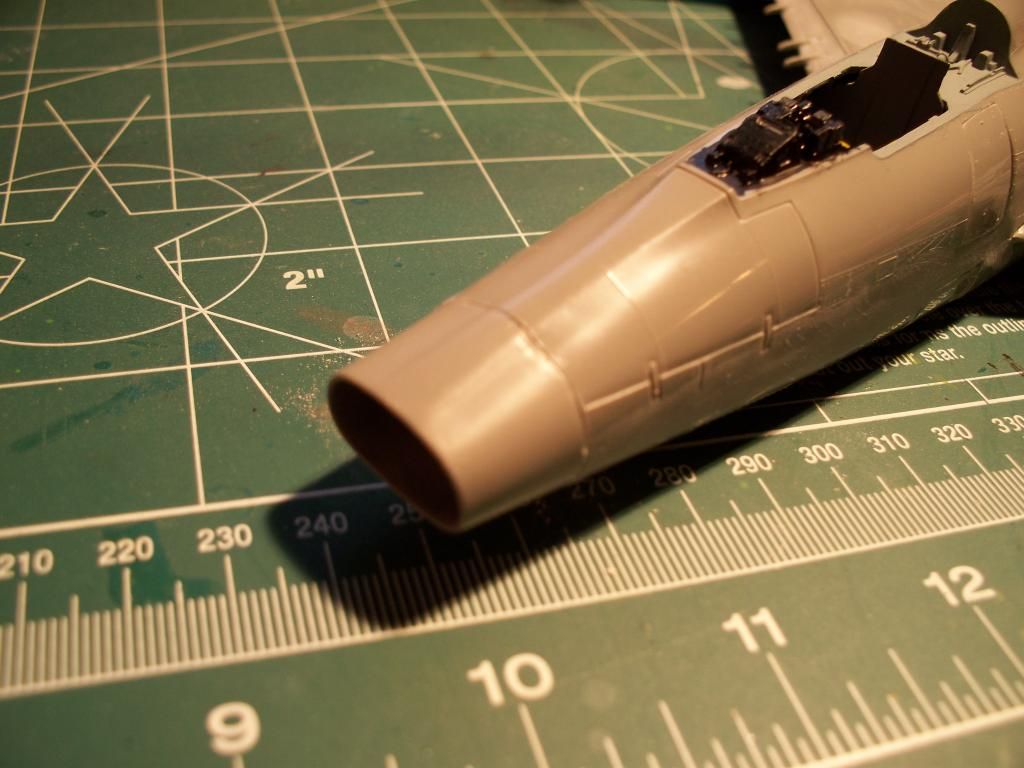
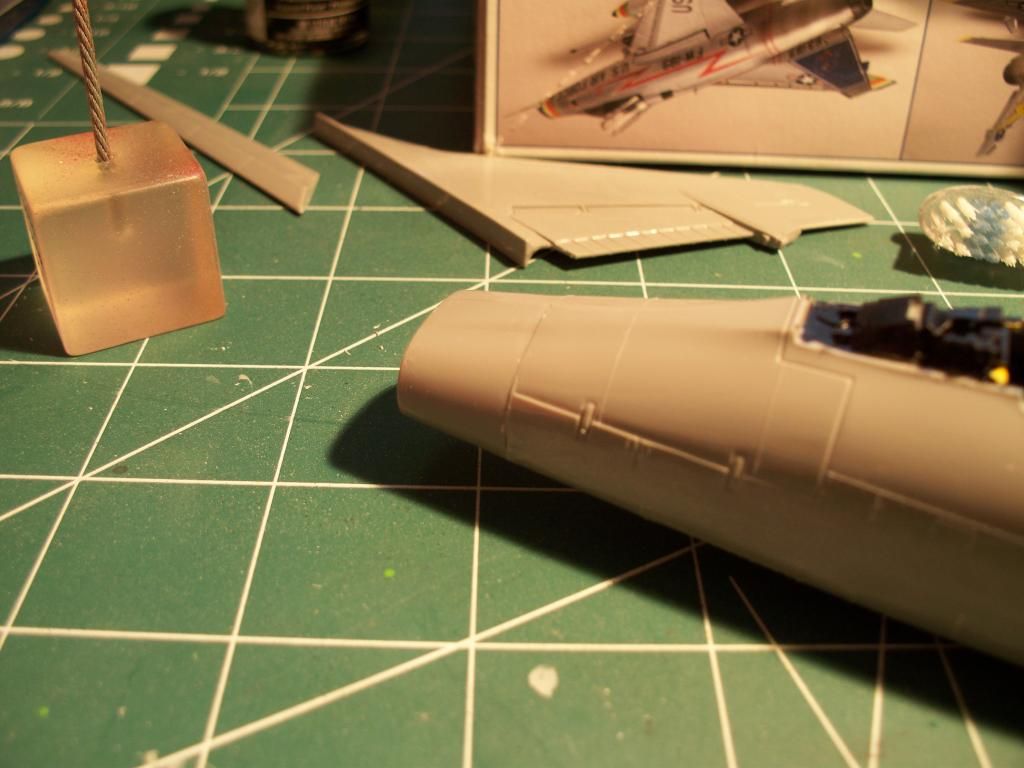
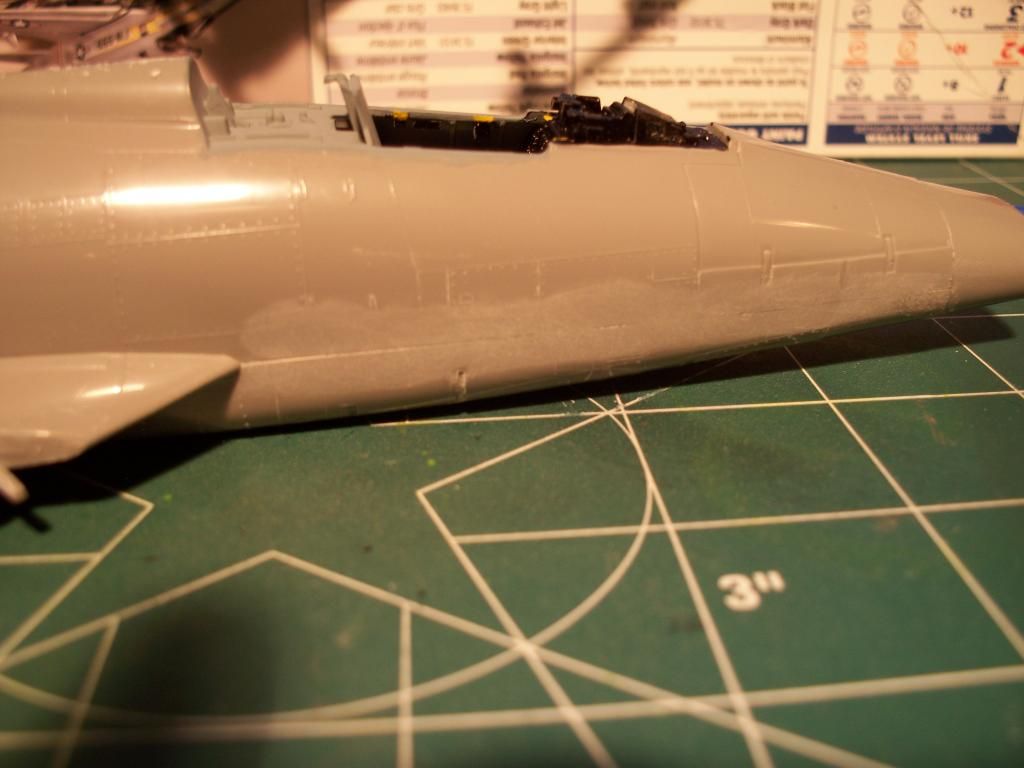
Anyways, here are the latest pictures of my F-100. In my last post, I stated how easy these particular kits are to put together, and how the seams aren't too bad at all, and some other niceties about the Monogram F-100D. Well, since I mentioned that, all kinds of seam and fit issues have popped up. Below are some examples.......

.
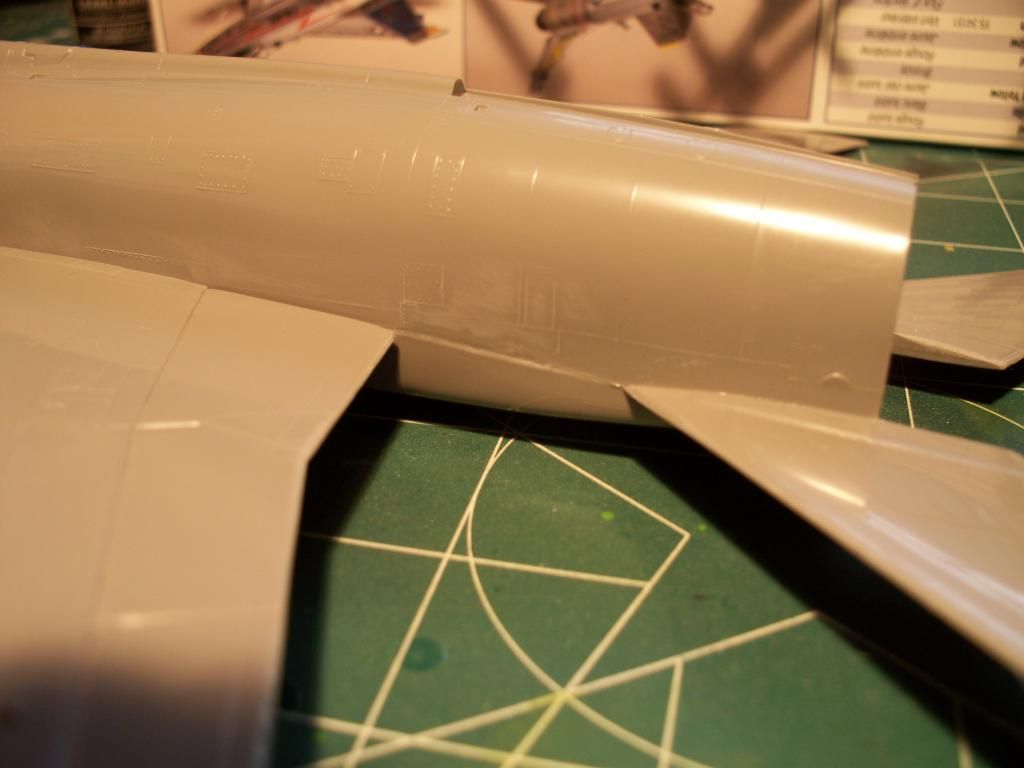
 A good-sized step appeared here, and on the opposite side as well. Had to do some judicious sanding to get it decently flush.

.
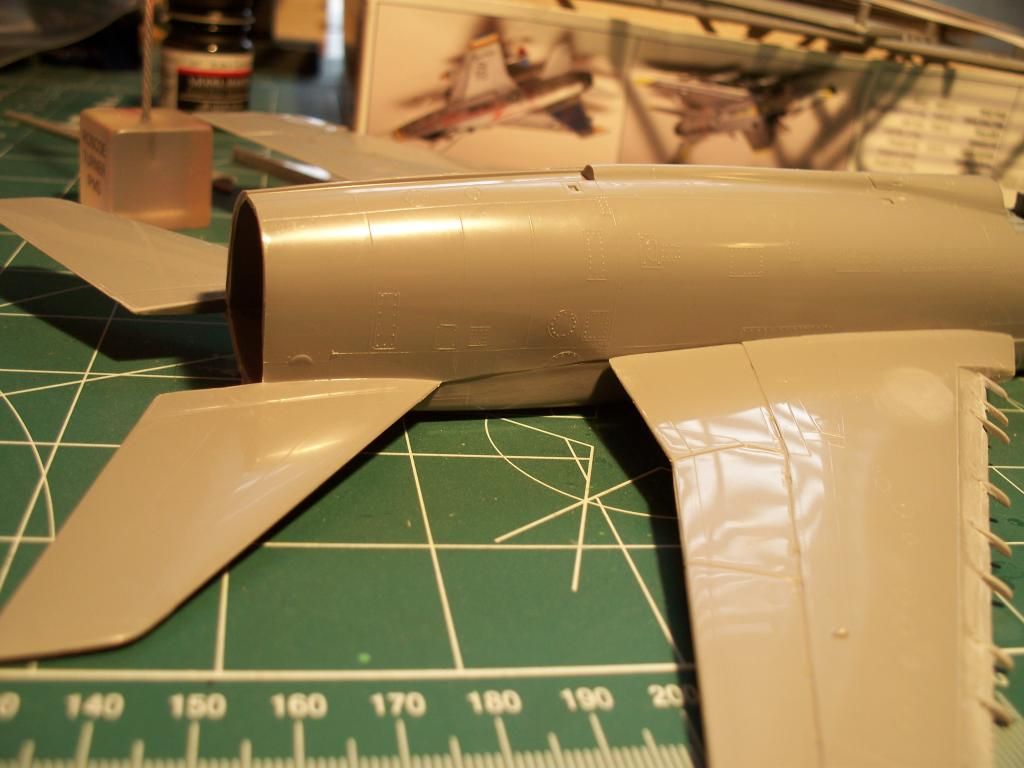
Here's the opposite side. Has anyone else had this issue before? I've built this kit at least twice in the past, and just don't remember this being an issue.

.
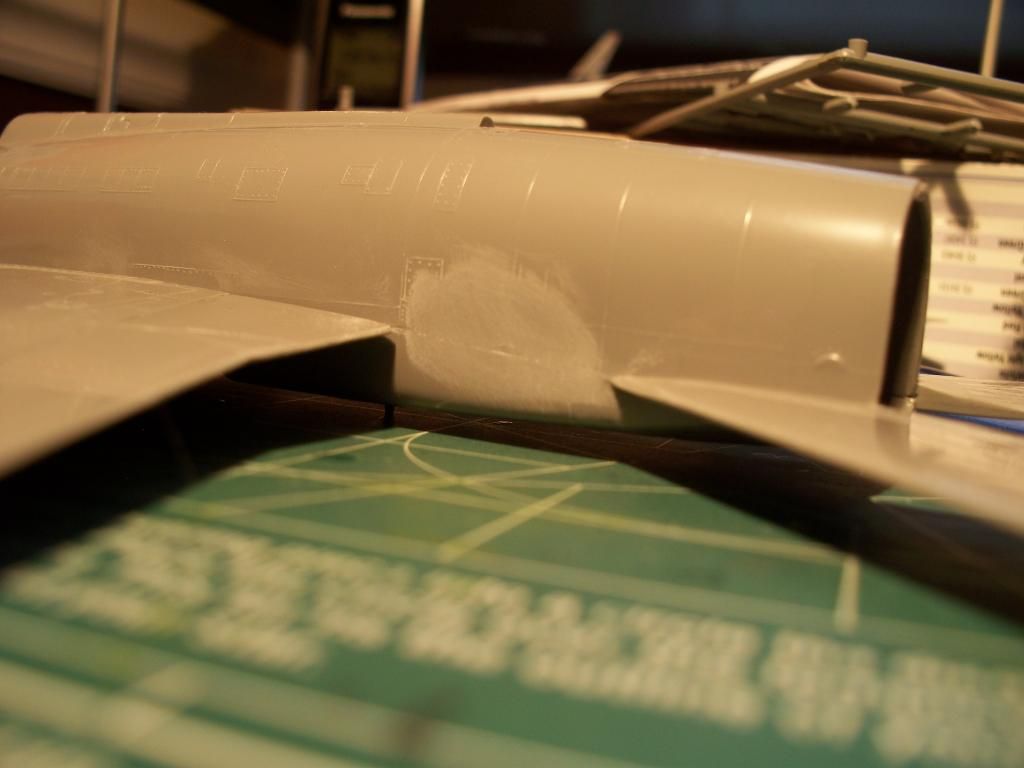
After sanding both sides. Not bad, but I hate sanding away all of the surface detail that's there. Raised panel lines aren't the easiest to replace.

.
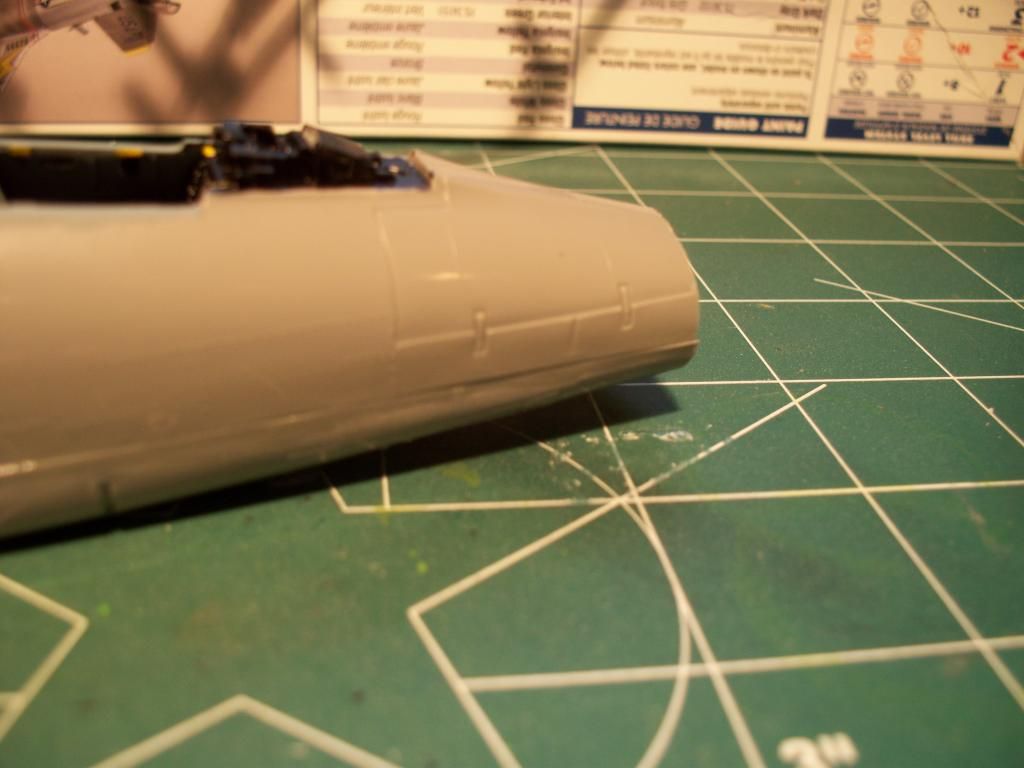
Had some fit issues with the nose area, too. You can see the huge steps between the upper & lower fuselage halves, plus the step where the intake piece's contour just didn't quite match the fuselage contour.....

.
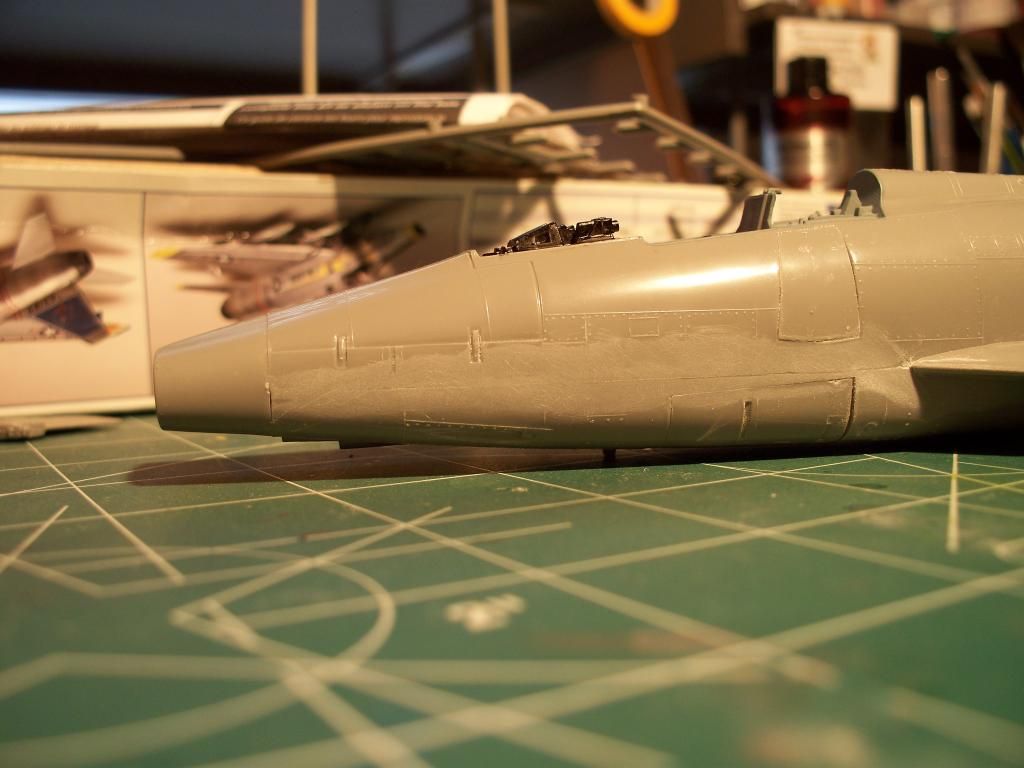
  It's amazing what rubbing some sand attached to paper can do for an ill fit. As I've mentioned before, I hate sanding away all of that surface detail, butcha gotta do whatcha gotta do to get things done.

.
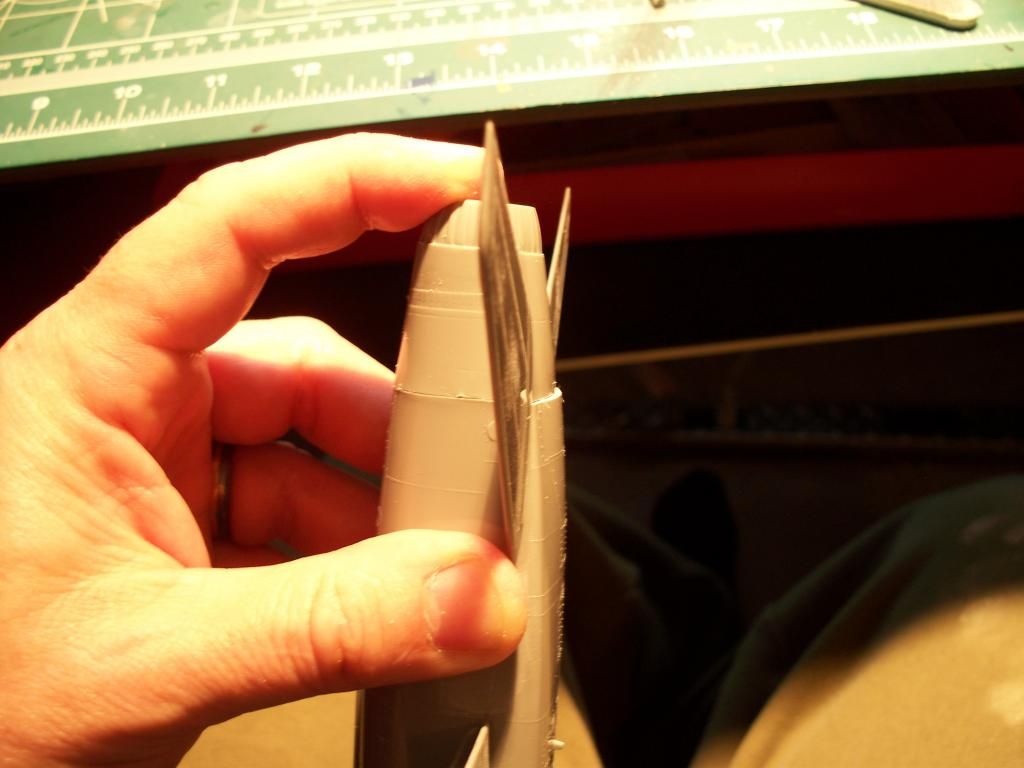
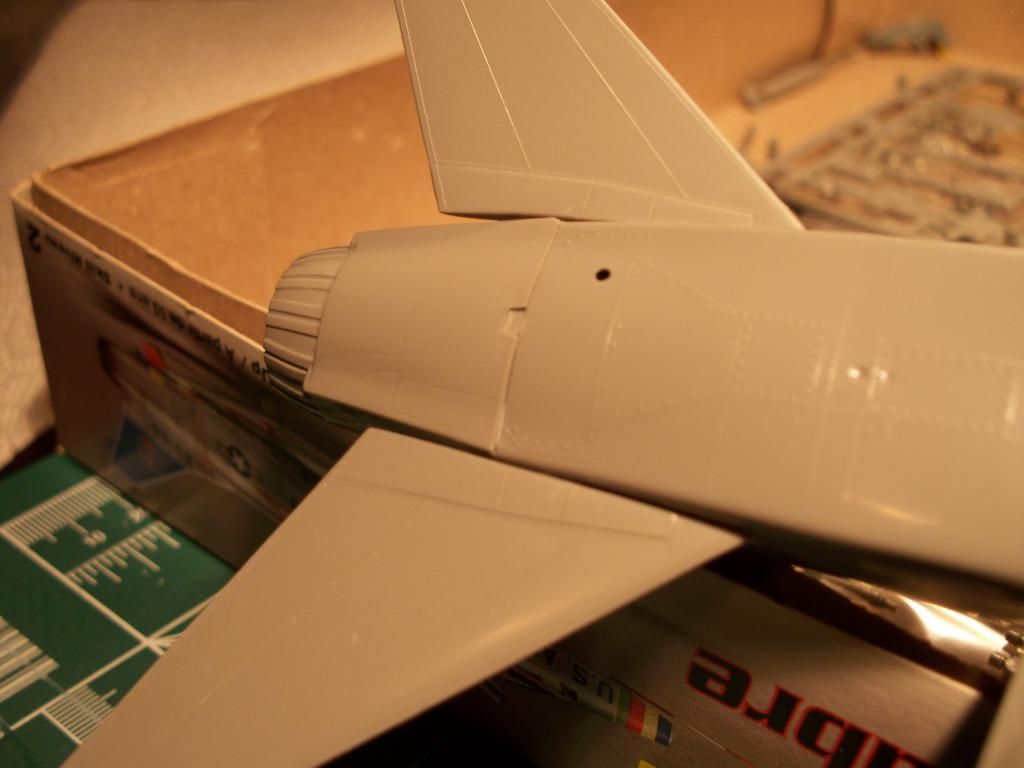
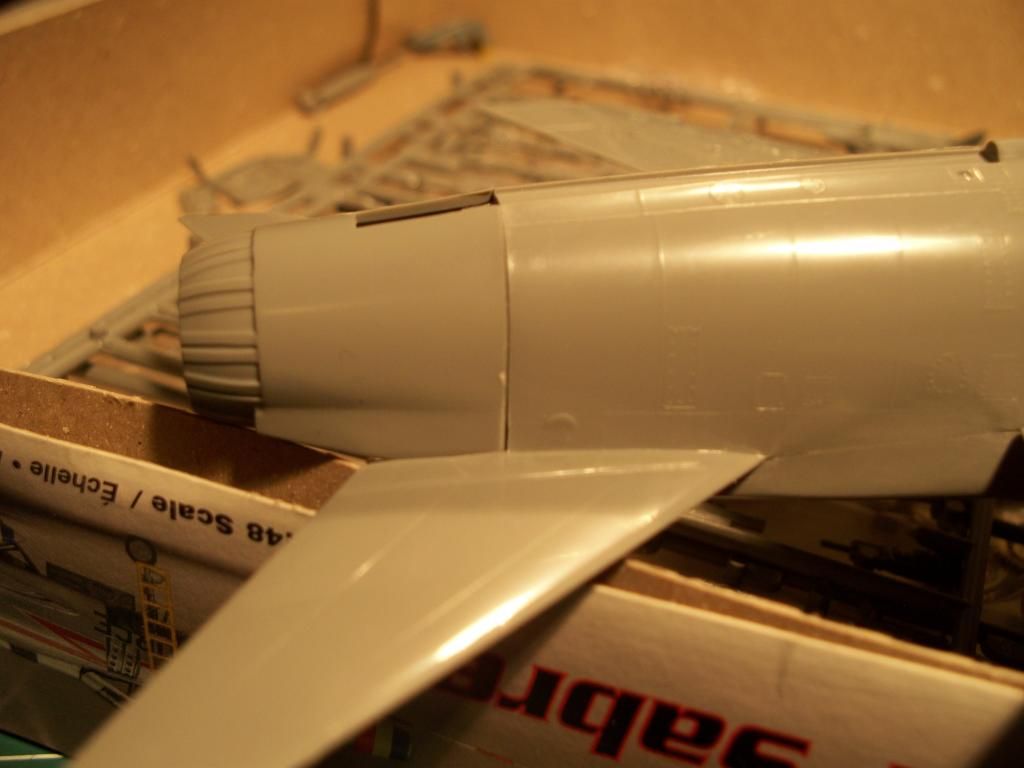
So now I'm ready to attach the exhaust cone/nozzle, and, regardless of what I do to get it to fit correctly, this is as good as I can get it. You can see the HUGE step on the bottom of the fuselage. This is after attempting to get the upper part of this nozzle to fit. If I get the lower to part to fit without a step, then the entire upper part has a huge step. I figure that it's better to have the step in the least-likely-seen area, which would be the bottom. Again, has anyone else had this issue when building this kit?

.
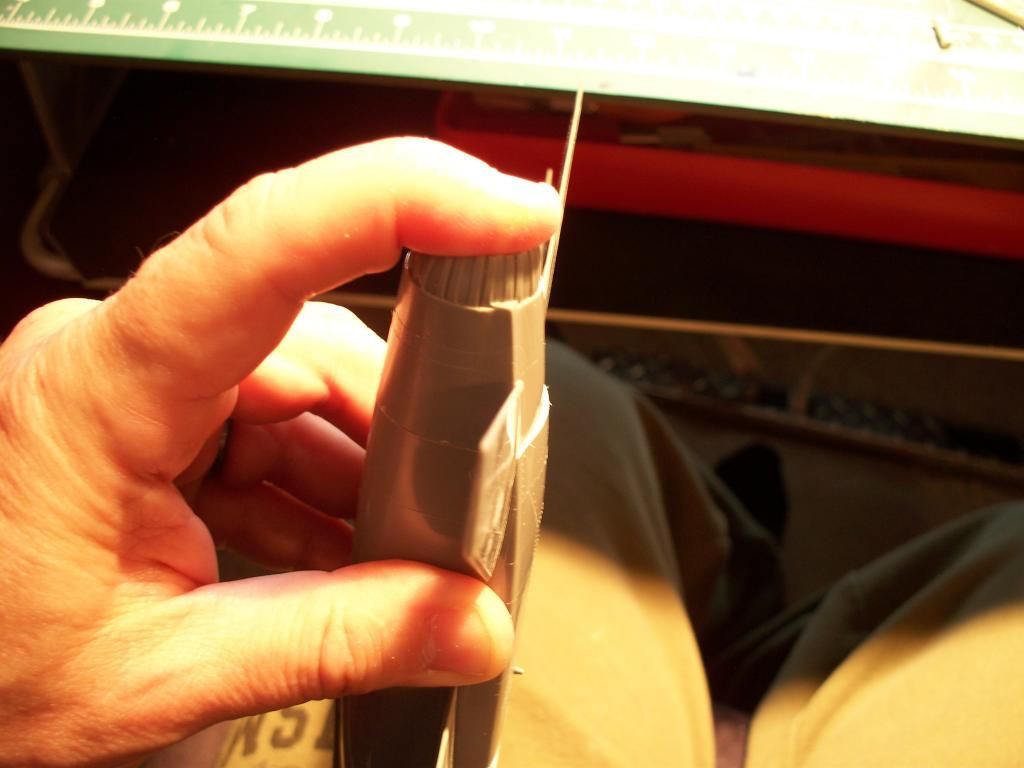
Another view of the same issue..........

.
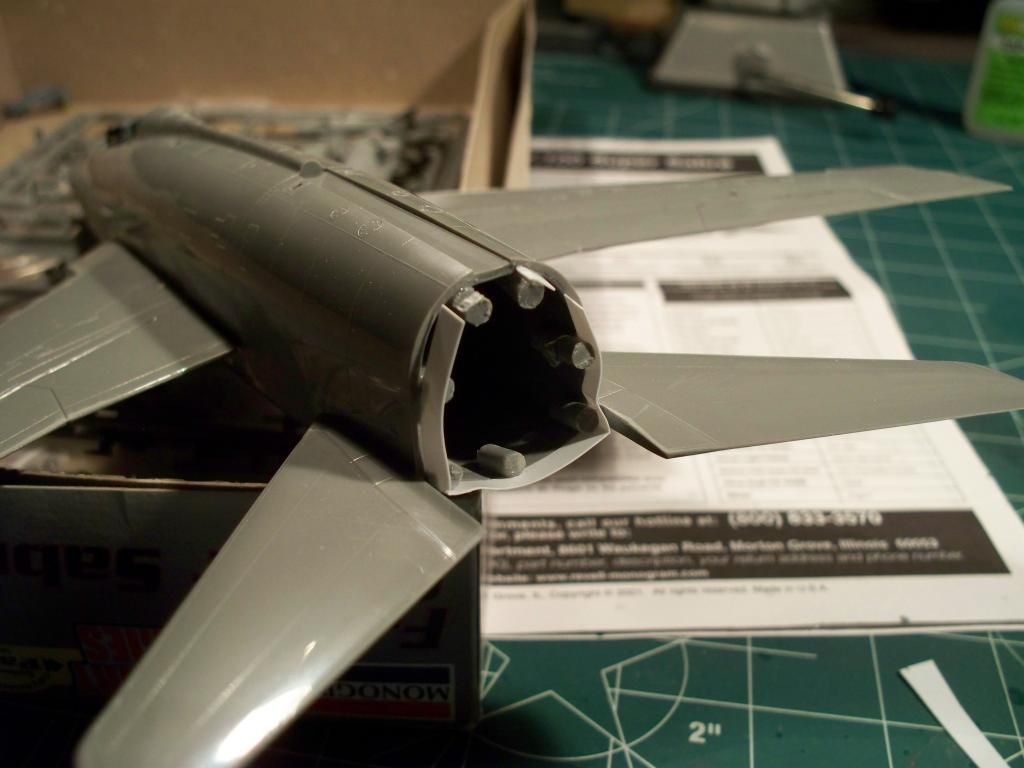
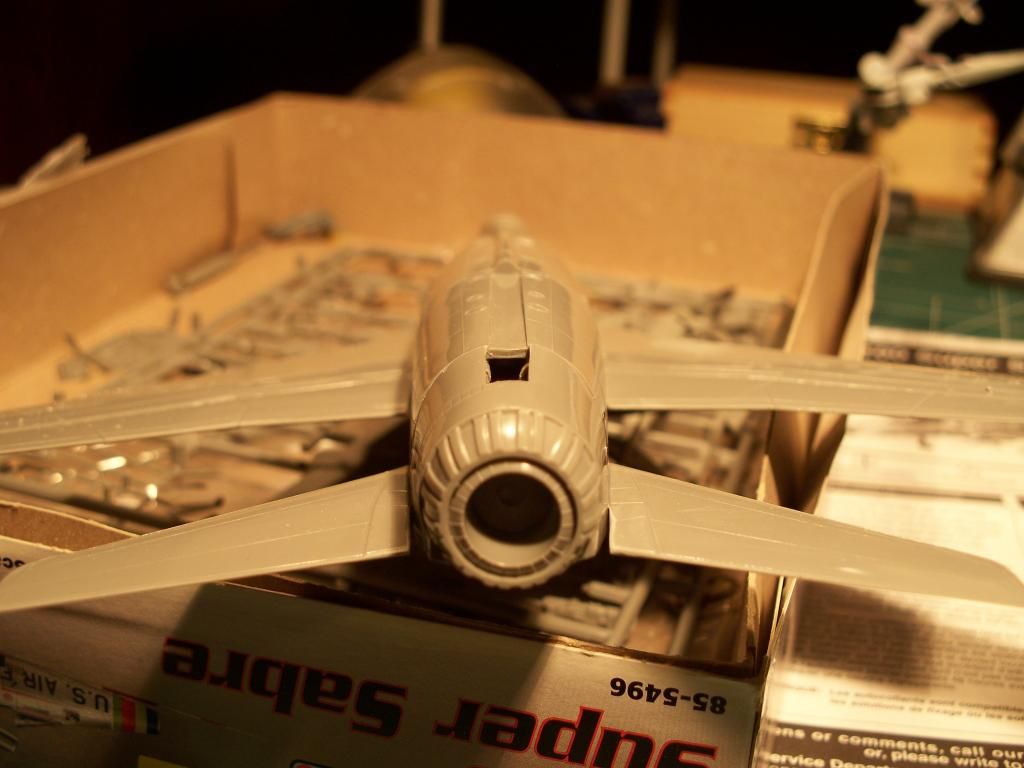
So, here is my attempt at trying to solve this issue - glue some sprue dowels in the rear of the fuselage, test fit, then add some .005" sheet plastic as a shim to get things somewhat lined up.

.
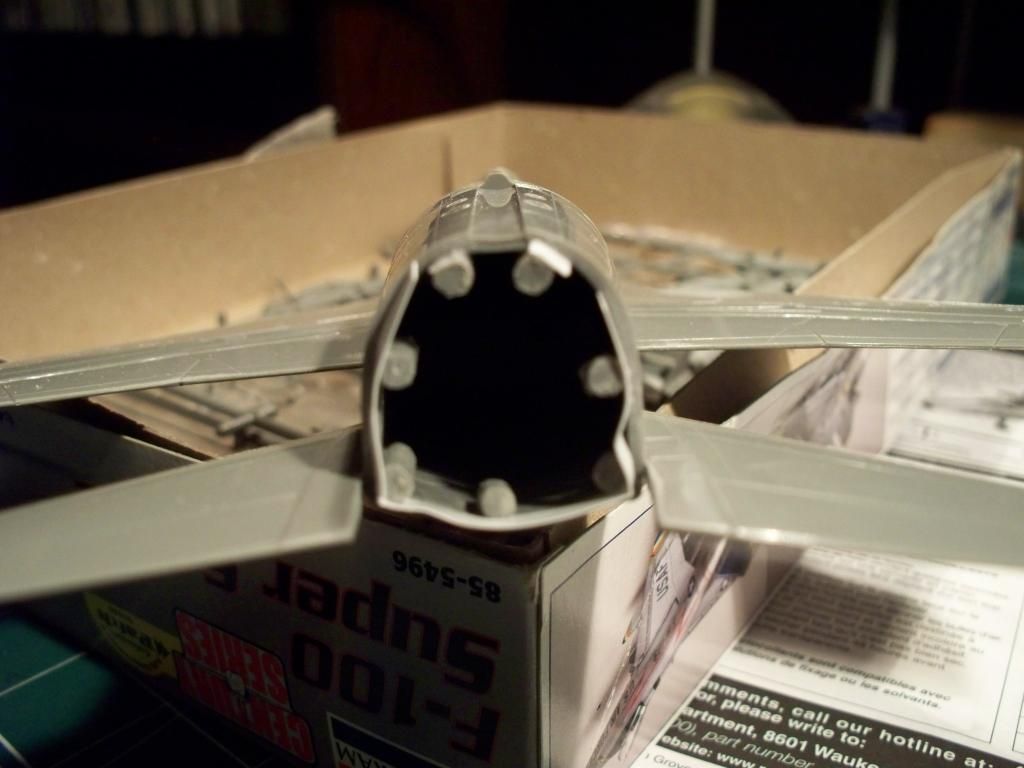
Sorry for the photo quality not being up to par. I'm using a Kodak EasyShare Z1285, which has a manual mode with the up-close-and-personal feature (you know, the little flower icon), and I still can't seem to figure out how to get it to focus on close-ups. Oh well, that's for another thread.......... Anyways, you can see where I placed the dowels, along with the shims.

.
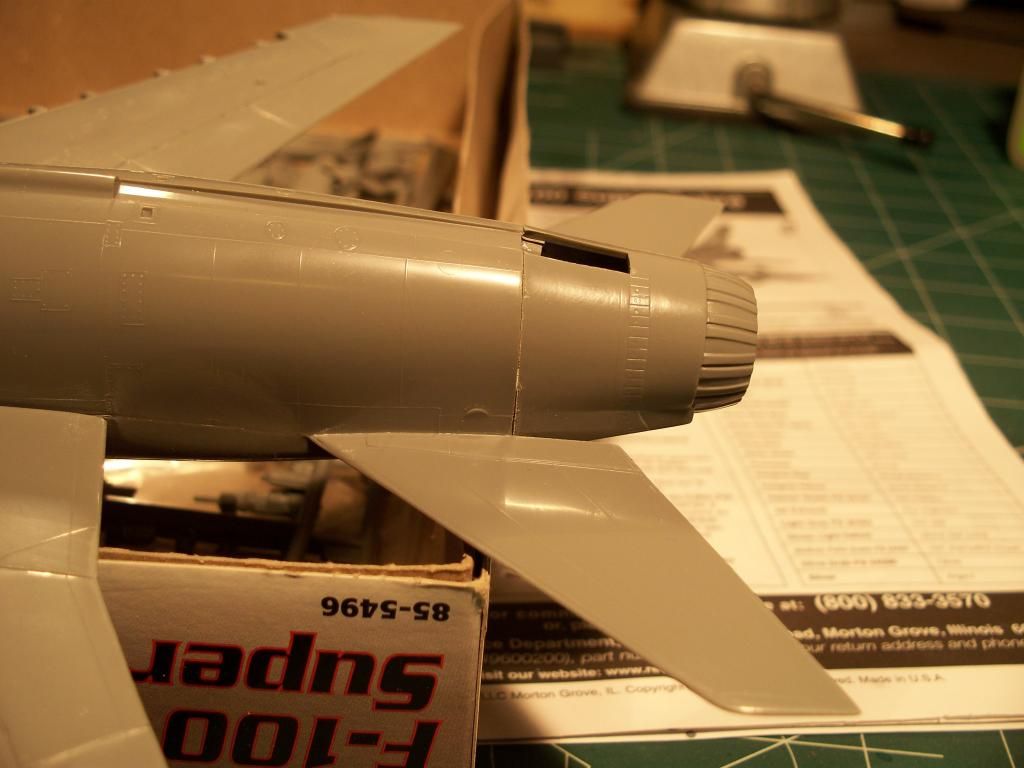
And here's how it looks with the dowels & shims added, and the nozzle in place. This is as good as I can get this to fit. You can see that the step on the bottom is gone, but the overall fit leaves a lot to be desired. I even tried the other F-102-type nozzle, but it has the same exact issues as this one. So, I'll be gluing this in place as soon as I'm done editing this post, and then going to AutoZone to buy a 5-gallon tub of Bondo to fix the gaps. Hopefully, 5 gallons will be enough....... Propeller

Let me know if there is a way to fix this issue better than what I've tried here. Thanks for looking!

Gary Mason

Devil Dawg

On The Bench: Tamiya 1/32nd Mitsubishi A6M5 Model 52 Zeke For Japanese Group Build

Build one at a time? Hah! That'll be the day!!

  • Member since
    February 2014
  • From: Michigan
Posted by silentbob33 on Saturday, December 27, 2014 4:52 PM

Thanks Stik!

On my bench: Academy 1/35 UH-60L Black Hawk

  • Member since
    May 2004
  • From: Land of Lakes
Posted by cbaltrin on Saturday, December 27, 2014 3:49 PM
No, no magazine article here :-)
stikpusher

CB, very nice progress on your Mustang. It almost looks like you're gonna do a magazine article with such a slick presentation ;)

On the Bench: Too Much

JOIN OUR COMMUNITY!

Our community is FREE to join. To participate you must either login or register for an account.

SEARCH FORUMS
FREE NEWSLETTER
By signing up you may also receive reader surveys and occasional special offers. We do not sell, rent or trade our email lists. View our Privacy Policy.