SEARCH FINESCALE.COM

Enter keywords or a search phrase below:

The 2015 /16 Red Hot and Rollin Automotive Group Build--Ended

121079 views
2225 replies
1 rating 2 rating 3 rating 4 rating 5 rating
  • Member since
    March 2011
Posted by ewheeler454 on Thursday, January 1, 2015 6:24 PM

Hey Mustang. nice start.

The 37 Ford is still not done stripping so I jumped on the 51 Chevy.

I got the 53 fender skirts sanded down and fitted, then glued them in. They look a lot better than the originals. All that's left on them is to fill in around the seam and sand them down smooth.

Here's the wheels I plan to use for it. I think they will look sharp with this thing sitting just above the ground hehehehe. They need to be cleaned up and polished yet.

And finished cutting all the parts from the sprues. Now for all the fun cleanup and sanding hehehehe.

Hopefully it'll be warm enough for me to get back out in the shop tomorrow.

L8TR,

Eric

  • Member since
    March 2012
  • From: Corpus Christi, Tx
Posted by mustang1989 on Thursday, January 1, 2015 7:20 PM

Nice job on the fender skirts Eric! What are you planning to polish the wheels with?


 Forum | Modelers Social Club Forum (proboards.com) 

  • Member since
    February 2005
  • From: Proctor. MN
Posted by 65ss on Thursday, January 1, 2015 7:29 PM

I would like to get in on this GB. Not sure what kit yet.

Dale

  • Member since
    February 2005
  • From: Proctor. MN
Posted by 65ss on Thursday, January 1, 2015 7:31 PM

Eric, the fender skirts look good. I think your choice of wheels are perfect!

Dale

  • Member since
    March 2012
  • From: Corpus Christi, Tx
Posted by mustang1989 on Thursday, January 1, 2015 7:58 PM

65ss

I would like to get in on this GB. Not sure what kit yet.

65ss:Let men know when you decide. We'll leave a light on for you.Idea


 Forum | Modelers Social Club Forum (proboards.com) 

  • Member since
    February 2013
  • From: Podunkville, USA
Posted by rommelkiste on Thursday, January 1, 2015 8:32 PM

Been having an argument with myself over the model A engine.  I wanted to use the Revell 31 because of the better detail but I wanted the AMT engine so I wouldn't have to fab up new engine mounts.  Soooo…… I just decided to combine the two.  This is the engine that came in the gloo bomb I started with and even though AMT calls it a Riley it looks to me more like a poorly done Rajo.  The Carbs are kind of crappy too.

 I think this engine was goooed together with Atomic Powered Tube Gloo so it goes in the garbage and a spare AMT A engine goes on the bench.  The AMT engine has lots of details molded on so I ground em off and will use the individual detail parts from the Revell 31 A kit.  The Revell head looks more like a Riley OHV conversion than the AMT.  There is not much to see yet but I am getting there!

Nothing ever fits……..and when it does, its the wrong scale.

To make mistakes is human.  To blame it on someone else shows management potential. 


  • Member since
    March 2012
  • From: Corpus Christi, Tx
Posted by mustang1989 on Thursday, January 1, 2015 9:14 PM

I'm a big fan of removing detail from one kit and transferring it to one I'm working on as well too. Nice job so far on that engine.


 Forum | Modelers Social Club Forum (proboards.com) 

  • Member since
    March 2012
  • From: Corpus Christi, Tx
Posted by mustang1989 on Thursday, January 1, 2015 9:57 PM

All the "before" pictures. This kit was built 32 years ago so I didn't have help like I do now with techniques and the like.

The interior pics:

Not bad considering that I didn't go off of any reference photos at the time. I might have had a recent car show under my belt but that was about it.

Then there's the IP and the dash. Paint coverage sucked but I gave it hell on the gauge detail painting...

Then there's the engine:

Again it wasn't too shabby for 14 years old. Lots of chrome and chrome silver paint used here. I painted the oil pan and complete transmission chrome silver as well. Indifferent

I'll be taking it from the start for the benefit of the newcomer and for the sake of the GB. More coming.........


 Forum | Modelers Social Club Forum (proboards.com) 

  • Member since
    November 2013
  • From: Jerseyville, ON
Posted by elass0wyp0 on Friday, January 2, 2015 8:47 AM

'Stang, that is fantastic for 30+years sitting.  A little dry brush and your golden.  I've also recently started stripping down my first re-entry into the hobby.  Messy.

I'm so glad 2015 is here, I'm looking forward to daily postings.  My 57 is almost done now-I've made good use of my time off so once I upload all the pics and organize it all I'll post something up.

I also like learning how others start their projects.  I've never considered stripping all the parts from the tree and cleaning them up first, I usually do them by sub-assembly like I think most do.  Start with the engine, move to step two, etc.  I'm gonna try it that way and see.  I recently read what I thought was some good starting advice, -start with the body as it typically takes the longest/most amount of work.  I always end up at the end doing one step per day as I wait for paint to dry with nothing left to do on the rest of the car.  It's worked out pretty good so far with the 57.  I feel like I'm making better use of my time this way.  Maybe not.  lol

Looking forward to 2015 GB and everyone's builds.

Gord    

  • Member since
    March 2012
  • From: Corpus Christi, Tx
Posted by mustang1989 on Friday, January 2, 2015 8:50 AM

Thanks Gord! Stripping the parts is not my style but hats off to Eric for doing it. I'd loose half of the parts! lol


 Forum | Modelers Social Club Forum (proboards.com) 

  • Member since
    March 2011
Posted by ewheeler454 on Friday, January 2, 2015 11:38 AM

Hi all,

One of the biggest reasons I remove all the part is for painting. By having every thing cleaned and ready, I can paint all the parts needing a certain color at one time. I tried painting parts while their still on the tree but then you have to go back and touch up the areas where they were cut from the sprue, It's also harder for me to clean up the flash and mold lines/pin marks on the parts. I keep all the parts in a plastic container to reduce the chance of losing any parts, but like Mustang says, I do have a set of 57 hood bullets that seem to be hiding somewhere hehehehehehe.

L8TR,

Eric

  • Member since
    March 2012
  • From: Corpus Christi, Tx
Posted by mustang1989 on Friday, January 2, 2015 1:20 PM

ewheeler454

Like Mustang says, I do have a set of 57 hood bullets that seem to be hiding somewhere hehehehehehe.

See! I told ya!!!! LOL 


 Forum | Modelers Social Club Forum (proboards.com) 

  • Member since
    January 2013
Posted by BlackSheepTwoOneFour on Friday, January 2, 2015 5:21 PM

Started working on my 57' Flip Nose Vette. What a mess I've gotten myself into. Parts don't fit as they should especially the manifold for the blower and the header tubes, flash, etc... They don't even line up right. Looks like I've got some serious work to do. Oh yeah -did I ever tell you I hate car kits that are molded in color?  

  • Member since
    March 2012
  • From: Corpus Christi, Tx
Posted by mustang1989 on Friday, January 2, 2015 5:29 PM

BlackSheepTwoOneFour:First off , what's your name because I can't go typing all that every time I want to talk to you. lol . Secondly I've got nothing but faith in your ability man. Post some pics so we can see what you're up against.


 Forum | Modelers Social Club Forum (proboards.com) 

  • Member since
    February 2013
  • From: Podunkville, USA
Posted by rommelkiste on Friday, January 2, 2015 5:45 PM

This is how you do it Stang---Hey BS214, If you are into one of those flip nose nightmares, I feel for you!  NOTHING--I repeat---NOTHING in those kits fit well.  When you go to hinge the front, we will be able to hear you say wordy dirds where ever we are.  Get ready to plan and re-engineer a lot of stuff before you haul out the Mossberg and put it out of its misery!

Nothing ever fits……..and when it does, its the wrong scale.

To make mistakes is human.  To blame it on someone else shows management potential. 


  • Member since
    March 2011
Posted by ewheeler454 on Friday, January 2, 2015 6:04 PM

Hehehehehehe Mustang,

Technically, their not lost, just permanently misplaced LOL.

I did get some parts cleaned up and smoothed out the fender skirts. Tomorrow I'll putty the skirts to even everything out and get rid of the seams. It's supposed to be in the 60's so I may get the gloss black sprayed on the parts that need re-chroming.

L8TR,

Eric

  • Member since
    February 2005
  • From: Proctor. MN
Posted by 65ss on Friday, January 2, 2015 6:06 PM

Stang- That kit looks like its held up pretty good over the years.

Eric- Your builds are always fun to follow, you are always up to something different.

Dale

  • Member since
    March 2011
Posted by ewheeler454 on Friday, January 2, 2015 6:59 PM

Thanks Dale,

The 51 is going to be painted tangerine and if I can teach myself to do it, I plan to add pearl yellow ghost flames. If not, then Tangerine it is LOL.

Also, I tried to polish out the wheels, but one of them has an issue. If you look in the photo from my post yesterday, you can see a squirrely line running though it. It's actually in the chrome.  I was hoping I could use them as is since the cut lines were inside but now looks like I'll strip them. Mustang, I use a dremel on the slowest speed (can you believe plastic will melt if you spin something on it to fast?? hehehehe) with a buffing pad. The other 3 look great, Oh well, this is what makes it fun and interesting LOL.

L8TR,

Eric

  • Member since
    September 2013
Posted by Raven728 on Friday, January 2, 2015 7:30 PM

Gord: for my last model car (69 Camaro), I painted the body first. It worked out well for me because I'm usually anxious about building the whole model and then dorking up the body paint in the end (it's happened to me before, but I was able to recover).

BlackSheep: for those colored plastic parts, I think primer is your friend. Wink

- Steve

  • Member since
    January 2013
Posted by BlackSheepTwoOneFour on Friday, January 2, 2015 7:40 PM

rommelkiste -

It's not that it's a flip nose kit that's what bothers me. It's the dang parts that don't fit right. I've alredy trimmed minor flash off the body and nose sections.  I've done a 57' Chevy Flip nose back in the day(Spirit of '57) that was an absolute joy to do. Never had issues there.

mustang - BS214 is the short version of my screen name. Use that. LOL!

  • Member since
    March 2012
  • From: Corpus Christi, Tx
Posted by mustang1989 on Friday, January 2, 2015 7:54 PM

Gotcha!


 Forum | Modelers Social Club Forum (proboards.com) 

  • Member since
    January 2014
Posted by Seabe on Friday, January 2, 2015 9:41 PM

Great to see some progress already!

The P34's engine and gearbox base is done and being painted. So nothing spectacular... Planning on doing a Ronnie version there, but just found out that it will require some surgery, since he used different mirrors to the ones molded into the upper cowl of the kit (which Depailler used).

Hoping to get to some progress on the front suspension of the Jordan over the weekend.

Whooo-hooo - and Dakar-time also...

  • Member since
    March 2012
  • From: Corpus Christi, Tx
Posted by mustang1989 on Friday, January 2, 2015 10:24 PM

Good to see all the progress. Going to keep bringing you guys up to speed starting at the beginning. Here's where I began sanding the clear and those wrinkly decals off of the body..........

 Here I have all of the decals off and am bringing it up to speed with the super fine sanding pads. I just knew these would come in handy one day when I bought 'em a couple of years ago.

More on the way...................


 Forum | Modelers Social Club Forum (proboards.com) 

  • Member since
    March 2012
  • From: Corpus Christi, Tx
Posted by mustang1989 on Sunday, January 4, 2015 8:00 PM

I've gotta start posting so I can catch up to the point I'm at now! Sheesh I'm falling behind here. 

I kept going with the polishing pads until I reached the 12000 grit pad:

and then I shot the gloss...........

There were a couple of spots that gave me trouble. I had a paint run on the R/H rear quarter and a speck of dust on the drivers door. 

I took a trip to North Texas for Christmas to be with family and was faced with leaving my car behind to miss out on a couple of days of bench time while I was away soooooooo.......................

  I took the thing with me!!!!Wink  !! I took my polishing pads and started to work on the affected areas.

Here's the drivers door after being sanded back down from the 3200 grit to the 12000 grit:

and the R/H rear quarter and passenger door after the run was sanded out with the 3200 grit working to the 12000 grit:

I've set this all aside now that I'm back home where the temp has been in the 40's and 50's. Will gloss it back and set aside to cure when weather permits.

Will be posting pics of the engine progress next time.Big Smile


 Forum | Modelers Social Club Forum (proboards.com) 

  • Member since
    January 2014
  • From: Toronto
Posted by Rob S. on Sunday, January 4, 2015 8:18 PM

Looking great thus far mustang!! To those that I promised parts (tires and engine), I should get those in the mail soon. Anyway, did a big binge build this weekend for the Star Wars GB, but, at the end, I got some time in on my 25 Ford. This is a pretty sad kit, but, what can you do. I assembled the engine, chassis and suspension. EVERYTHING is black, so, I'll shoot that soon and start to detail. I plan on doing some light wiring under the hood, BUT, the engine compartment may be sealed. Perhaps I can just set the engine hood and cowlings over the engine, but, we'll see. I plan on making this Model T slightly worn, but, not in too bad of shape. Anyway, just a basic start:

______________________________________________________________________________


On the Bench: Nothing on the go ATM

  • Member since
    March 2012
  • From: Corpus Christi, Tx
Posted by mustang1989 on Monday, January 5, 2015 10:22 AM

Hey Rob! Looks like you're off to a good start man! And thanks again for the tires dude. If you need anything and I have it, it's yours pal!


 Forum | Modelers Social Club Forum (proboards.com) 

  • Member since
    March 2012
  • From: Corpus Christi, Tx
Posted by mustang1989 on Monday, January 5, 2015 12:36 PM

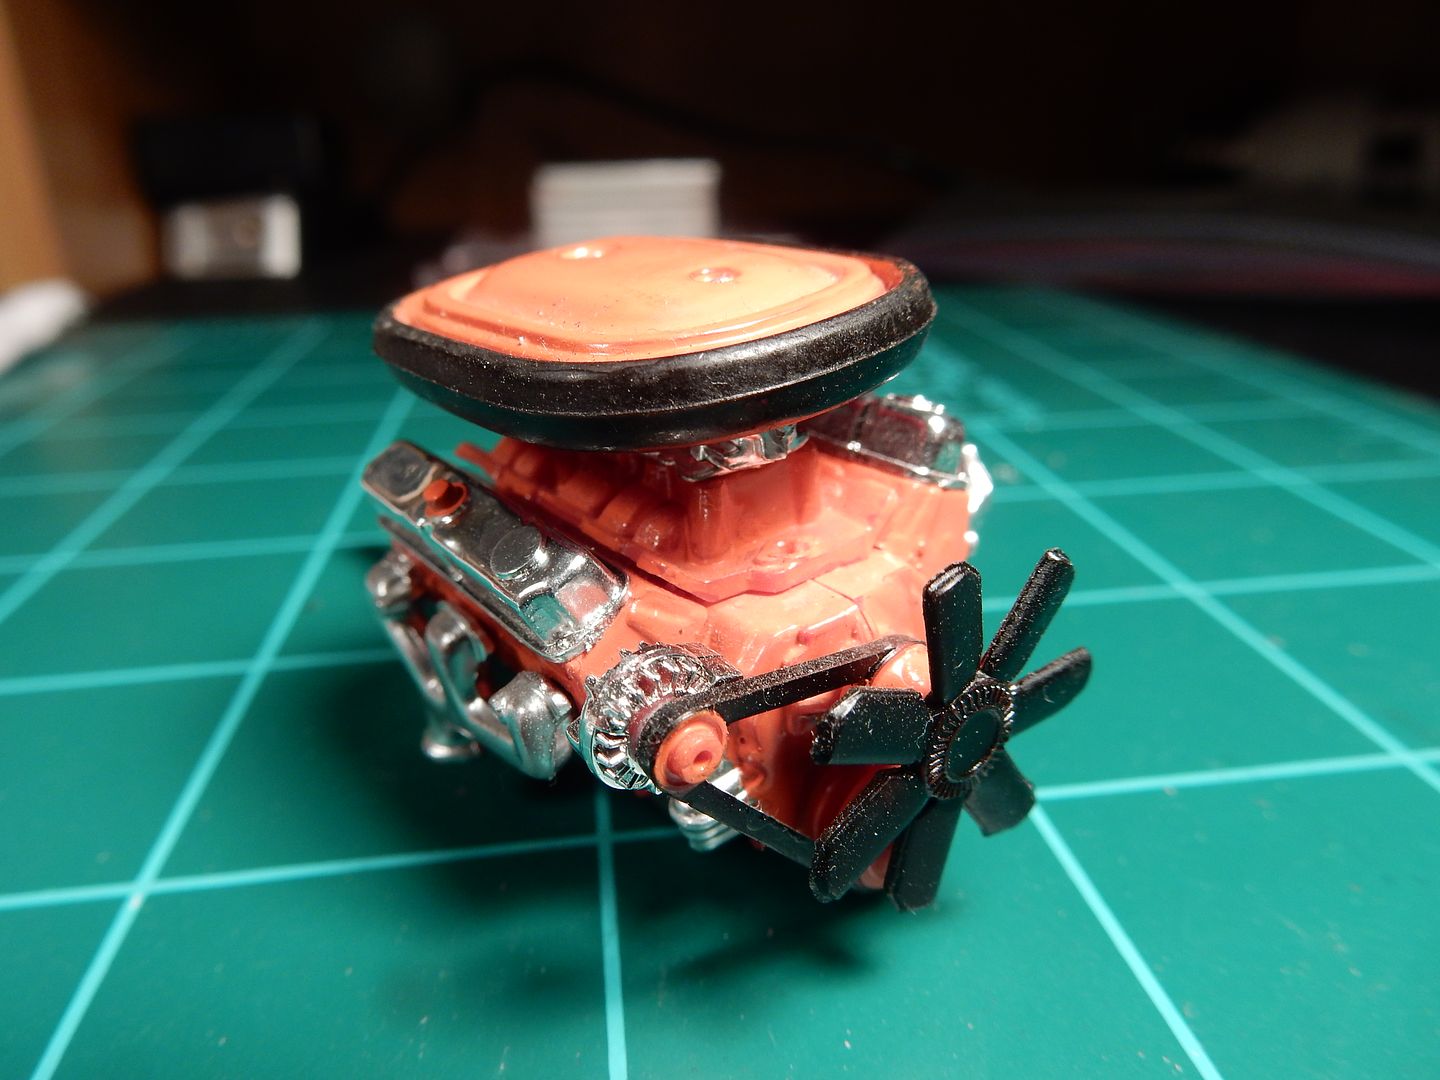
Now for the 340 Six Pack engine updates. I started with this when I took it apart. I don't consider it bad for only being 14 years old at the time. As with most young folks, I was into the "bling bling" of chrome at that point.
I simply did not want to tear this thing down soooooooooo....I started over with the engine out of the spare kit that I recently acquired:
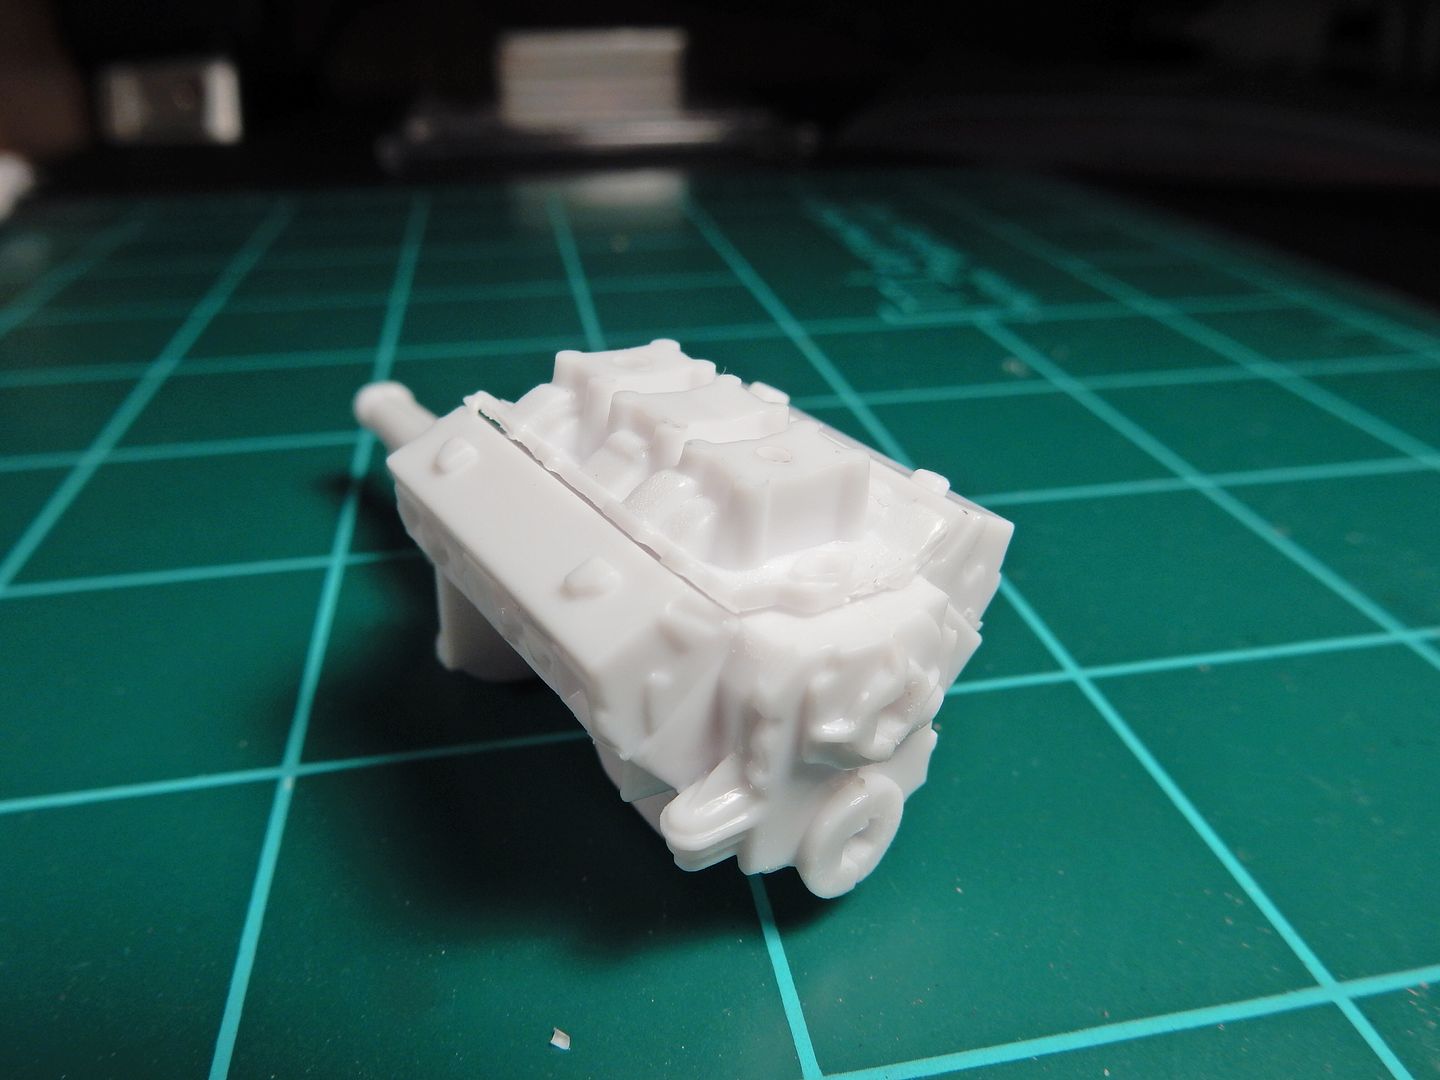
 

....and it's got that nasteee seam line running right down the middle of the engine and transmission! I had to do something about that!!!
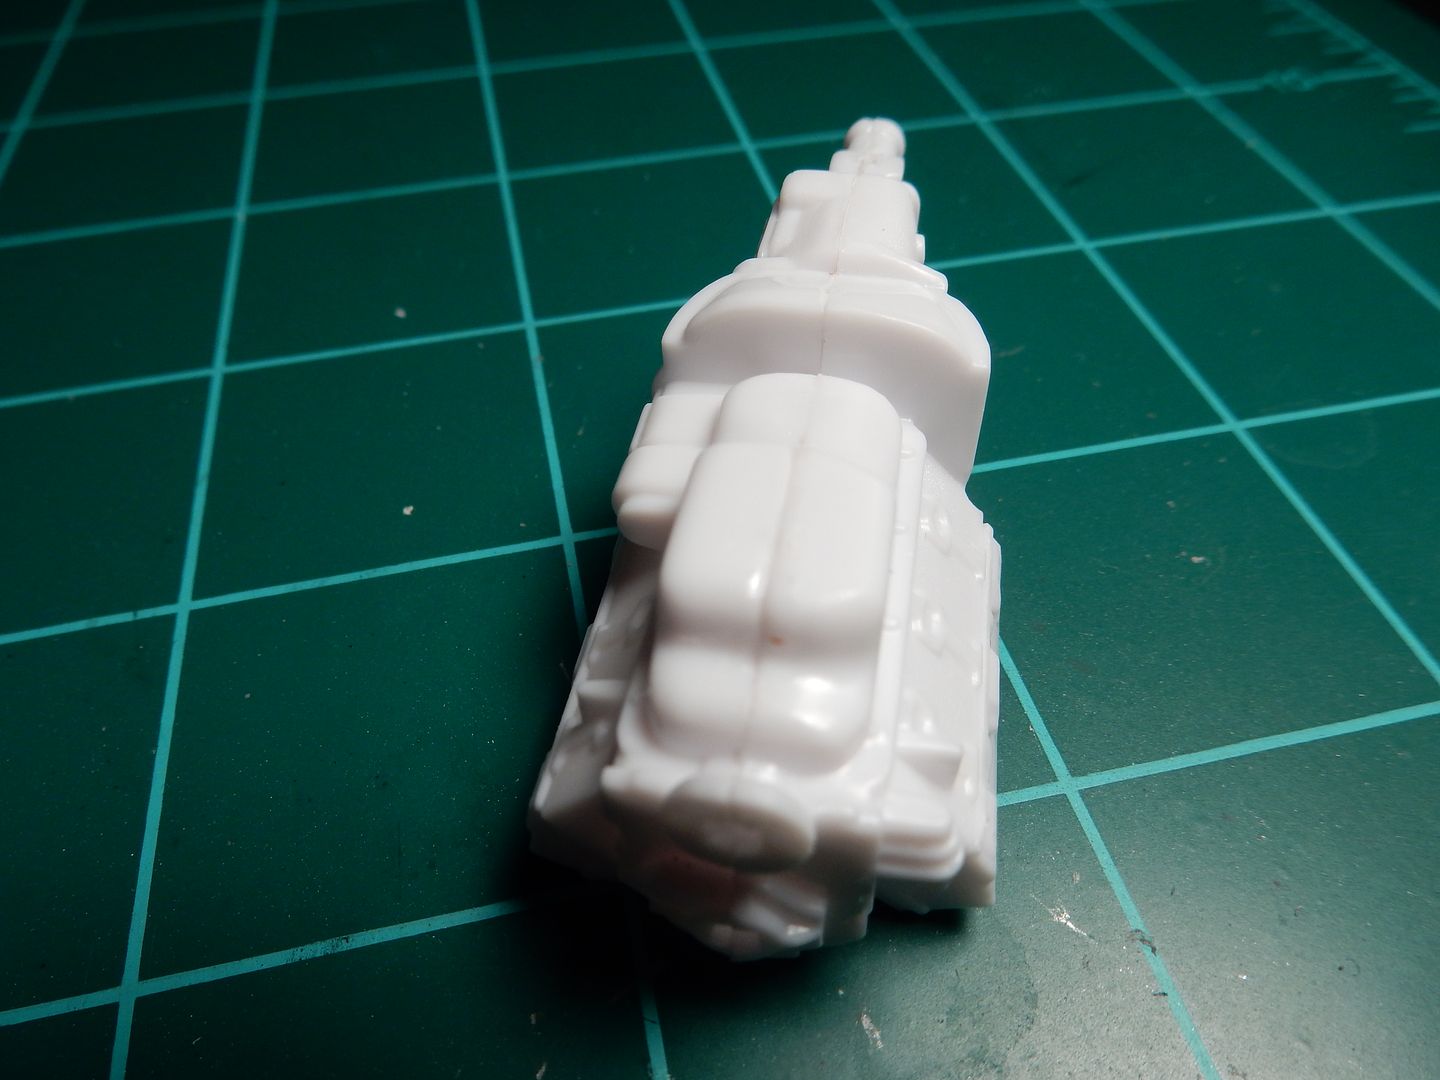
 First I primed the engine black because the only orange I could find was a bright orange and the real thing wasn't just covered up in bright color. e.g:
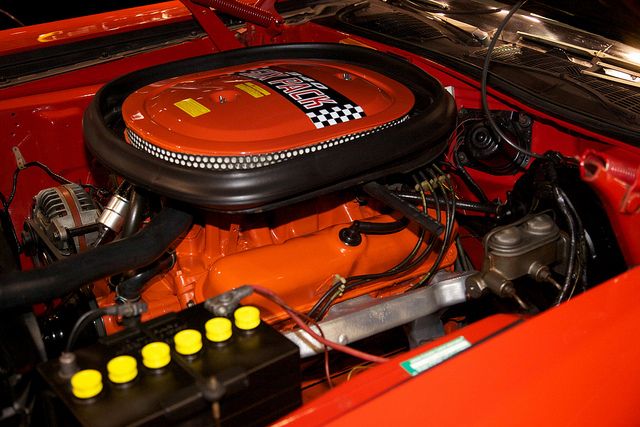
Well....the pic came out a lot brighter for some reason. The orange on these engines is kind of a dull color.

So after puttying the seams I started applying layers of orange, slowly working it up to the shade of orange that I felt was about right.
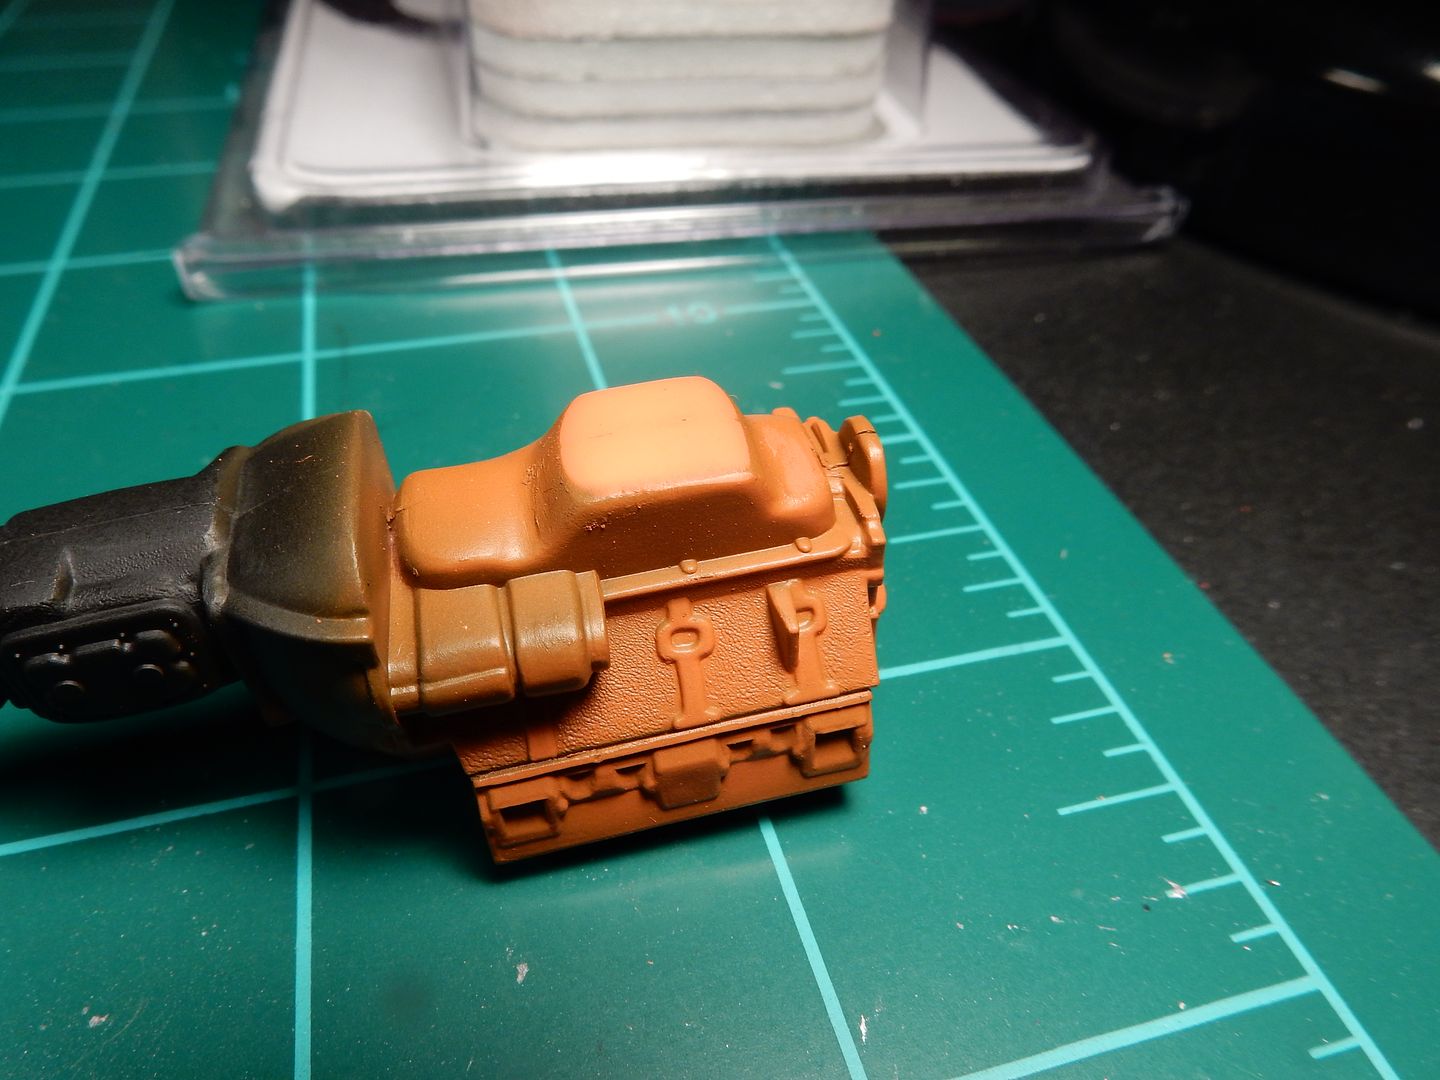
In flipping the old and replacement engines upside down you can see a direct contrast between the chrome silver and the orange O.E.M. color that's not quite where I wanted it yet....
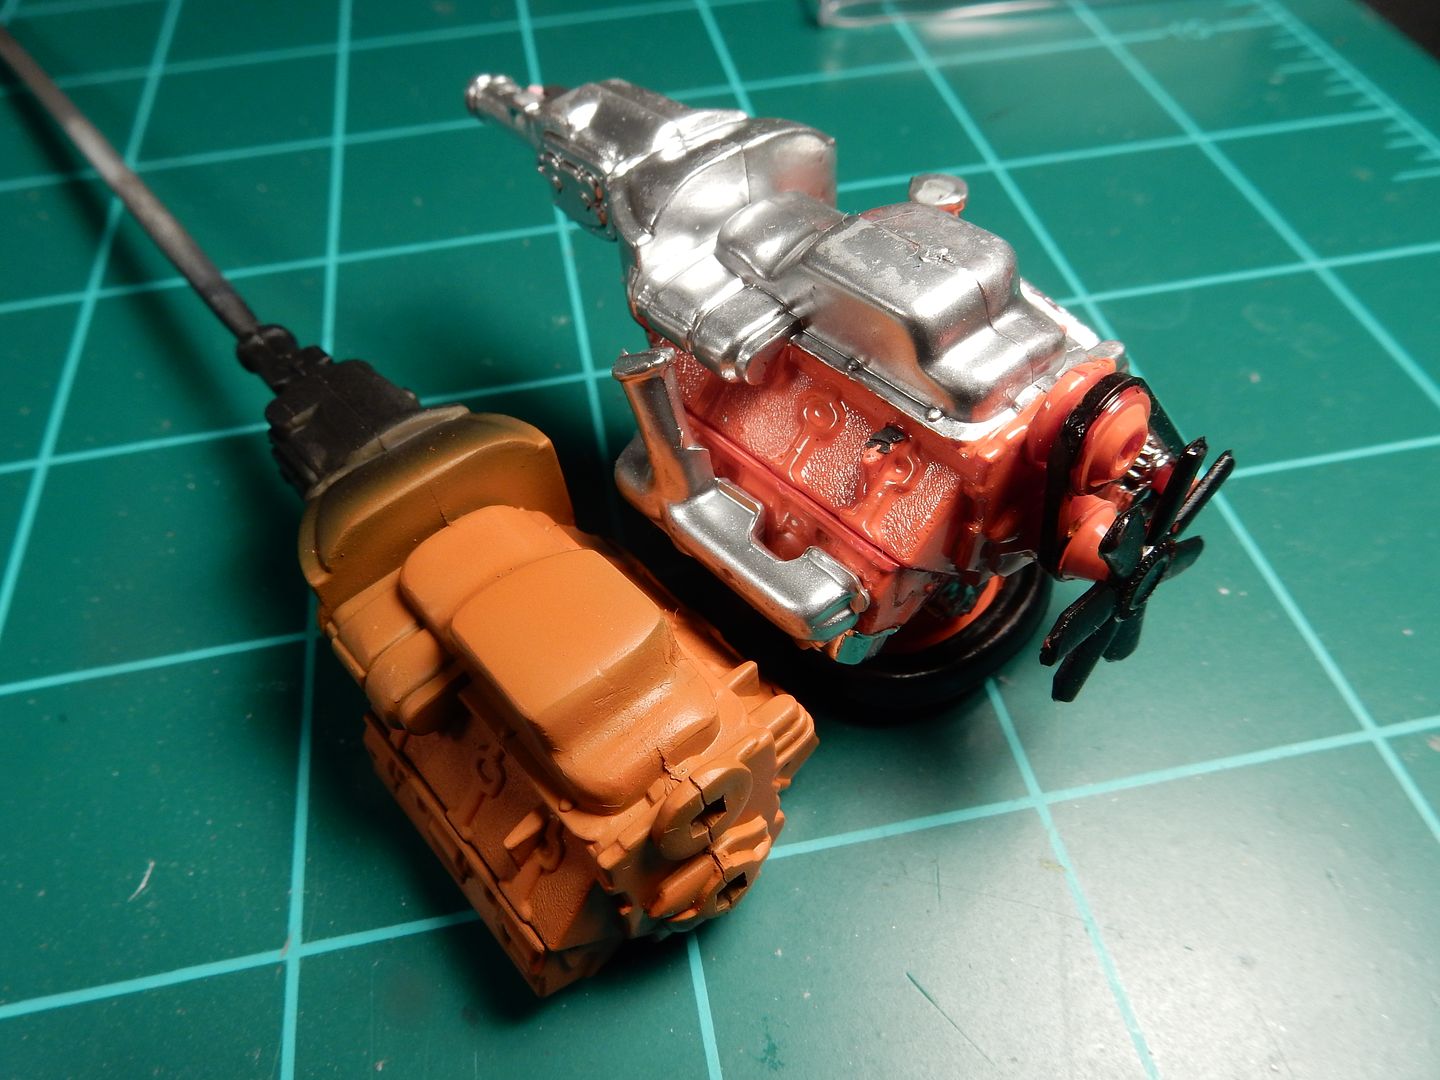
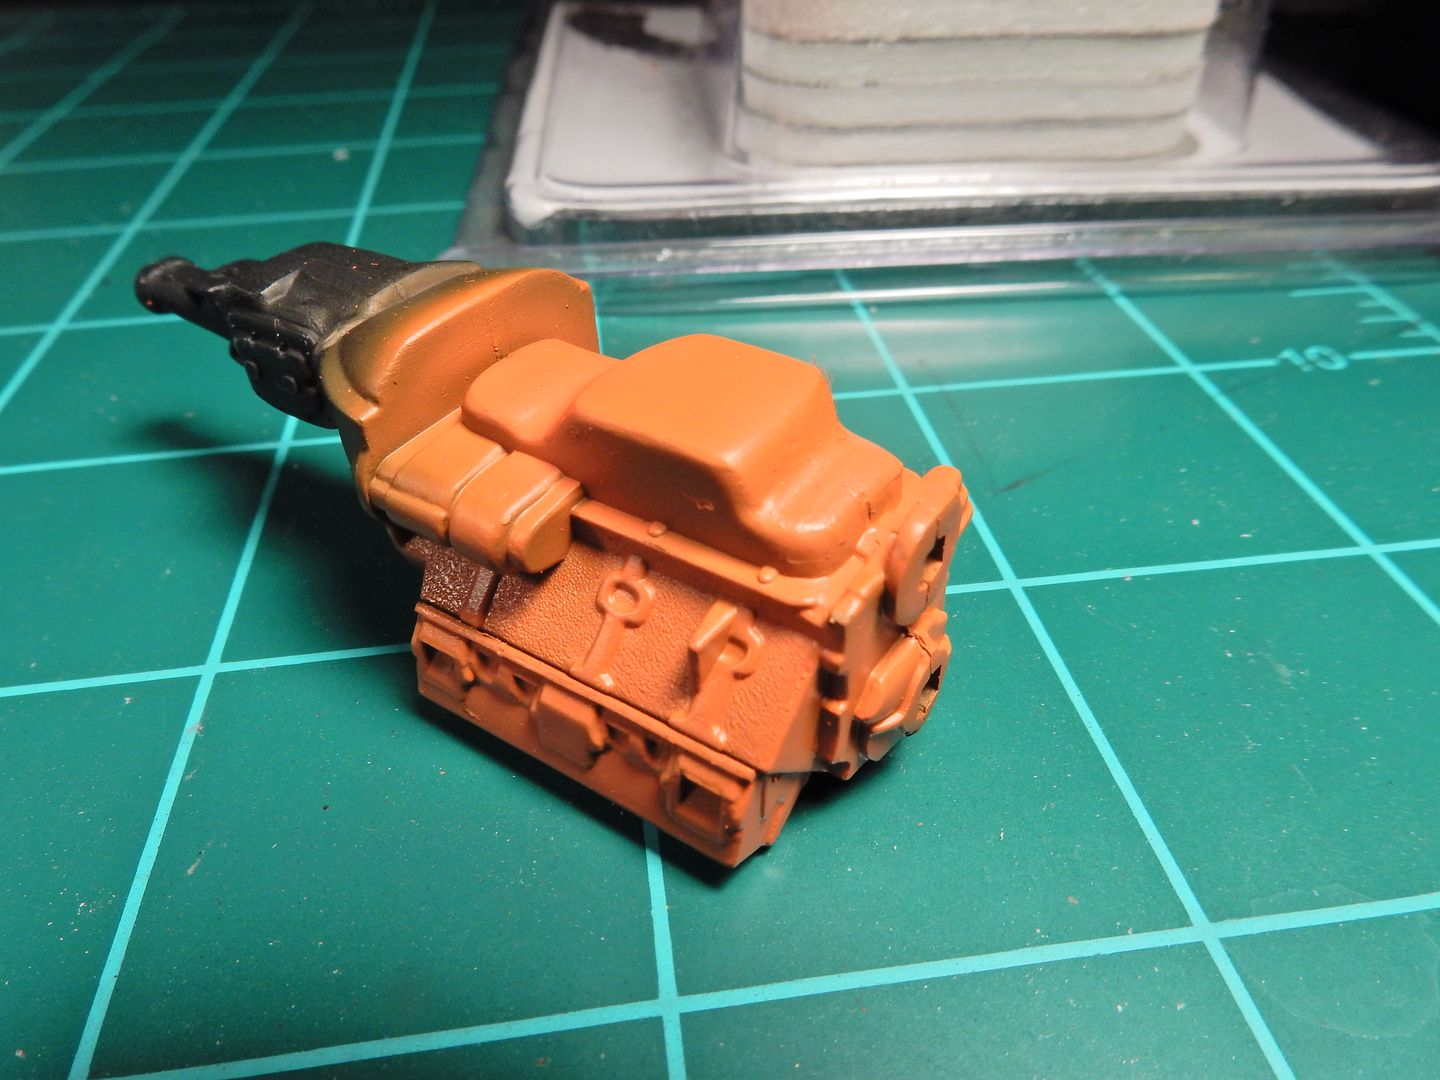
Another coat or two took care of that....and the rest of the seam lines.
 Rocker covers went from chrome to orange:
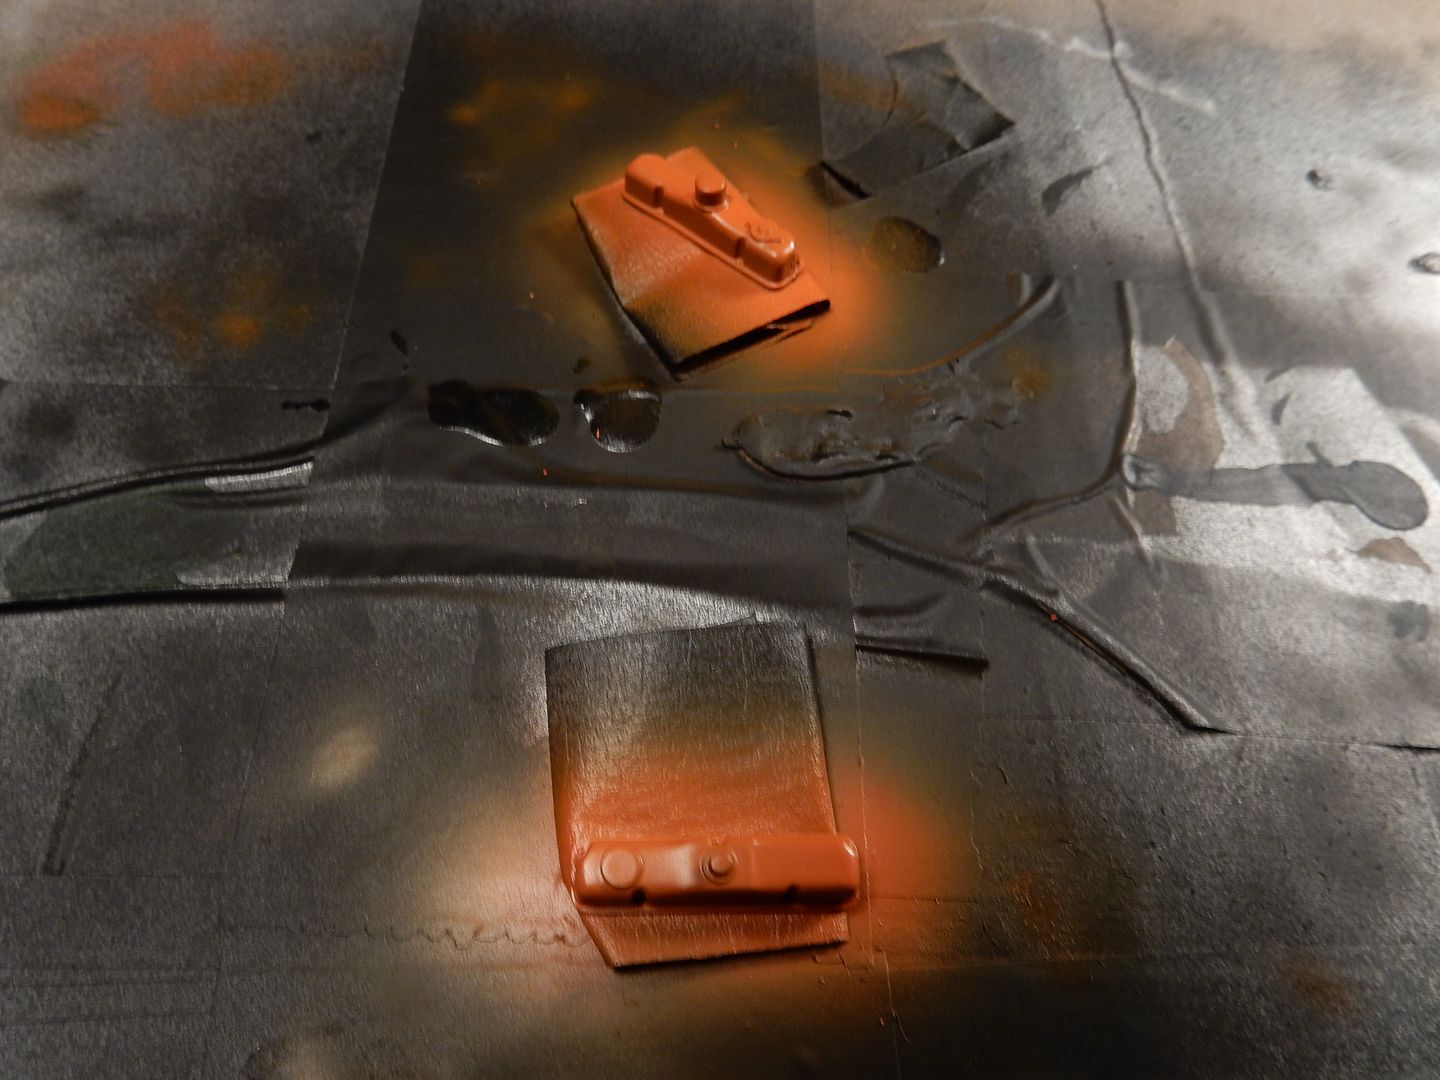
and then onto the engine:
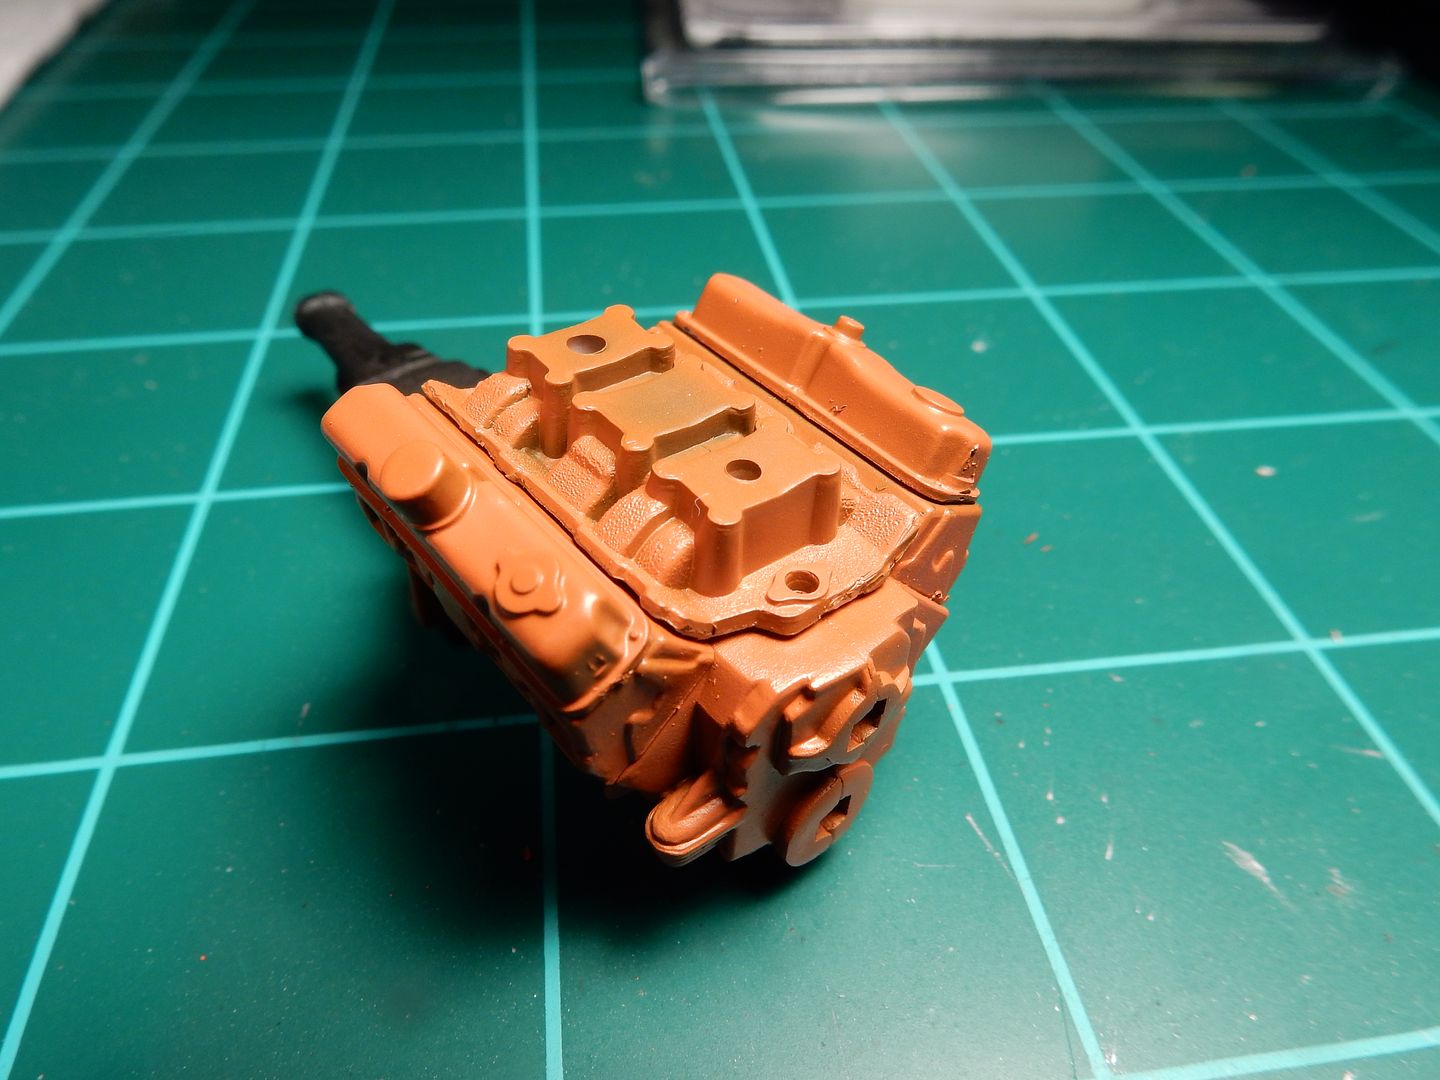
Here we are with a light wash applied and some of the details picked out:
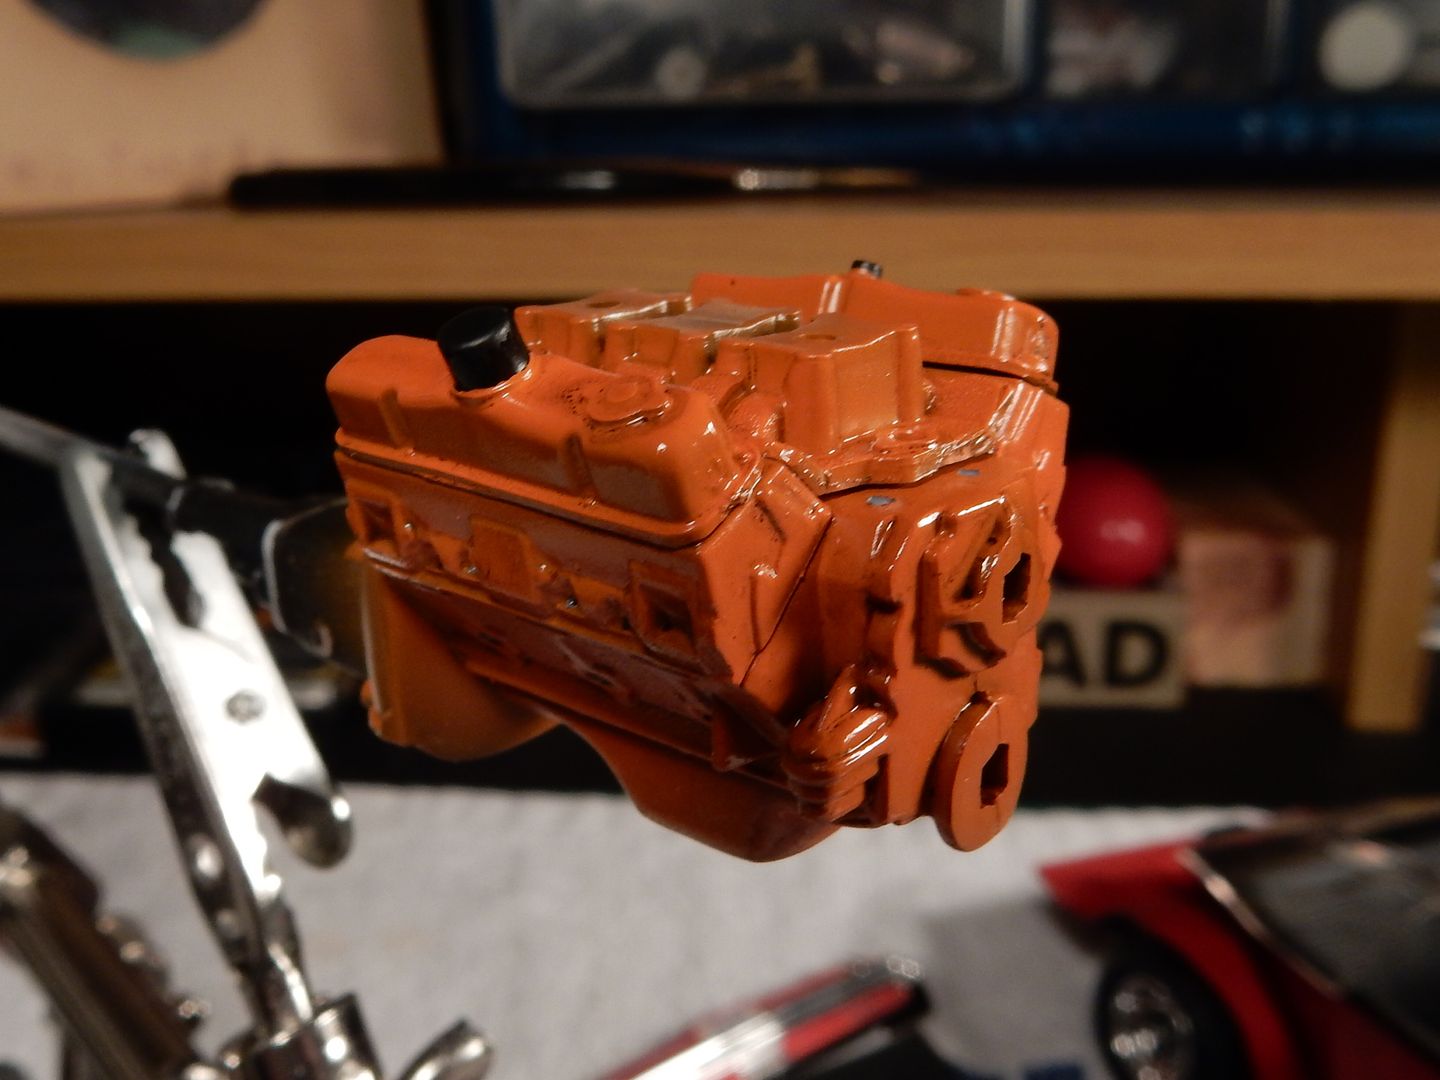
and the started painted ...
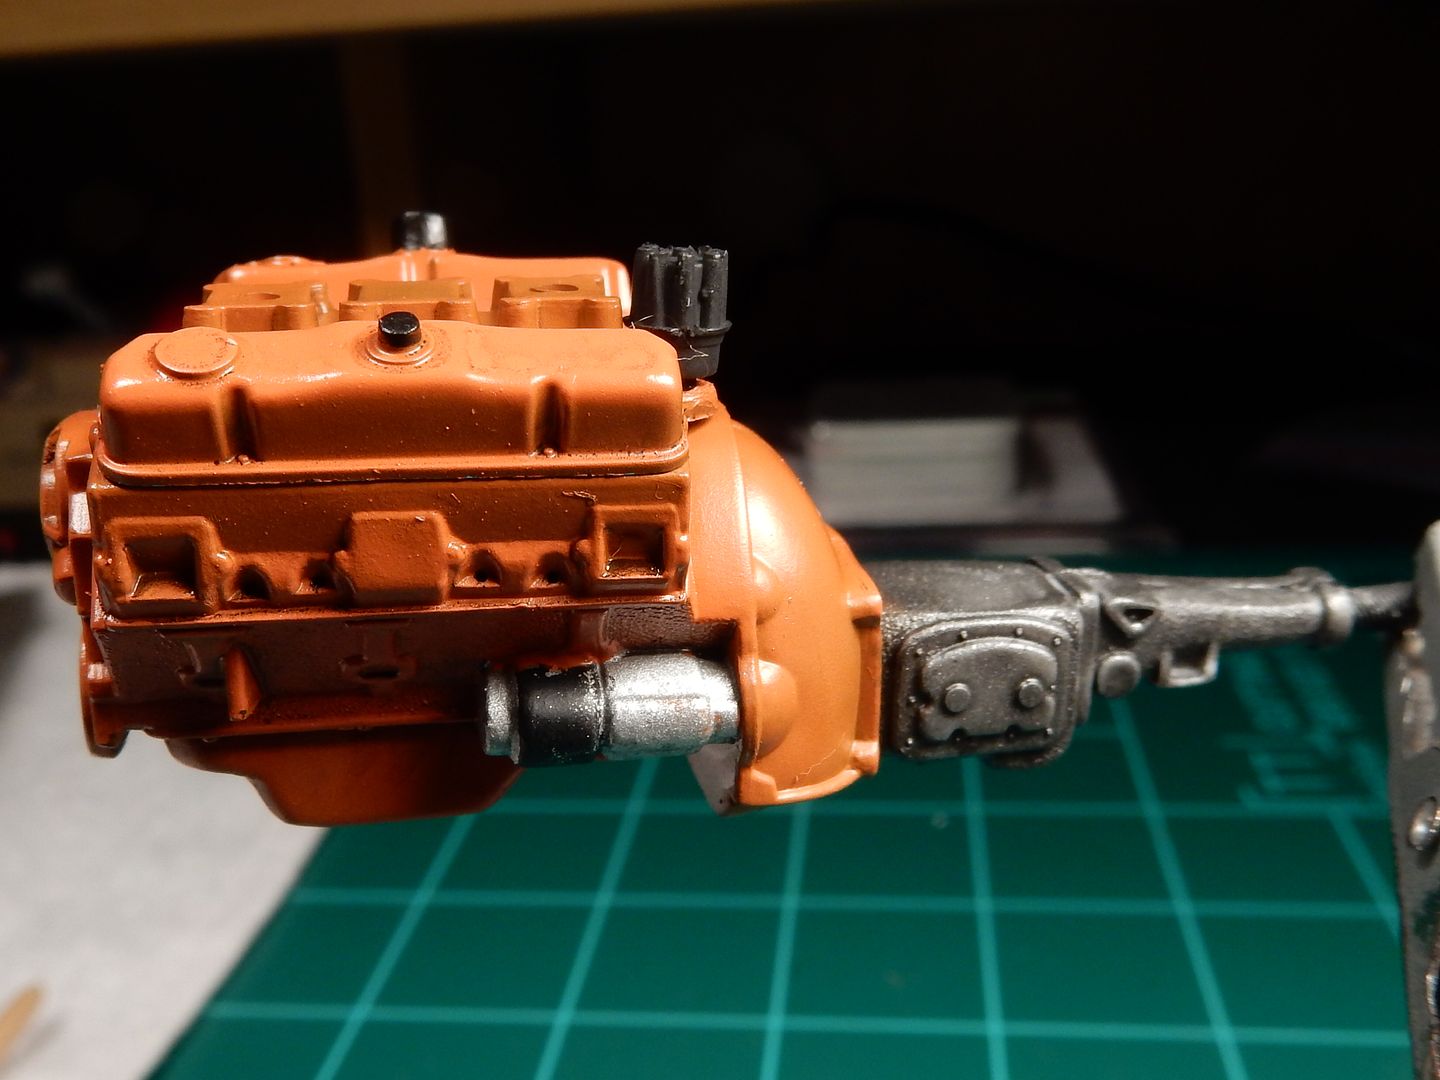
Belts, alternator and wiring installed:
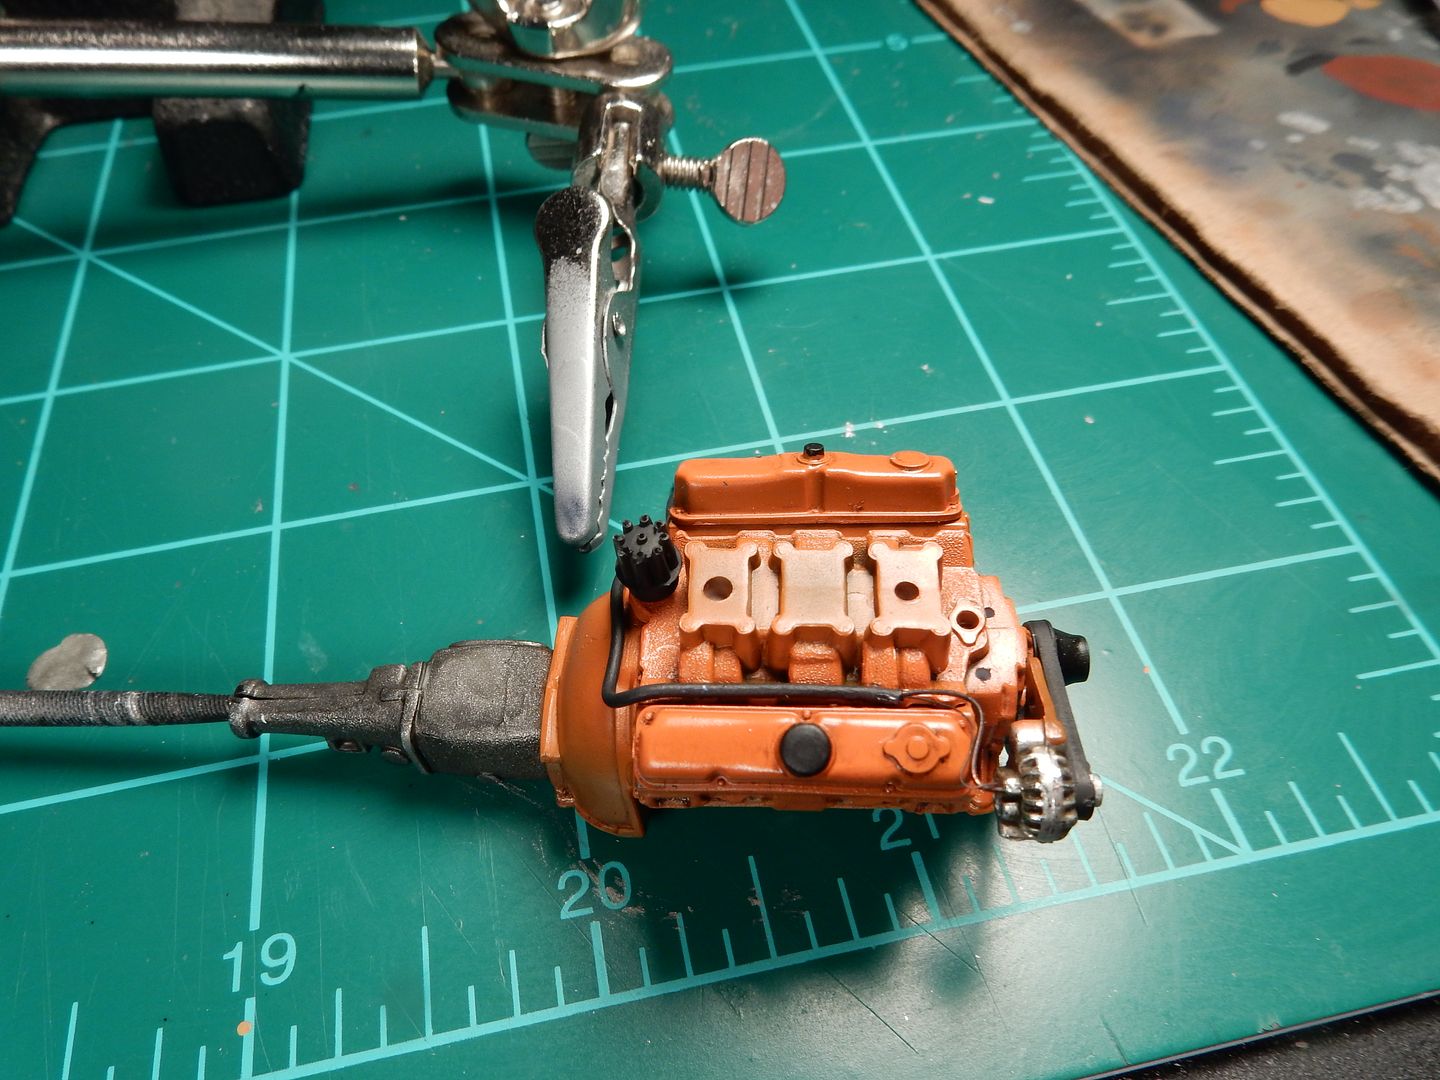
more on the way....


 Forum | Modelers Social Club Forum (proboards.com) 

  • Member since
    September 2013
Posted by Raven728 on Monday, January 5, 2015 6:49 PM

Nice drivetrain, Mustang. What color did you use on the transmission? I always use steel, but it never looks quite convincing enough to me, I like yours a lot better.

- Steve

  • Member since
    March 2012
  • From: Corpus Christi, Tx
Posted by mustang1989 on Monday, January 5, 2015 8:36 PM

Thanks Steve! The black primer is a two fold thing. I've found that with a darker primer I can replicate a steel look with a light coat of steel enamel paint so that the darker underlying color can bleed through a little. Works for me every time.


 Forum | Modelers Social Club Forum (proboards.com) 

  • Member since
    January 2014
Posted by Seabe on Wednesday, January 7, 2015 10:16 AM

Well I'll be darned... I do the required surgery to make a Ronnie car. Take out a new sprue to add the bit between the cowling halves to assist in getting the two halves (only joined in front) the correct width to fit the lower body. And there I see it! BLUE COWLING HALVES!

That means that the white was done as extras for the Monaco 77 version and added as an extra sprue... and the original bits should all be there! Which also means I can do a Jody Scheckter version! Which is now my mission. Well, first I must confirm that my deductions are in fact correct. But I'm so confident that the two blue halves have already been glued together.

Oh... now I must also find the 76 decals I KNOW I've ordered some time or the other. That may be a bit of a mission...

JOIN OUR COMMUNITY!

Our community is FREE to join. To participate you must either login or register for an account.

SEARCH FORUMS
FREE NEWSLETTER
By signing up you may also receive reader surveys and occasional special offers. We do not sell, rent or trade our email lists. View our Privacy Policy.