SEARCH FINESCALE.COM

Enter keywords or a search phrase below:

The 2015 /16 Red Hot and Rollin Automotive Group Build--Ended

121078 views
2225 replies
1 rating 2 rating 3 rating 4 rating 5 rating
  • Member since
    February 2013
  • From: Podunkville, USA
Posted by rommelkiste on Friday, January 9, 2015 8:10 PM

Man, you guys are cranking out some nice goodies!  Rob S. your T is looking super good!  Keep doing what you are doing and you are there.  You are right, there is not much to T wiring.  Just in case, I have attached a photo for you for some detail reference.  You might already have it.  

I will be back to Model A bashing pretty quick.  Got a few other things to tie down first.  Keep it up guys, some nice builds here.  

Nothing ever fits……..and when it does, its the wrong scale.

To make mistakes is human.  To blame it on someone else shows management potential. 


  • Member since
    January 2014
  • From: Toronto
Posted by Rob S. on Friday, January 9, 2015 9:02 PM

Thanks Rommel...great guide!

______________________________________________________________________________


On the Bench: Nothing on the go ATM

  • Member since
    January 2014
Posted by Seabe on Friday, January 9, 2015 9:45 PM

True to the build name, there's already some red hot action here! Well done, some truly impressive work!

Seems I have all the parts I require to adjust my build. So the P34 will become a Scheckter car! Think it will be the correct parts to depict the Sweden win (where they ran a 1-2). Having found all that, I still have to find some more time to actually build...  The later colourscheme (FNC sponsorship)  is nicer, but hey, it's not as if we're falling over South African F1 drivers!

  • Member since
    March 2012
  • From: Corpus Christi, Tx
Posted by mustang1989 on Saturday, January 10, 2015 5:07 AM

Lookin' forward to the progress Seabe!

I managed to make some progress in the engine bay today but will post updates to that (which reminds me...............that's another full scale update I need to do.............oh well, almost caught up anyways! lol) . For today's progress: A horn was not included in this kit but I robbed on from a Monogram 1970 Mustang kit that was molded to the core support. I was about to install it and just couldn't bring myself to do it. Here's what it initially looked like:

There's what it's supposed to look like:

So I cut the original mounting from the horn, cut a strip of PE and broke out the super glue:

and painted 'er up! It aint exact but it's a helluva lot closer than what it was.Wink


 Forum | Modelers Social Club Forum (proboards.com) 

  • Member since
    September 2013
Posted by Raven728 on Saturday, January 10, 2015 11:44 AM

I wasn't planning to start my build just yet, but last night I felt like opening the box and taking a peek. Then I figured I'd go ahead and wash the parts...you know...just in case. Wink Anyway, here's all the parts minus chrome & tires cause my bench isn't big enough!

Oh, and outstanding work, Mustang! You're really going all out on that build - it's great to see.

- Steve

  • Member since
    November 2013
  • From: Jerseyville, ON
Posted by elass0wyp0 on Saturday, January 10, 2015 11:52 AM

ewheeler454

It's funny that I also have the 66 Impala hat I was planning to do after the current two, so I'll move it down my build list and do it next year maybe so we're not doing the same thing hehehehe.

Eric - Don't not do it because of me.  I '66 Impala challenge you to a build off. lol  My red is Vallejo Scarlett red.  Vibrant. Spicy. lol   My red car is gonna kick your red car in the balls.  :)  I picked up that amt 69 Chevelle convertible.  You should check it out, it seems really nice, might fit the bill.  I would eventually like to do every year chevelle, I own a 72-my first car, bought it at 15.

Looking good everyone.  I gotta try that hairspray technique, really nice results.  Do you have to chip it or can you do a sun faded/worn area?  I've seen both chipping and wear done but never know if the hairspray method is the way to go about it.  I thought it might be cool to do 2 of the same kit, one show room, one sun bleached and worn out.  Like beginning and end of life.

Mustang - that thing is looking amazing.  I also went out at lunch and grabbed some of that dull-cote for my tires-great tip-thanks. 

I think I hurried through the 57 because I lost steam on it as I started to get further into it and noticing the weaker detail.  It didn't deserve that much over-effort in my opinion. You couldn't even display the hood open, it's closed or removed -why detail the engine.  I just selected and focused on refining a few weaknesses which are many but mainly getting paint to lay smooth and stay put, and trying out more bmf.  Last year I completed 3 kits.  Poorly, but completed.  Your engine pics and post have inspired me to try my hand at upping the detail under the hood.

Gordy

  • Member since
    January 2014
  • From: Toronto
Posted by Rob S. on Saturday, January 10, 2015 5:46 PM

got a whole bunch more done on the Model T:

This dash is actually kinda amusing after seeing Mustang's EPIC dash for his, oh, well, it was a 'slower' era, LOL:

The coil box to each plug, I used fly fishing wire. A bit tedious, but, I got 'em to settle down. Unfortunately, the plugs are just big thimble shaped masses on top of the head. Oh, well, it's ERTL:

Plugs and wires painted white with a hint of brass at each end to simulate the leads:

the hood was a one piece deal, so, I scored the insides and opened up the hood to the two-fold open position.The plastic is horribly thick, I know. I don't have a rotary tool or experience thinning out plastic parts Embarrassed:

The rad mounted easily and has a ledge to mount the hood:

Steering wheel, pedals and brake lever installed:

The ultra modern 'Starter', Stick out tongue:

And, the 'up-top' installed with window in back:

______________________________________________________________________________


On the Bench: Nothing on the go ATM

  • Member since
    March 2011
Posted by ewheeler454 on Saturday, January 10, 2015 6:05 PM

Wow,

I can see this is going to be a fun year! Getting a lot of god tips also. Bulds are looking most excellent!

Ok Gord, I accept your 66 Impala build off challenge hehehehehe. Years ago I owned (at different times) 2 69 Chevelles, a 70 and a 68. The 69 is by far my favorite body style. Wish I still had any of them. I also had a 66 Chevy 396 Caprice that was a scary ride hehehehe.

We're supposed to have warmer weather tomorrow so hopefully I can at least get some of the sanding done on the 51.

Mustang,

Can you add the REVELL 66 Impala to my list. Thanks.

L8TR,

Eric

  • Member since
    March 2012
  • From: Corpus Christi, Tx
Posted by mustang1989 on Saturday, January 10, 2015 6:49 PM

I'll get 'er goin for ya Eric! Update to this--The Impala is now added to the roster good sir! 

Rob S. : Lookin' good so far!! This build of yours is epic! Thanks for the vote of confidence though.

Steve and Gordy: Thank you both for the encouragement! 


 Forum | Modelers Social Club Forum (proboards.com) 

  • Member since
    January 2013
Posted by BlackSheepTwoOneFour on Saturday, January 10, 2015 8:21 PM

Heh - my "62 Impala SS ragtop starts an  Impala build-off. Nice...

  • Member since
    March 2012
  • From: Corpus Christi, Tx
Posted by mustang1989 on Saturday, January 10, 2015 8:40 PM

BS214:Got your entry changed in the intro. 

elass0wyp0: Got your new entry posted Gordy! We'll get your finished 57 in the completed builds pronto dude! 

Sorry it took me so long guys.


 Forum | Modelers Social Club Forum (proboards.com) 

  • Member since
    January 2014
  • From: Toronto
Posted by Rob S. on Saturday, January 10, 2015 10:29 PM

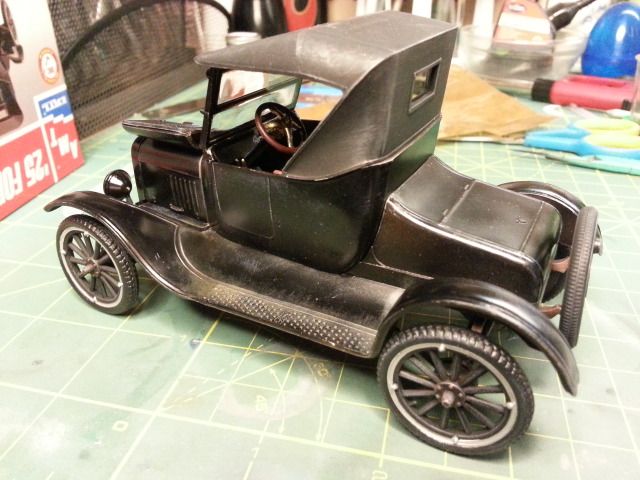
Callin' this one done! Not a great kit, but, I did have some fun with it. AMT ERTL is not, well, ahem...anyway, the final set of WIP shots.

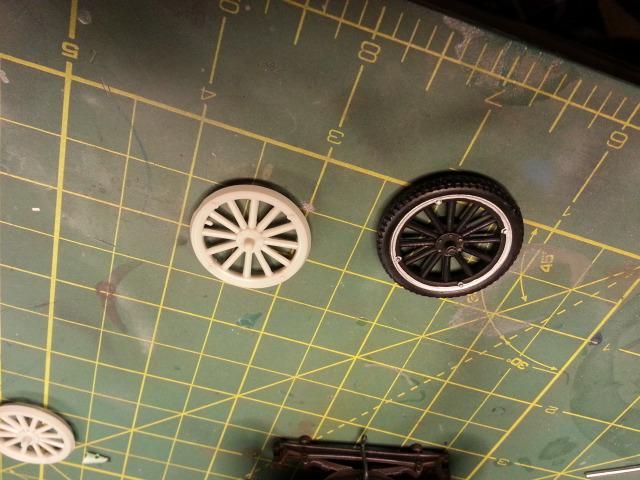
Before and After wheels/tires
Spare mounted
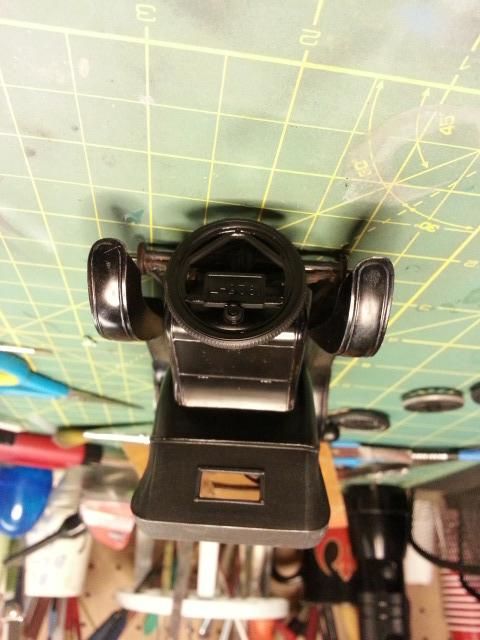
AND, I called this earlier this week...YUP, that tire is NOT making contact with the ground...gonna wrestle with it to get it to settle down
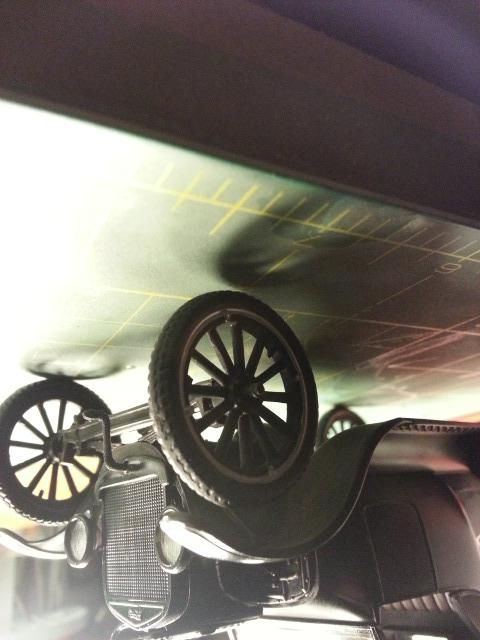
Ok, wheels on and settled down
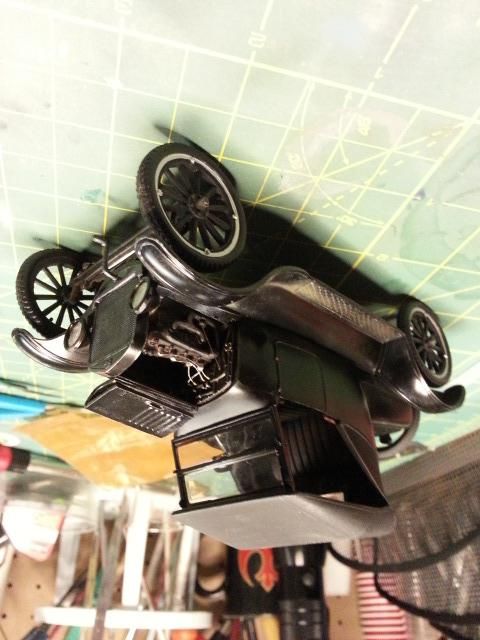
Um, yes, that rear tire IS making contact with the fender side Bang Head

Wow, super bright chromy axle!! Gonna have to subdue that
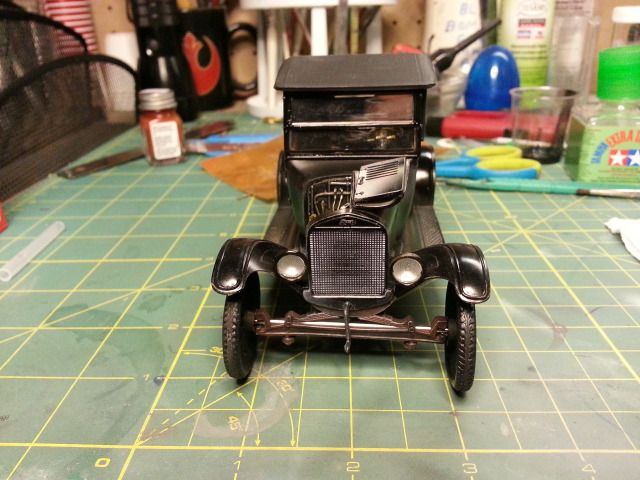
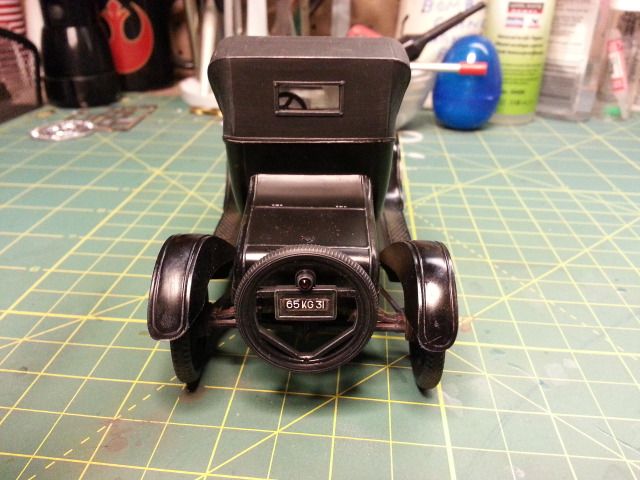
OK, this was a 'artistic licence' choice...I hated that molded licence plate, so, I covered it with a random set of number and letters...no hate mail plz...LOL...Stick out tongue

Subdued the bright white wires and plugs..they were too bright...
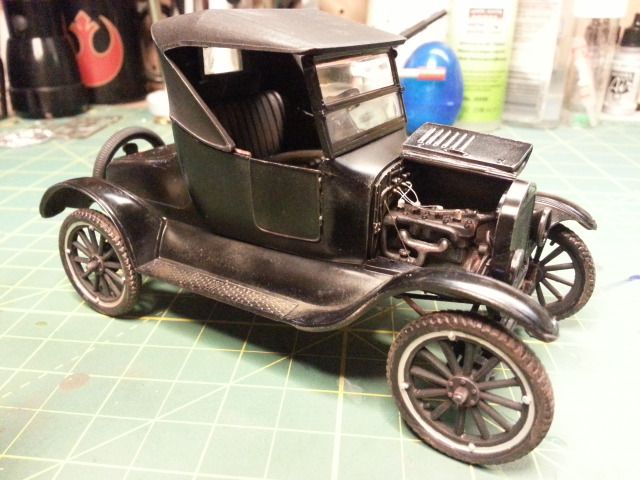
Tamed down that bright axle and dirty'd up the tires
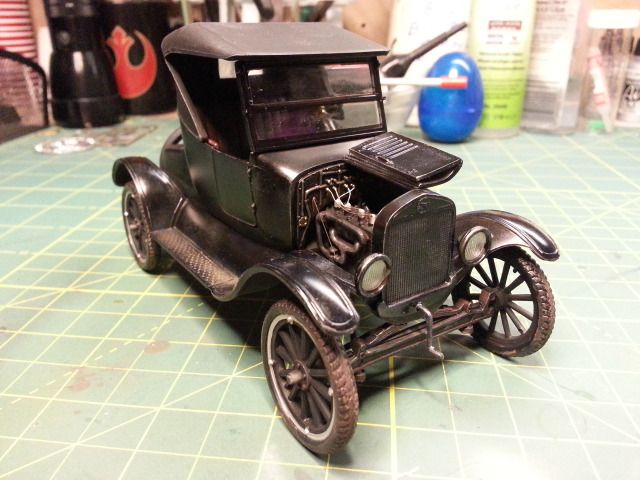
Well, that's it. Thanks for lookin' and have a great GB. I'll grab the 'hotty' badge (of course) and will continue to look in on the great progress happening here. This last shot is my 'neutral' background 'beauty shot'. Thanks again....and just a reminder that my car was intended to not be showroom, rather, 'well' used.

1/25 AMT Ertl Ford Model T Roadster

______________________________________________________________________________


On the Bench: Nothing on the go ATM

  • Member since
    March 2011
Posted by ewheeler454 on Saturday, January 10, 2015 10:34 PM

Rob,

That looks awesome! It looks like it could be rolling down the road. Congrats.

Thanks Mustang.

  • Member since
    January 2014
  • From: Toronto
Posted by Rob S. on Saturday, January 10, 2015 11:10 PM

Thanks ewheeler...it was fun! Cheers!

______________________________________________________________________________


On the Bench: Nothing on the go ATM

  • Member since
    March 2012
  • From: Corpus Christi, Tx
Posted by mustang1989 on Sunday, January 11, 2015 4:10 AM

Man! Like I was sayin' earlier, it's amazing folks can roll out  a great model like Rob did here in  a short time. Rob ..........this just looks fabulous man with the detail and especially the weathering. I want to thank you for being a part of this GB and would like to extend the invite to grab another kit and continue this fine level of work here. We'll get your pic up in the Completed Builds section on the front page here. Thanks again Rob ! Yes


 Forum | Modelers Social Club Forum (proboards.com) 

  • Member since
    January 2014
Posted by Seabe on Sunday, January 11, 2015 5:05 AM

Brilliant one Rob! Superb on the weathering and metal-look touches... love it!

  • Member since
    January 2013
Posted by BlackSheepTwoOneFour on Sunday, January 11, 2015 11:44 AM

Awesome job, Rob! You know, the last few summers, my wife and I like to go for walks in the summer with the dog and once in a while this old fella in his 70's drives his an old Model A through the neighborhood. One of these days this coming summer, I'm gonna stop and talk to him just to get a look at it and maybe ask for a ride on it. Always wanted to get a ride in an Model A. This time I may bring my son along too.

  • Member since
    January 2014
  • From: Toronto
Posted by Rob S. on Sunday, January 11, 2015 2:08 PM

My good friend at work has a Model A as well. I love riding in it. Everyone loves it and it always attracts a crowd!

______________________________________________________________________________


On the Bench: Nothing on the go ATM

  • Member since
    March 2011
Posted by ewheeler454 on Sunday, January 11, 2015 8:09 PM

Here is some of the progress I made on the 51 today.

I was able to sand the skirts and body smooth and then but filler over it. I used Tamiya putty for this.

Got the front seats welded together. After they were dry, I rounded the edges to get rid of the squared edges.

The rest of the work on the 51 was cleaning parts and some minor scribing on the interior panels where I plan to add chrome strips.

I also un-boxed the 66 Impala to get started on it. About all I did to it today was to scribe around all the doors and trunk, window trim, and side chrome.

I also have a set of resin cragers I ordered for it along with the photo-etch. I had already stripped the chrome before since I was planning to build it on the last GB but ran out of time.


I also plan to add a cowl induction hood later on in the build.

L8TR,

Eric

  • Member since
    January 2014
  • From: Toronto
Posted by Rob S. on Sunday, January 11, 2015 8:33 PM

Fantastic Eric...great progress

______________________________________________________________________________


On the Bench: Nothing on the go ATM

  • Member since
    January 2015
Posted by Freakshow12 on Monday, January 12, 2015 9:00 AM

I'm in with a 71 duster 340 or at least that's what the stripes say. Lol and a 67 camaro SS 396.  There may be one more later

  • Member since
    March 2012
  • From: Corpus Christi, Tx
Posted by mustang1989 on Monday, January 12, 2015 9:24 AM

Eric: Will look at your progress pictures when I get home later this evening. My work server is blocking the pics....... Dammit!

Fred: Welcome to the GB dude! Will get your builds entered in to the intro post. Say... what's the kit manufacturer for both of these kits?


 Forum | Modelers Social Club Forum (proboards.com) 

  • Member since
    January 2015
Posted by Freakshow12 on Monday, January 12, 2015 9:53 AM
Duster is Amt and camaro is revell
  • Member since
    March 2012
  • From: Corpus Christi, Tx
Posted by mustang1989 on Monday, January 12, 2015 10:01 AM

Got it!

Update:.........................and you're posted Fred!


 Forum | Modelers Social Club Forum (proboards.com) 

  • Member since
    January 2014
Posted by Seabe on Monday, January 12, 2015 11:32 AM

Aaah! Blood! Scalpel found finger... At least a good thing - it shows I've attempted doing something!

  • Member since
    March 2012
  • From: Corpus Christi, Tx
Posted by mustang1989 on Monday, January 12, 2015 11:47 AM

  Sorry to hear about that Seabe!!! No bleeding allowed! lol


 Forum | Modelers Social Club Forum (proboards.com) 

  • Member since
    January 2014
Posted by Seabe on Monday, January 12, 2015 11:57 AM

NOW you tell me the rules! Whistling Nothing serious, but will only progress tomorrow - a bit sensitive and always in the way - as always...

  • Member since
    March 2012
  • From: Corpus Christi, Tx
Posted by mustang1989 on Monday, January 12, 2015 12:35 PM

Seabe
NOW you tell me the rules! Whistling

I amended the original rule set to reflect the latest rule......Big Smile


 Forum | Modelers Social Club Forum (proboards.com) 

  • Member since
    March 2012
  • From: Corpus Christi, Tx
Posted by mustang1989 on Monday, January 12, 2015 1:58 PM

Ok...............I almost forgot the firewall build up to where I'm at now.

So we start with a blank azz firewall..........

and fellas, aside from a master cylinder, that's exactly what it was:

Then I measure the blower motor diameter (that I robbed from a more updated Revell Challenger kit) and  drill the holes for the heater hoses and blower motor:

and then I turned my attention to the firewall in the newer Revell Challenger kit I had in the stash.

This is what we start with:

and then cut the detail to be used from that and place it on a piece of sandpaper:

and go to work...............

and end up with usable detail pieces here:

Then we detail 'er out and Purdy it up a bit:

Just before installing this part I noticed that there was no black coating on the windshield wiper /vent cowl and along the sides of the front fender/ engine bay border

So we mask and paint that up and install the wiper motor and drop the blower motor in place as well.......

I decided to mount a voltage regulator on the firewall also. And while we're at it why not add some stenciling( I used stenciling from a 1/48 Eduard Hellcat-the casual onlooker will never notice)and electrical ckts to it too...


 That's it for now. Will be back for an update on the horn construction.....................Wink


 Forum | Modelers Social Club Forum (proboards.com) 

  • Member since
    July 2014
Posted by modelcrazy on Monday, January 12, 2015 2:03 PM

Mustang,

You totally blow me away with the detail you put into your builds. I'm oblivious to of all the stuff you notice that needs to be done.

Steve

Steve

Building a kit from your stash is like cutting a head off a Hydra, two more take it's place.


http://www.spamodeler.com/forum/

JOIN OUR COMMUNITY!

Our community is FREE to join. To participate you must either login or register for an account.

SEARCH FORUMS
FREE NEWSLETTER
By signing up you may also receive reader surveys and occasional special offers. We do not sell, rent or trade our email lists. View our Privacy Policy.