SEARCH FINESCALE.COM

Enter keywords or a search phrase below:

Going Big GB

34455 views
551 replies
1 rating 2 rating 3 rating 4 rating 5 rating
  • Member since
    July 2014
Posted by modelcrazy on Monday, February 9, 2015 5:17 PM

PANZERJAGER

Man that is one mean looking beast. It looks like the Mallet could deflect an 88 for sure. Too bad it get into service, I would have liked to see it's performance record.

Steve

Building a kit from your stash is like cutting a head off a Hydra, two more take it's place.


http://www.spamodeler.com/forum/

  • Member since
    December 2007
  • From: Eagle River, WI
Posted by PANZERJAGER on Monday, February 9, 2015 5:13 PM

 PANZERJAGER


  • Member since
    December 2007
  • From: Eagle River, WI
Posted by PANZERJAGER on Monday, February 9, 2015 5:08 PM

I'll post some more progress pictures, though nobody seems to care about armor in this GB!

Now onto the pictures;

I had to use many clamps due to badly warped parts;

I noticed there was a lot of "cast" texture missing when compared to the real thing.

after texturing

 PANZERJAGER


  • Member since
    April 2006
  • From: Denver, Colorado
Posted by waynec on Monday, February 9, 2015 4:00 PM

Rob S.

Hey Wayne, why not scratchbuild a Vögele Turntable?? The sheer epic-ness of that would be legendary!!

why not, everybody thinks i'm crazy anyway. Big Smile that would be a 4 foot square base

5star sells (or sold) a resin 1/72 one. i have seen it priced at $117 but not sure how far back that was. if i could find decent plans i would consider scratch building it for 1/35 just the platform and maybe a 45 degree wedge of track.

Никто не Забыт    (No one is Forgotten)
Ничто не Забыто  (Nothing is Forgotten)


  • Member since
    November 2008
  • From: Central Florida
Posted by plasticjunkie on Monday, February 9, 2015 1:53 PM

Rob

That's why I like the WNW kits so much as they are gorgeous as a plain OOB build. Fantastic job with that interior.

 GIFMaker.org_jy_Ayj_O


Too many models to build, not enough time in a lifetime!!

  • Member since
    July 2004
  • From: Sonora Desert
Posted by stikpusher on Monday, February 9, 2015 12:13 PM
Rob S.

I'll try that Stik...thanks. I have NO camera skills, lol. Just me and my Samsung cellphone....Embarrassed

I am in a similar bind. I am using a Kodak Easy share camera that is roughly 10 years old now, or occasionally my iPhone. Then whatever photo editing program I can muddle thru on whichever computer I upload the photos onto. No high speed photographer skills here...


F is for FIRE, That burns down the whole town!

U is for URANIUM... BOMBS!

N is for NO SURVIVORS...

       - Plankton

LSM


  • Member since
    January 2014
  • From: Toronto
Posted by Rob S. on Monday, February 9, 2015 11:31 AM

Hey Wayne, why not scratchbuild a Vögele Turntable?? The sheer epic-ness of that would be legendary!!

______________________________________________________________________________


On the Bench: Nothing on the go ATM

  • Member since
    April 2006
  • From: Denver, Colorado
Posted by waynec on Sunday, February 8, 2015 11:19 PM

hey Rob

looking good.

started working on freehand rails for low side gondola as prep for a 40" rail base for K-5. gondola may be attached to it t the end.

Никто не Забыт    (No one is Forgotten)
Ничто не Забыто  (Nothing is Forgotten)


  • Member since
    January 2014
  • From: Toronto
Posted by Rob S. on Sunday, February 8, 2015 9:54 PM

I'll try that Stik...thanks. I have NO camera skills, lol. Just me and my Samsung cellphone....Embarrassed

______________________________________________________________________________


On the Bench: Nothing on the go ATM

  • Member since
    July 2004
  • From: Sonora Desert
Posted by stikpusher on Sunday, February 8, 2015 8:32 PM

That is beautiful work sir. For better camera focus, try using a plain white piece of paper for your background. That cutting mat and all the hobby items in the background give the camera eye too many things to focus on. With the plain white paper background, the camera can focus on the intended item.


F is for FIRE, That burns down the whole town!

U is for URANIUM... BOMBS!

N is for NO SURVIVORS...

       - Plankton

LSM


  • Member since
    January 2014
  • From: Toronto
Posted by Rob S. on Sunday, February 8, 2015 8:27 PM

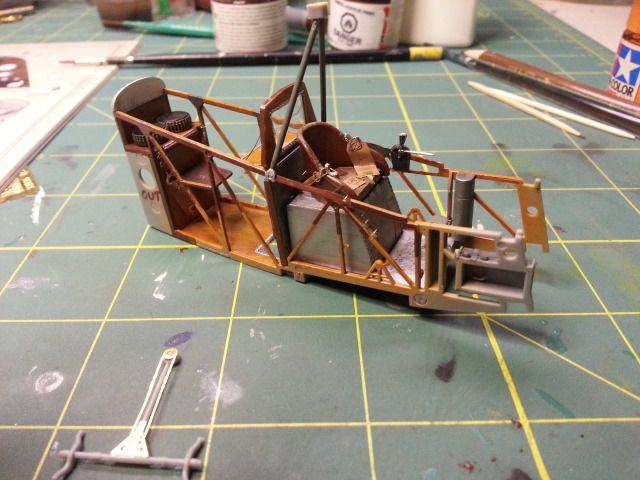
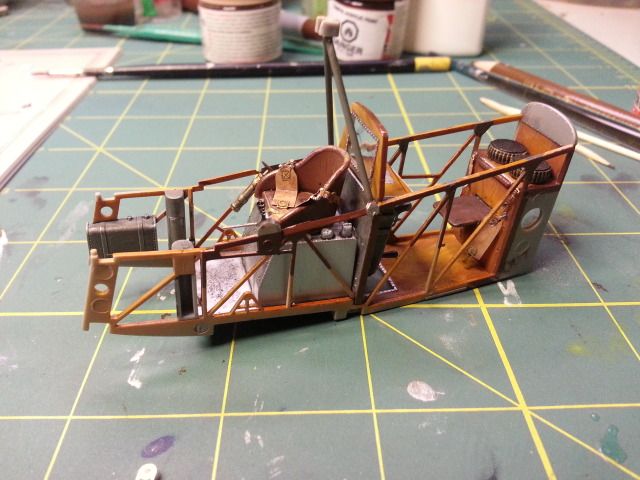
A bit of progress today....slowly getting there. I've spent more time on this first page of the build than I did on the entire last build I did Indifferent. WNW planes are absolutely superior in every way, hands down.

Anyway...

the side rails and PE seatbelts installed. There is some woodgraining going on on each thin piece of wood, but, couldn't get the camera to focus on it, but, it's there Embarrassed

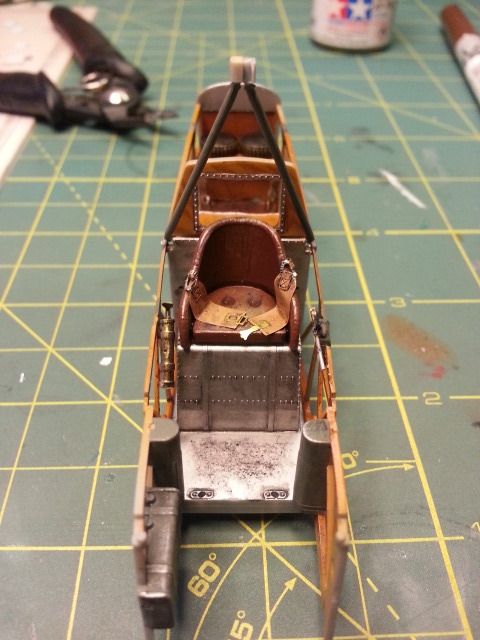
Here's the front seat and 'grungy' floor (stippled artist oil sludge) beneath the pilot's seat. I painted the seatbelts buff and did a light brown filter to create a few different hues. I left the brass of the PE raw as it really pops as real brass hardware would:
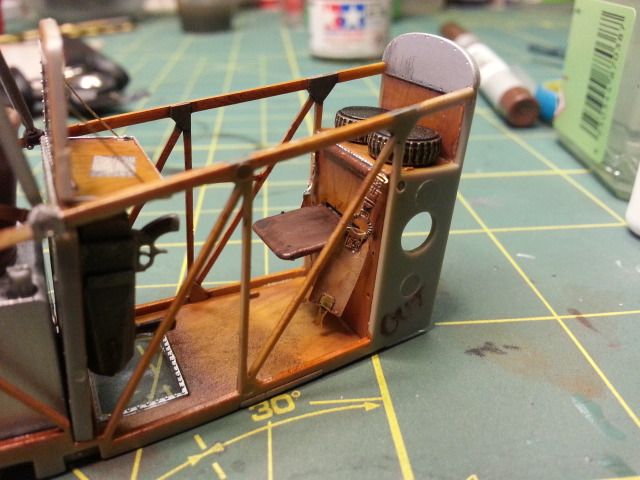
Here's the rear seat. You can see the map on the navigator table and his seatbelts. You can see the colour variations on the rear belt and the oil wash to bring out the highs and lows. That 'thing' with the trigger under the table is the reconnaissance camera the guy in the back can use through the view port just beneath the camera:
And, the flight yolk with PE pully and cable's built in. Nice touch WNW.
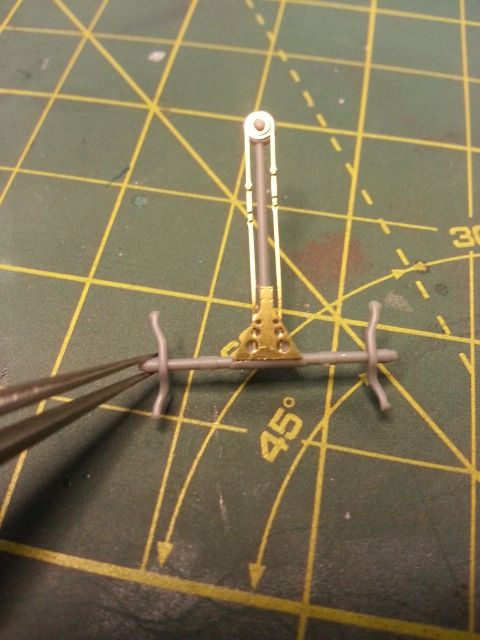
Anyway, these builds are exhausting when you pour half a weekend into 'em Sleep. They, do, however, deserve the attention as, previously mentioned, the premiere model company in the world right now, IMHO Bow Down

Not gonna lie, I hope my PE cockpit detail set for my 1/72 Crusader comes in this week for a break from this monster!! Many more hours needed to string up everything and install all the flight controls!!

______________________________________________________________________________


On the Bench: Nothing on the go ATM

  • Member since
    January 2014
  • From: Toronto
Posted by Rob S. on Sunday, February 8, 2015 12:52 PM

goldhammer

Rob-  you are really doing that kit justice.

thanks goldhammer...too bad all that work gets sealed up inside the fuselage Indifferent

______________________________________________________________________________


On the Bench: Nothing on the go ATM

  • Member since
    July 2004
  • From: Sonora Desert
Posted by stikpusher on Sunday, February 8, 2015 12:42 PM

Theuns, I do have a BTR-70 that I barely started for another GB a couple years back, then sidelined. I might just throw that one in here too. But I need to do a tank...


F is for FIRE, That burns down the whole town!

U is for URANIUM... BOMBS!

N is for NO SURVIVORS...

       - Plankton

LSM


  • Member since
    August 2014
  • From: Willamette Valley, Oregon
Posted by goldhammer on Sunday, February 8, 2015 11:40 AM

Rob-  you are really doing that kit justice.

Dre
  • Member since
    June 2007
  • From: here, not over there
Posted by Dre on Sunday, February 8, 2015 10:51 AM

Rob- mighty fine painting happening there, it looks real.   And thanks for the tutorial on getting a realistic wood grain!   That kit looks like it will keep you busy for quite some time.

I've spent the last hour digging Hind detail pics from the internets- PrimePortal.net has plenty to choose from if anyone else decides to build one of these things....   from the photos I've culled, it is apparent that Trumpeter decided to completely forego the avionics racks that are found between the cockpit and cargo area so I have to do something about that.   That, and pretty much all of the other interior details not found inside the cockpit.   At least they got the quilting on the cargo bay ceiling right.

I don't really want to paint the cockpit that lovely Russian bright blue/green color, but since this is a Mi-24 and not an upgraded Mi-35, I guess I'm going to do it.  (dammit)

Stik-  do it, do it, do it!   Build a field-modified BTR or upgraded BMP.    Lots of prime movers in use right now as well.

  • Member since
    April 2010
Posted by Theuns on Sunday, February 8, 2015 10:31 AM

Hey Stik, how about a nice BMD  or BTR/60/80 ??We had them a dime a dozen here in Angola and Mozambique  :-)

Theuns

  • Member since
    July 2004
  • From: Sonora Desert
Posted by stikpusher on Sunday, February 8, 2015 12:41 AM

Man there are some nice builds going on in here! Great stuff! But I must now confess to a "Doh!!!" moment regarding this GB... I did not realize until this morning that this GB was open to other genres besides aircraft. Obviously I have not been keeping up to date, nor reading the rules here... Some co host... No matter, I will still finish my Scooter for this GB and if time permits, perhaps an armor build strictly for here too... All this stuff in the Ukraine and some gazing over my shelves at home has me hankering to do some soviet stuff... I'm feeling a bit nostalgic for commie AFVs...


F is for FIRE, That burns down the whole town!

U is for URANIUM... BOMBS!

N is for NO SURVIVORS...

       - Plankton

LSM


  • Member since
    April 2010
Posted by Theuns on Sunday, February 8, 2015 12:19 AM

I will be defenately using that plywood tecnicue, thanx:-)

Now I just need to find the 0.3mm drillbits to do the rigging for the Se5.

The only place I know of needs to get stock in again....

Theuns

  • Member since
    December 2012
Posted by flyerduke on Saturday, February 7, 2015 10:19 PM

Rob, your work so far looks amazing.

  • Member since
    January 2014
  • From: Toronto
Posted by Rob S. on Saturday, February 7, 2015 9:05 PM

Just a bit more for tonight. Pretty much all for now...gonna be back at it tomorrow.

The rear gunner's map table, reconnaissance camera and storage case:

And, spare MG canisters:

______________________________________________________________________________


On the Bench: Nothing on the go ATM

  • Member since
    December 2007
  • From: Eagle River, WI
Posted by PANZERJAGER on Saturday, February 7, 2015 4:16 PM

been some nice stuff on here so far.

like the "plywood" tutorial.

here are more progress pics on my T28 tank build;

now onto finishing the tracks.

 PANZERJAGER


  • Member since
    July 2014
Posted by modelcrazy on Saturday, February 7, 2015 4:04 PM

Thanks for the link PJ,

I spent over and hour trying to find the Fokker you built for the Monogram build last night. I remembered you gave a quick lesson on how you did the wood grain. I finally found it.

Rob,

You wood looks fantastic. Kinda like a pine wood.

Steve

Building a kit from your stash is like cutting a head off a Hydra, two more take it's place.


http://www.spamodeler.com/forum/

  • Member since
    November 2008
  • From: Central Florida
Posted by plasticjunkie on Saturday, February 7, 2015 3:24 PM

Thanks Theuns

Rob

I'll say it again, great wood effect.

 GIFMaker.org_jy_Ayj_O


Too many models to build, not enough time in a lifetime!!

  • Member since
    January 2014
  • From: Toronto
Posted by Rob S. on Saturday, February 7, 2015 1:50 PM

So, here's the sequence for painting a plywood surface. I start off painting the surface with XF-74 Wooden deck tan. I set my pressure on my compressor quite high and mix with 99% iso to ensure the surface will be very flat and even a bit 'powerdery'. This will allow the Prismacolour brown pencil to adhere to the surface. I have a Googled pic of unfinished plywood displayed at my workbench on my IPad.

I use a constant motion with the pencil. I am not 'drawing' on the pattern, it's for lack of a better term, scribbling. This will allow for the grainyness of the pattern.

Clear orange gives the piece that varnished look. The orange also reacts with the pencil to darken and give it some depth.

Here it is now with a subtle filter around the perimeter and nooks and crannies. I like this because it gives the illusion that someone works in the centre most part of the surface, thus more wear and the lighter colour.

And final Future coat which this photo can't show. 

Here's the final product. I then washed it with oil and even dragged some onto the surfaces to 'grime' it up slightly, but, not too much. That's pretty much it....

______________________________________________________________________________


On the Bench: Nothing on the go ATM

  • Member since
    April 2010
Posted by Theuns on Saturday, February 7, 2015 11:51 AM

Guys the front page has the 2 badges, you are welcome to choose one for your build.

Plasticjunkie the roster has been updated

Theuns

  • Member since
    January 2014
  • From: Toronto
Posted by Rob S. on Saturday, February 7, 2015 10:55 AM

See, now, plastic, you've mastered the oil streaking techique...I can't do it. Tried many times and am always disappointed.

______________________________________________________________________________


On the Bench: Nothing on the go ATM

  • Member since
    November 2008
  • From: Central Florida
Posted by plasticjunkie on Saturday, February 7, 2015 10:41 AM

Rob

I've been wanting to get that kit but the price tag scares me a bit so I got a 1/48  Eduard at a show for a few bucks. A while back I grabbed a WNW SE-5 at a show for $40. Maybe I will eventually get lucky with the 1/32 HB.

Steve

Yes the Mustang had a plywood floor believe it or not. I just brushed some MM acrylic wood color then used burnt umber artists oil to streak it as I did with the Polar lights Guillotine I built a while back here cs.finescale.com/.../162000.aspx

 GIFMaker.org_jy_Ayj_O


Too many models to build, not enough time in a lifetime!!

  • Member since
    July 2014
Posted by modelcrazy on Saturday, February 7, 2015 8:37 AM

PJ,

I didn't realize it, but the floor of the P-51 was wood. I will be trying your method of wood grain and see if I can get it right.

I may have questions for you.

Steve

Steve

Building a kit from your stash is like cutting a head off a Hydra, two more take it's place.


http://www.spamodeler.com/forum/

  • Member since
    January 2014
  • From: Toronto
Posted by Rob S. on Saturday, February 7, 2015 8:14 AM

Thanks plastic...this H-B is probably the most unusual plane design out there..I had to have it!

______________________________________________________________________________


On the Bench: Nothing on the go ATM

  • Member since
    November 2008
  • From: Central Florida
Posted by plasticjunkie on Saturday, February 7, 2015 7:43 AM

Rob

Just saw your woodwork and excellent job on that graining. I also love that WNW model. Looks like you have your hands or rather your bench full!

 GIFMaker.org_jy_Ayj_O


Too many models to build, not enough time in a lifetime!!

JOIN OUR COMMUNITY!

Our community is FREE to join. To participate you must either login or register for an account.

SEARCH FORUMS
FREE NEWSLETTER
By signing up you may also receive reader surveys and occasional special offers. We do not sell, rent or trade our email lists. View our Privacy Policy.