SEARCH FINESCALE.COM

Enter keywords or a search phrase below:

Battle of Britain GB 2006 - 1 May to 31 Oct 06

55080 views
1038 replies
1 rating 2 rating 3 rating 4 rating 5 rating
  • Member since
    February 2003
  • From: Montreal, Quebec, Canada
Posted by superbear on Thursday, October 19, 2006 11:16 AM

Hi Tom I'm glad to hear all is well.  It does seem like we've all been hit by the modeling slump to various degrees, just as long as your doing ok thats the main thing the urge to build will return ...eventualy.


Cheers

Bear 

Marc
  • Member since
    December 2002
  • From: Reno, NV
Posted by espins1 on Thursday, October 19, 2006 11:25 AM

Hey guys, I know it's not much to look at yet but the Spitfire has been primered!  Tonight I do the preshading, and tomorrow begins the camo. 

Scott Espin - IPMS Reno High Rollers  Geeked My Reviews 

  • Member since
    February 2003
  • From: A Spartan in the Wolverine State
Posted by rjkplasticmod on Thursday, October 19, 2006 2:58 PM

Looks like a nice clean build Scott.

Regards,  Rick

RICK At My Age, I've Seen It All, Done It All, But I Don't Remember It All...
  • Member since
    December 2002
  • From: Reno, NV
Posted by espins1 on Thursday, October 19, 2006 3:25 PM

Here's a question for those of you with multi-colored camo experience.  I remember seing a build write up recently where the guy painted the green and brown upper surfaces first, then masked and sprayed the light gray underside last.  I know the conventional wisdom is to start with the light colors, and work your way to the dark, but there seems to be some wisdom to this approach.  I can see the obvious benefit of only worrying about the camo masking on the upper surfaces, overspray on the underside be damned, then doing a clean mask all the way around to then spray the underside. 

Any thoughts on this?

Scott Espin - IPMS Reno High Rollers  Geeked My Reviews 

  • Member since
    August 2004
  • From: Nowhere. (Long Island)
Posted by Tankmaster7 on Thursday, October 19, 2006 3:38 PM
either way works. it's just a matter of personal preference. I personally like to spray the bottom first, so i dont have to worry about overspray onto the complicated topside camo.
-Tanky Welcome to the United States of America, a subsidiary of Exxon Mobil Corporation, in partnership with Halliburton. Security for your constitutional rights provided by Blackwater International.
  • Member since
    July 2004
  • From: SETX. USA
Posted by tho9900 on Thursday, October 19, 2006 8:08 PM
 wing_nut wrote:

 I think about 3 1/2 years ago when I had my PE…Pulmonary Embolism… not Photo Etch ;o)… nearly bought the farm.  I would have disappeared from here too. 

Marc - wow!!  yeah I know what a PE is, I was a Respiratory Therapist in a past life... we're very lucky to have you modeling with us!!!  Those things are quick and can be very deadly!!!

ALL:  Thanks for your worm... er... warm words... yeah maybe this is a good sign, I'll get back into modeling in reverse... after my almost 20 yr hiatus I started building, then bumped into this place while researching an aircraft... maybe I'll start back here and that will get me modeling again!!!  Good to see all of you, I haven't had time to go back and look at all your builds yet.  I have the 80-90% complete He-111 in a cabinet protecting it from the dust and if I can, I'll get pics even though I haven't finished it yet... my "almost" finished offering for the build...

Take care and thanks for being understanding!!!

---Tom--- O' brave new world, That has such people in it!
  • Member since
    July 2004
  • From: SETX. USA
Posted by tho9900 on Thursday, October 19, 2006 8:10 PM
Scott - I am also a follower of the bottom color then mask and do the camo for the top.  After ALL that masking for that disruptive pattern, Sky wouldn't look too good misted over it...  But it would be interesting to see how it works for you if you try it... who knows maybe WE had the wrong idea!!!
---Tom--- O' brave new world, That has such people in it!
  • Member since
    December 2002
  • From: Reno, NV
Posted by espins1 on Thursday, October 19, 2006 8:24 PM

 tho9900 wrote:
Scott - I am also a follower of the bottom color then mask and do the camo for the top.  After ALL that masking for that disruptive pattern, Sky wouldn't look too good misted over it...  But it would be interesting to see how it works for you if you try it... who knows maybe WE had the wrong idea!!!

Normally I do the same as you, bottom first, then upper.  But here is what intrigues me about doing it in reverse.  Spray the upper brown, piece of cake all one solid color, no masking (other than cockpit).  Mask the camo pattern on the upper parts and spray the green.  Again, piece of cake although the masking will take some time.  Then, mask all the camo'd parts and one quick spray for the underside and I'm done.  In terms of masking it might be easier I would think, unless my logic is flawed.  I'm going to try to find that build I got the idea from and review that again.

Anyone see any issues with trying that?  I know one of you mentioned the posibility of overspray on all the nicely camo'd stuff, but if I just take my Tamiya tape, mask the edge between the upper camo and the lower, then us the super wide tape I have to mask the wings, sides and top, then there shouldn't be any risk.. in theory. 

I suppose either way is the same situation.  Going to get started on the camo in about an hour.  Smile [:)]


Scott Espin - IPMS Reno High Rollers  Geeked My Reviews 

  • Member since
    February 2003
  • From: A Spartan in the Wolverine State
Posted by rjkplasticmod on Thursday, October 19, 2006 9:45 PM

Either way works, but I always paint the lighter colors first, which is almost always the bottom.  Some night fighter exceptions, & there I paint the bottom black last.

Regards,  Rick

RICK At My Age, I've Seen It All, Done It All, But I Don't Remember It All...
  • Member since
    December 2002
  • From: Reno, NV
Posted by espins1 on Friday, October 20, 2006 9:58 AM

I found where I got that idea from.  It's in Osprey's "Modeling the Messerschmitt Bf109 B/C/D/E."  There was a write up on building an E and they painted the gray and green camo first so that they could then mask it and paint the sides lichtblau.  On that particular scheme the blue goes pretty high on the fuselage so it allowed them to have a nice, clean straight edge between the green/gray camo and the light blue.

I did my preshading last night.  Camo work begins tonight.

Scott Espin - IPMS Reno High Rollers  Geeked My Reviews 

  • Member since
    August 2004
  • From: Nowhere. (Long Island)
Posted by Tankmaster7 on Friday, October 20, 2006 4:10 PM
GOTT IM HIMMEL!!!!!!!!!!!!!!!!!!!

Tom, you've been a long time gone.

We've missed ya.

On the other hand, I'm glad to hear im not the only one having trouble building... Evil [}:)]
-Tanky Welcome to the United States of America, a subsidiary of Exxon Mobil Corporation, in partnership with Halliburton. Security for your constitutional rights provided by Blackwater International.
  • Member since
    December 2002
  • From: Reno, NV
Posted by espins1 on Friday, October 20, 2006 9:20 PM
Hey gents, I just sprayed the underside of my 1/48 Tamiya Spitfire Mk. 1. I went for a subtle pre-shade on this one, and plan on weathering it up pretty good if time allows. The Dark Earth goes on tomorrow.

Scott Espin - IPMS Reno High Rollers  Geeked My Reviews 

  • Member since
    February 2003
  • From: A Spartan in the Wolverine State
Posted by rjkplasticmod on Friday, October 20, 2006 9:34 PM

Looking good Scott.

Regards,  Rick

RICK At My Age, I've Seen It All, Done It All, But I Don't Remember It All...
  • Member since
    September 2004
  • From: Vernon, BC, Canada
Posted by razordws on Friday, October 20, 2006 11:06 PM
Looks great Scott! Thumbs Up [tup]

Dave

  • Member since
    July 2003
  • From: Bicester, England
Posted by KJ200 on Saturday, October 21, 2006 11:12 AM
Scot, nice progress on the Spit.

Like everyone else, I've always gone the lightest colour first route, which is where my Emil is at the moment.

Tidied up all the little defects earlier in the week, and spent this afternoon re-applying the RLM65 to pretty much the entire airframe.

I've also lightented the centre of each panel to start the weathering process.

I'll post some pics tomorrow, probably after the RLM02 goes on.

I'm going for Galland's machine, mainly because it's the simplest camo scheme in the box, and I can therefore finish it by next week.

Karl


Currently on the bench: AZ Models 1/72 Mig 17PF

  • Member since
    December 2002
  • From: Reno, NV
Posted by espins1 on Saturday, October 21, 2006 11:51 AM
Thanks guys, getting ready to spray the dark earth as we speak.  I'm going to try some new techniques, hopefully they'll work out.  I'm going to try lightening the brown a tad after I get the basecoat on to create variations in the color for a more weathered effect.  I hope it works the way I want it to.  Smile [:)]

Scott Espin - IPMS Reno High Rollers  Geeked My Reviews 

  • Member since
    December 2002
  • From: Reno, NV
Posted by espins1 on Saturday, October 21, 2006 2:55 PM
I masked off the sky portions of the Spit and sprayed the Dark Earth.  The lighting in the picture doesn't remotely capture the subtle preshading or the post shading.


Scott Espin - IPMS Reno High Rollers  Geeked My Reviews 

  • Member since
    September 2004
  • From: Vernon, BC, Canada
Posted by razordws on Saturday, October 21, 2006 9:16 PM
Looking great Scott.  Keep at it!

Karl, lets see some pics!!

The Italian contribution is getting mired (lierally) in the mud of on going home renovations and work commitments but I hope to have some progress pics soon.  I doubt it will be finished by the end of the month.

Dave

  • Member since
    February 2003
  • From: A Spartan in the Wolverine State
Posted by rjkplasticmod on Saturday, October 21, 2006 10:25 PM

Looks good Scott.

Regards,  Rick

RICK At My Age, I've Seen It All, Done It All, But I Don't Remember It All...
  • Member since
    July 2003
  • From: Bicester, England
Posted by KJ200 on Sunday, October 22, 2006 11:39 AM
Scott, the Spit is looking good, and not far from finished by the look of things.

Dave, as requested pics.....


As you can see I've gone for the mask pretty much everything route! Too many overspray incidents, and it's not as if there is that much tape required on a 1/72 109!

The panel lightening looks a little OTT in the photos, but that is due to the lighting and the Future top coat, which always seems to exagerate differences in shade.

OK brain fade on my part, is it RLM 70 or 71 for the final green.

Hate Tamiya instructions, why cant they just quote RLM colours!

The forward part of the canopy is a complete loss after my over exuberant sanding, must not watch TV while sanding! So I've ordered a new Squadron vac form one, which will hopefully appear before next weekend!

Karl


Currently on the bench: AZ Models 1/72 Mig 17PF

  • Member since
    September 2004
  • From: Vernon, BC, Canada
Posted by razordws on Sunday, October 22, 2006 1:59 PM
Thanks for the pics Karl, looks great!  Thumbs Up [tup]  I believe it is RLM 71/02 for the upper camo.

Dave

  • Member since
    July 2003
  • From: Bicester, England
Posted by KJ200 on Sunday, October 22, 2006 2:08 PM
Dave, thanks.

I did a trawl through the various AM decal sheets for 109s on Hannant's site after I posted, and all bar one were 65/02/71.

Karl


Currently on the bench: AZ Models 1/72 Mig 17PF

  • Member since
    November 2003
  • From: Nashville, TN area
Posted by bobbaily on Sunday, October 22, 2006 2:18 PM
Scott & Karl-both planes are looking good.

Bob


  • Member since
    February 2003
  • From: A Spartan in the Wolverine State
Posted by rjkplasticmod on Sunday, October 22, 2006 8:07 PM

Nice work Karl.  Most BoB Emils were RLM 71/02/65, but a few were still in RLM 70/71/65.  Best to check references.

Regards,  Rick

RICK At My Age, I've Seen It All, Done It All, But I Don't Remember It All...
  • Member since
    February 2003
  • From: Montreal, Quebec, Canada
Posted by superbear on Monday, October 23, 2006 7:01 AM

Scott & Karl  your builds are comming along nicely, great workThumbs Up [tup]


Cheers

Bear

Marc
  • Member since
    July 2003
  • From: Bicester, England
Posted by KJ200 on Monday, October 23, 2006 3:02 PM
Rick, I do early war Luftwaffe A/C so infrequently I can never remember the correct colours! Thanks for the confirmation. This one is definitely 02 and not 70.

Having said that, the griffon on the side of the cockpit is offered as either red or black, so I'm assuming there's a little confusion over that aspect of Galland's machine.

Bear, Bob, glad you like. This kit does all the work for you, despite my best efforts to ruin it.Blush [:I]

Progress Update


Applied the RLM70 this afternoon....
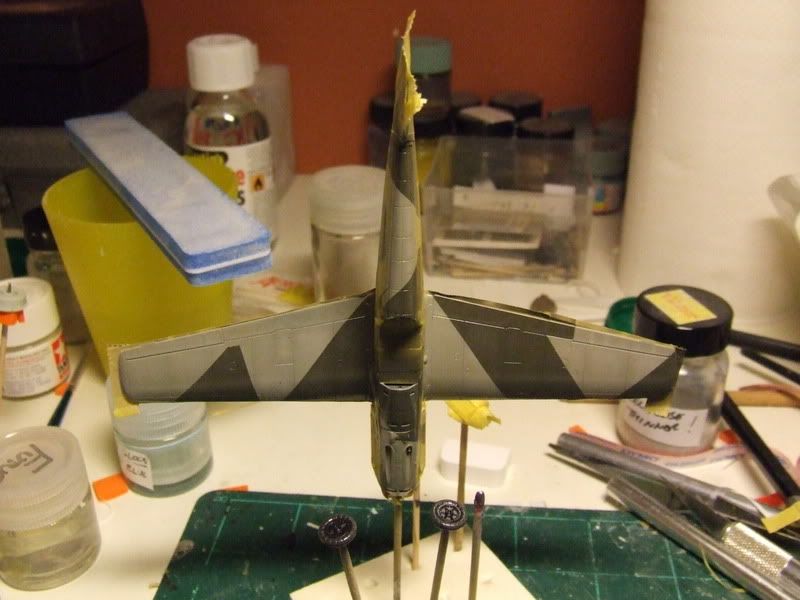


...managed to mask the triangle on the starboard wing short, but I'll touch that in tomorrow, then it's on to decals.

Also back on the bench....
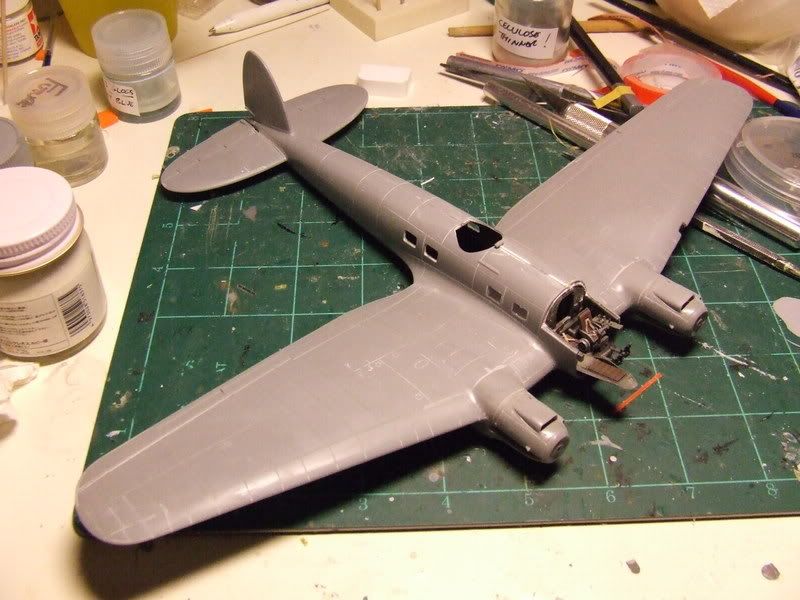


.....but this won't be done for the end of the month.

I'm also trying to complete the Dornier for the end of the month.

Karl

Currently on the bench: AZ Models 1/72 Mig 17PF

  • Member since
    February 2003
  • From: A Spartan in the Wolverine State
Posted by rjkplasticmod on Monday, October 23, 2006 7:11 PM

looking good Karl.

Regards,  Rick

RICK At My Age, I've Seen It All, Done It All, But I Don't Remember It All...
  • Member since
    September 2004
  • From: Vernon, BC, Canada
Posted by razordws on Monday, October 23, 2006 11:55 PM
Looking really good Karl, on both counts!  Can't wait to see the finished product(s).

Dave

  • Member since
    July 2003
  • From: Bicester, England
Posted by KJ200 on Tuesday, October 24, 2006 11:39 AM
Rick, Dave, thanks for the encouragement.

Bit more progress today.....


...retouched yesterday's mistakes, and then re-Futured. The top and bottom engine cowls are now glued in place, as is the airscoop. All glued in with PVA wood glue, I always make a mess with CA, and I didn't want to screw up the paintwork.


The underside sans masking. Still need to touch in the rear stab supports and Future,

Tomorrow should see the decals on, followed by more Future and then a panel wash and matt coat over the weekend.

Also undergoing work...


This is definitely going to be a 2 foot build, that being the distance at which it stops looking too great!

Really did bite off more than I could chew with that one.

Karl

Currently on the bench: AZ Models 1/72 Mig 17PF

  • Member since
    December 2002
  • From: Reno, NV
Posted by espins1 on Tuesday, October 24, 2006 11:45 AM

Looking good Karl!  Man, you have a lot of projects going on!  They all look great!  Nice work!

No progress on the Spitfire yesterday, had a very long day and when I finally got home there were "honey do's" I had to take care of and by the time I finished them I was ready for a couple glasses of wine and watched a movie "The Breakup".  Jennifer Anniston can keep me away from the modelling bench anytime.  Shock [:O] Wink [;)] Laugh [(-D]

Scott Espin - IPMS Reno High Rollers  Geeked My Reviews 

JOIN OUR COMMUNITY!

Our community is FREE to join. To participate you must either login or register for an account.

SEARCH FORUMS
FREE NEWSLETTER
By signing up you may also receive reader surveys and occasional special offers. We do not sell, rent or trade our email lists. View our Privacy Policy.