SEARCH FINESCALE.COM

Enter keywords or a search phrase below:

Fourth Annual Berny Memorial Group Build

35361 views
489 replies
1 rating 2 rating 3 rating 4 rating 5 rating
  • Member since
    January 2014
  • From: Nampa, Idaho
Posted by jelliott523 on Wednesday, May 27, 2015 11:50 AM

FANTASTIC WORK STEVE!!!!  That is way cool!  The cotton makes it come to life, I'm in total awe of how cool this thing turned out, impressive!!

On the Bench:  Lots of unfinished projects!  Smile

  • Member since
    July 2014
Posted by modelcrazy on Wednesday, May 27, 2015 7:58 AM

Thanks guys, Embarrassed

Steve

Building a kit from your stash is like cutting a head off a Hydra, two more take it's place.


http://www.spamodeler.com/forum/

  • Member since
    November 2010
  • From: Lafayette, Indiana
Posted by Son Of Medicine Man on Wednesday, May 27, 2015 5:59 AM

modelcrazy

Don't mean to step on you post Jim,

Gentlemen (and ladies),

Here it is, this was my first attempt at doing water for a ship. So without further adieu, my 1/350 scale Indianapolis. Please excuse the tape in the middle of the backdrop. I need to come up with a better method for a background.

As always comments and critiques welcome.

I'll take my badge now, if it's ok.

Steve

Wow Steve!  I am totally blown away!  That turned out fantastic!  Yes  Yes 

Ken

  • Member since
    November 2010
  • From: Lafayette, Indiana
Posted by Son Of Medicine Man on Wednesday, May 27, 2015 5:56 AM

jimbot58

Gamera

Yow Jim you lucky guy!

I really want to see those photos- so cool!!!

Ok, some photos!

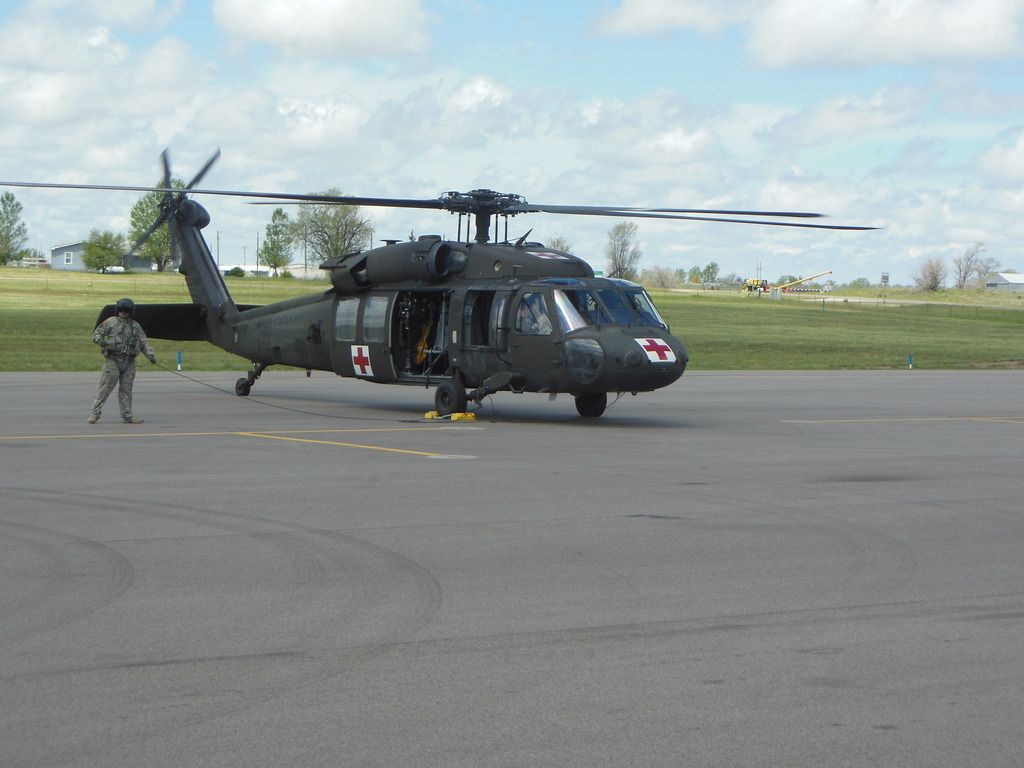
Here the Blackhawk had just landed and you see one of the crew has just set the chocks - the rotor is still turning and we actually boarded while they were still running. Duck down, just like in the movies!
My buddy sitting next to the window just before we taxied to the runway and did a rolling lift-off!
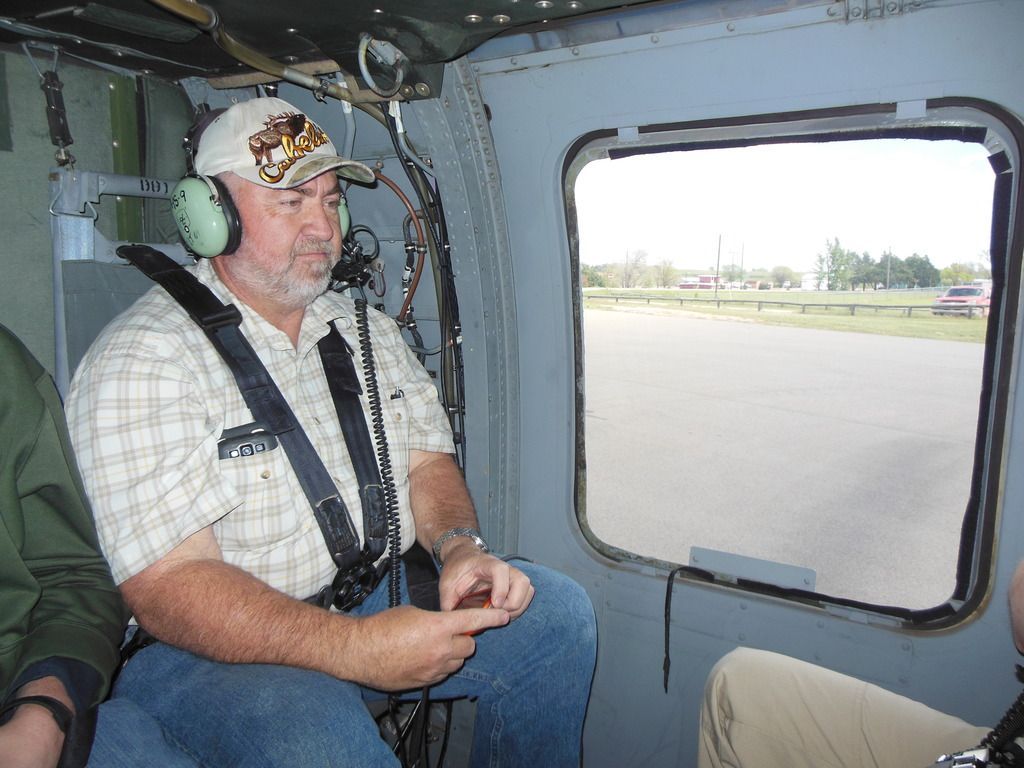
Hearing protection was required - I wish I could have had a headset too, but they were for the guys who were there to do a job. Oh well!Sad

Airborne!

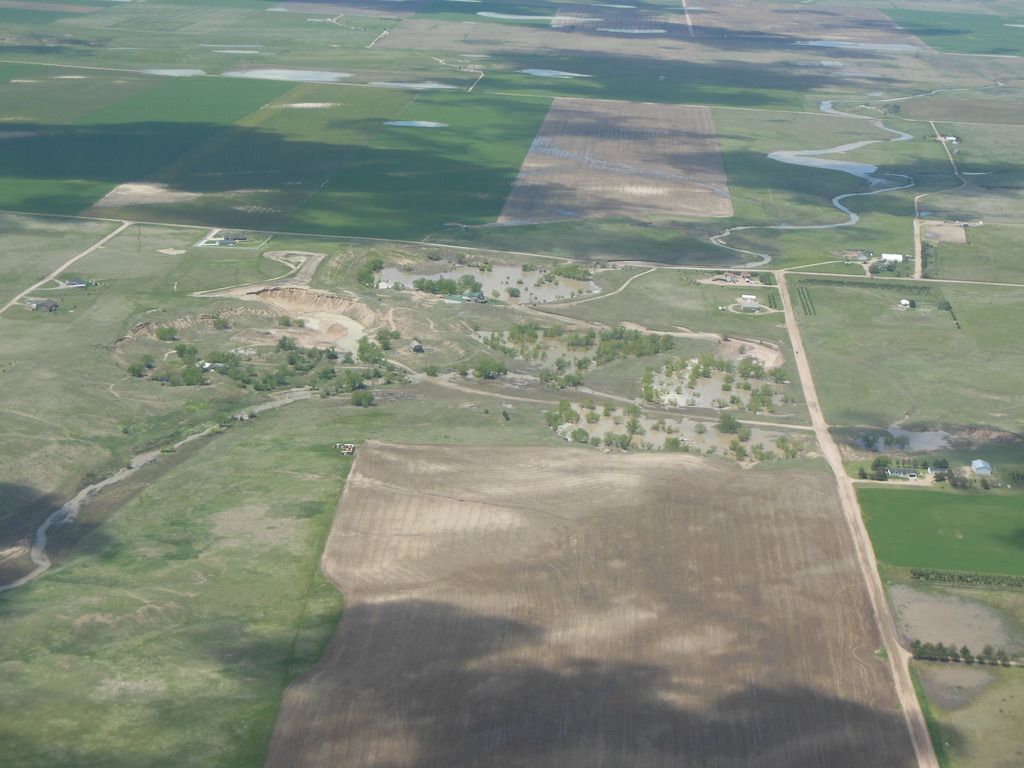
Some of what they came to see. The actual river channel is just visible at the bottom.
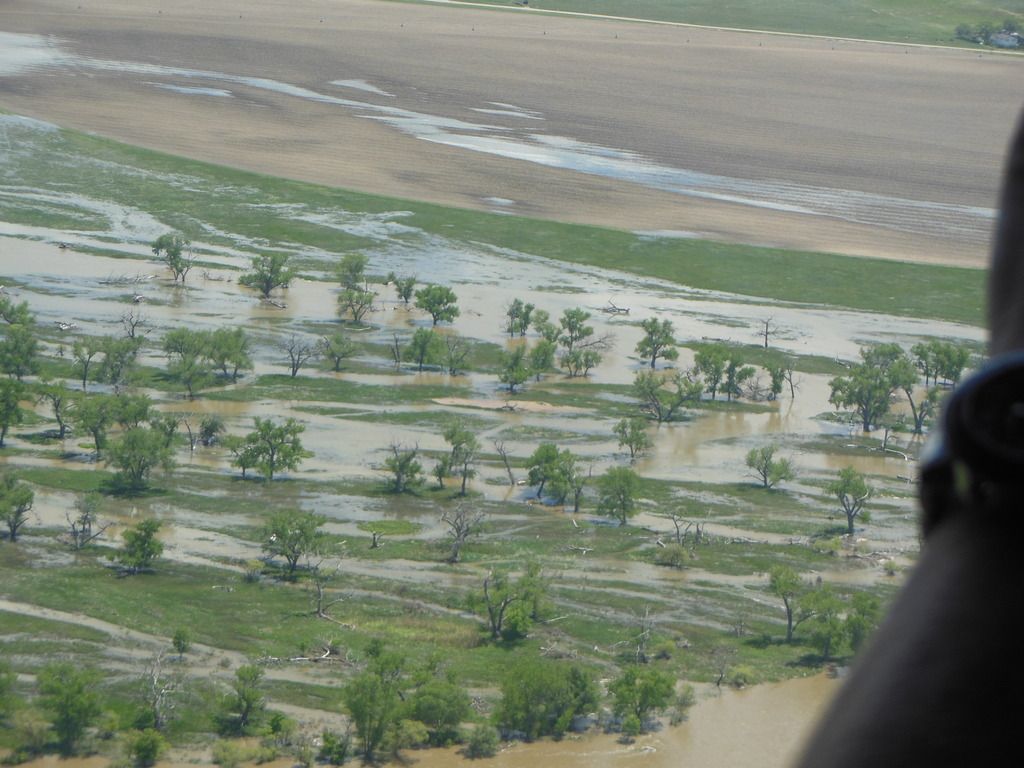
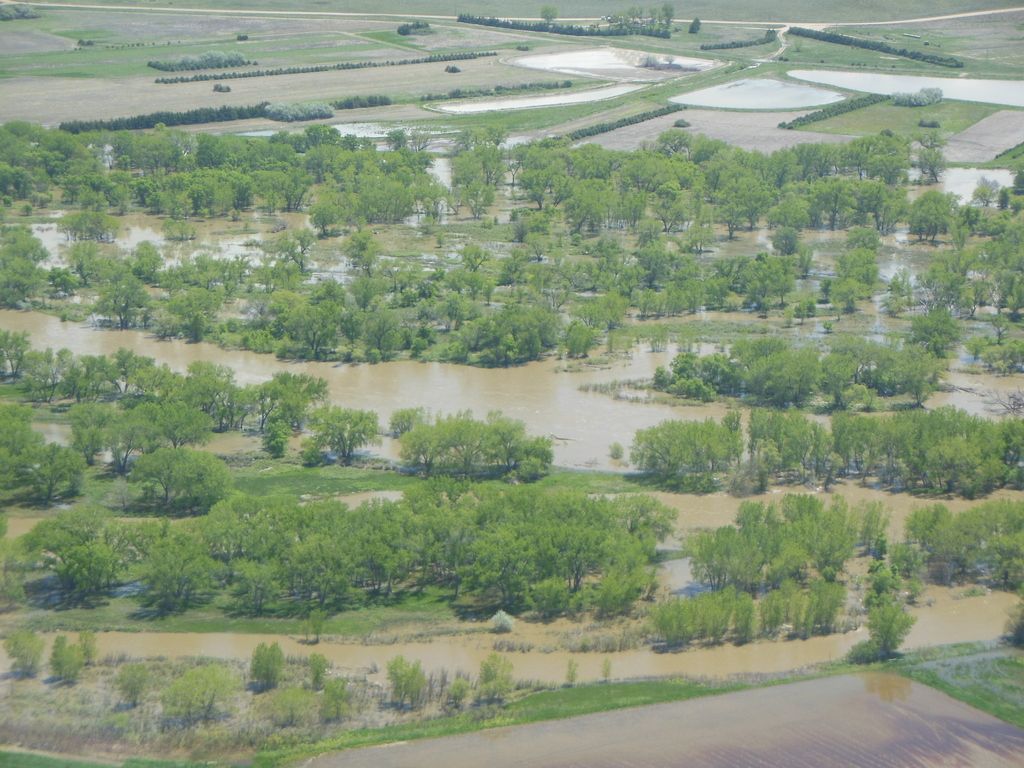
I know a lot of that is just farmland, but it does mean a livelyhood to a lot of people. There is also the fact that these guys are delayed in planting as there has been so much rain, the ground is saturated and water is just standing in the fields.

This is just after we landed and got off. They made us wait as they had shut down the engines and we had to wait until the rotors stopped. As you can see, there is quite a bit of droop there. I could reach up and grab the rotor tips at this point. They did take on some jet fuel.
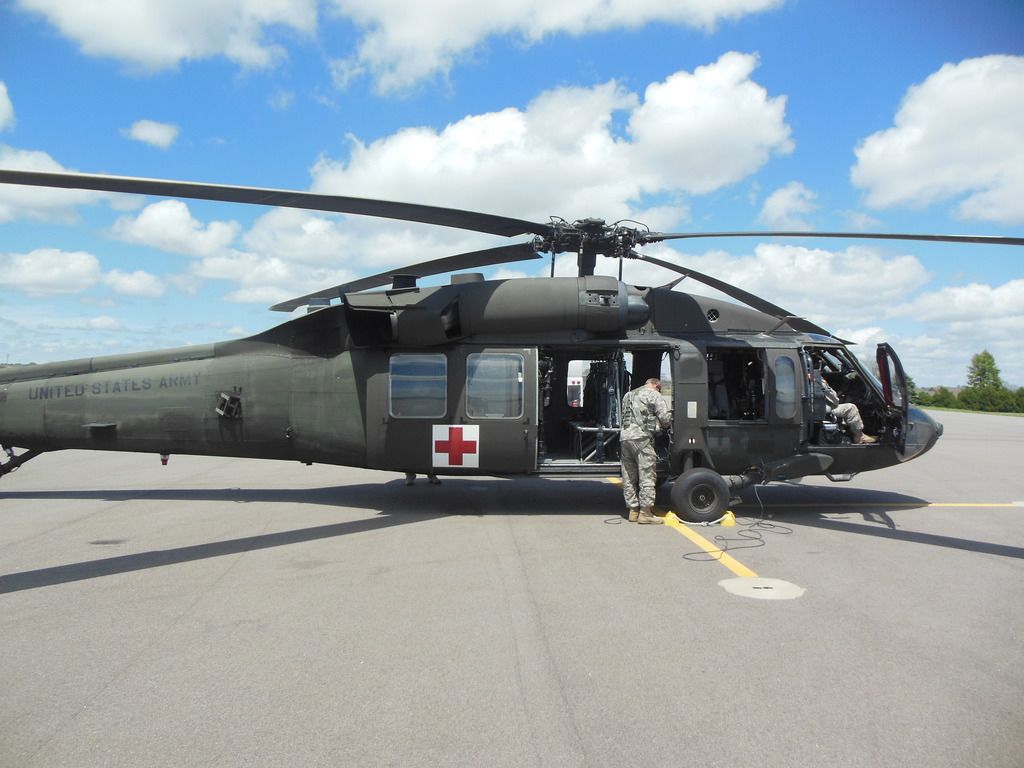
The rest are pretty much more of the same. I would have loved to spend about an hour or so photographing every square inch of her, but everybody was heading back to their cars.

They did tell us that they have been stationed out at Buckley AFB most of the winter so they would be available for possible search and rescue assistance, which they said they had already taken part in several this year.

You can see is is set up for this mission as the winch is just visible inside the door., plus there is a large medical kit attached to the back wall. Plus there is only seating for 6 inside, where as units that are used for transport, I think can carry 11 troops. They did have a crew of 4, but I had my back to the flight deck and was strapped into the seat with a 5 point harness, and I could not see what they were doing...

I assume that in a rescue mission, at least one of those guys would be riding in the back - perhaps both the 3rd and 4th crew members.

I did make a couple of short videos that I will have to try and upload to Youtube

Jim

Very cool adventure Jim!  That is just awesome!  Thank you for the pictures.  That had to have been quite a thrill.

Ken

  • Member since
    November 2010
  • From: Lafayette, Indiana
Posted by Son Of Medicine Man on Wednesday, May 27, 2015 5:52 AM

jimbot58

Speaking of helicopters.....

I had a wild weekend! Went out to see my buddy out on the plains, where he works as a city official. I arrived on Sunday, and overnight they had some heavy rains, a ditch had overflowed and flooded some areas in town. I went out to the local airport to meet him as they were waiting for a chopper to take the group out to overlook the damage. What shows up but a Blackhawk! They were getting briefed and about to board, when my friends boss asks "we have an extra seat, does your friend want to go for a ride?" I couldn't say no, could I?

I have some photos that I will post later as I am at work now, but I couldn't wait to tell you guys!

Talk about a chance in a lifetime for a guy like me!

Jim

Wow Jim!  A free ride in a Blackhawk helicopter!  That is awesome!  You lucky guy!  I am so envious!  Propeller 

Ken

  • Member since
    January 2014
  • From: Toronto
Posted by Rob S. on Wednesday, May 27, 2015 5:03 AM

Yup, wow Steve!! Like Gam said, I've never seen hard seas like yours...AND, this was your first! VERY effective. You know what would be cool? A black and white photo to put it in the era? Anyway, very effective and I'm totally jealous that I don't have the 'you know what's' to attempt water, especially a raging sea. Well done...YesCoolYes

______________________________________________________________________________


On the Bench: Nothing on the go ATM

  • Member since
    November 2009
  • From: SW Virginia
Posted by Gamera on Tuesday, May 26, 2015 10:51 PM

Jim: Hate to see all the flooding, what a mess. Still getting to ride in the Blackhawk was pretty darn epic!

Steve: WOW!!! Beautiful model and that ocean! I've only seen people do placid seas but that's just friggin' spectacular!!!

"I dream in fire but work in clay." -Arthur Machen


  • Member since
    July 2014
Posted by modelcrazy on Tuesday, May 26, 2015 10:18 PM

Don't mean to step on you post Jim,

Gentlemen (and ladies),

Here it is, this was my first attempt at doing water for a ship. So without further adieu, my 1/350 scale Indianapolis. Please excuse the tape in the middle of the backdrop. I need to come up with a better method for a background.

As always comments and critiques welcome.

I'll take my badge now, if it's ok.

Steve

Steve

Building a kit from your stash is like cutting a head off a Hydra, two more take it's place.


http://www.spamodeler.com/forum/

  • Member since
    June 2009
Posted by jimbot58 on Tuesday, May 26, 2015 10:03 PM

Gamera

Yow Jim you lucky guy!

I really want to see those photos- so cool!!!

Ok, some photos!

Here the Blackhawk had just landed and you see one of the crew has just set the chocks - the rotor is still turning and we actually boarded while they were still running. Duck down, just like in the movies!

My buddy sitting next to the window just before we taxied to the runway and did a rolling lift-off!

Hearing protection was required - I wish I could have had a headset too, but they were for the guys who were there to do a job. Oh well!Sad

Airborne!

Some of what they came to see. The actual river channel is just visible at the bottom.

I know a lot of that is just farmland, but it does mean a livelyhood to a lot of people. There is also the fact that these guys are delayed in planting as there has been so much rain, the ground is saturated and water is just standing in the fields.

This is just after we landed and got off. They made us wait as they had shut down the engines and we had to wait until the rotors stopped. As you can see, there is quite a bit of droop there. I could reach up and grab the rotor tips at this point. They did take on some jet fuel.

The rest are pretty much more of the same. I would have loved to spend about an hour or so photographing every square inch of her, but everybody was heading back to their cars.

They did tell us that they have been stationed out at Buckley AFB most of the winter so they would be available for possible search and rescue assistance, which they said they had already taken part in several this year.

You can see is is set up for this mission as the winch is just visible inside the door., plus there is a large medical kit attached to the back wall. Plus there is only seating for 6 inside, where as units that are used for transport, I think can carry 11 troops. They did have a crew of 4, but I had my back to the flight deck and was strapped into the seat with a 5 point harness, and I could not see what they were doing...

I assume that in a rescue mission, at least one of those guys would be riding in the back - perhaps both the 3rd and 4th crew members.

I did make a couple of short videos that I will have to try and upload to Youtube

Jim

*******

On my workbench now:

It's all about classic cars now!

Why can't I find the "Any" key on my keyboard?


  • Member since
    November 2009
  • From: SW Virginia
Posted by Gamera on Tuesday, May 26, 2015 7:48 PM

Yow Jim you lucky guy!

I really want to see those photos- so cool!!!

"I dream in fire but work in clay." -Arthur Machen


  • Member since
    January 2014
  • From: Toronto
Posted by Rob S. on Tuesday, May 26, 2015 6:50 PM

Sounds epic Jim....good for you!

______________________________________________________________________________


On the Bench: Nothing on the go ATM

  • Member since
    June 2009
Posted by jimbot58 on Tuesday, May 26, 2015 1:31 PM

Speaking of helicopters.....

I had a wild weekend! Went out to see my buddy out on the plains, where he works as a city official. I arrived on Sunday, and overnight they had some heavy rains, a ditch had overflowed and flooded some areas in town. I went out to the local airport to meet him as they were waiting for a chopper to take the group out to overlook the damage. What shows up but a Blackhawk! They were getting briefed and about to board, when my friends boss asks "we have an extra seat, does your friend want to go for a ride?" I couldn't say no, could I?

I have some photos that I will post later as I am at work now, but I couldn't wait to tell you guys!

Talk about a chance in a lifetime for a guy like me!

Jim

*******

On my workbench now:

It's all about classic cars now!

Why can't I find the "Any" key on my keyboard?


  • Member since
    June 2009
Posted by jimbot58 on Tuesday, May 26, 2015 1:16 PM
Duke Maddog

Ken, I think your helo is looking fabulous! Way to go. Question: is the blemish on the inside or outside of the canopy? I've had some fogging-type issues on mine before that were from my masking agent. If it is on the outside, try using Goo Gone to clean it up.

I wonder if it is some residue from your masking agent? I've had that happen a few times and didn't discover it until the area was inaccessible. In any case, it looks great from here! Don't forget we are often our own worst critics! Jim

*******

On my workbench now:

It's all about classic cars now!

Why can't I find the "Any" key on my keyboard?


  • Member since
    November 2009
  • From: SW Virginia
Posted by Gamera on Tuesday, May 26, 2015 11:43 AM

I don't think anyone is satisfied with their own work, to me she looks fantastic Rob. You took an insanely complex scheme with probably the worst colour to paint, yellow, and knocked her right outta the park.

I wonder if the smudge might have something to do with Future, did you dip your clear parts in it? I've had it do some weird stuff before.

"I dream in fire but work in clay." -Arthur Machen


  • Member since
    January 2014
  • From: Toronto
Posted by Rob S. on Tuesday, May 26, 2015 11:38 AM

The marring is on the inside and she's sealed up tight.

______________________________________________________________________________


On the Bench: Nothing on the go ATM

  • Member since
    June 2003
  • From: Rowland Heights, California
Posted by Duke Maddog on Tuesday, May 26, 2015 8:53 AM

Ken, I think your helo is looking fabulous! Way to go. Question: is the blemish on the inside or outside of the canopy? I've had some fogging-type issues on mine before that were from my masking agent. If it is on the outside, try using Goo Gone to clean it up.

  • Member since
    November 2010
  • From: Lafayette, Indiana
Posted by Son Of Medicine Man on Tuesday, May 26, 2015 5:59 AM

Rob S.

I'm done with this yellow mess. I'm not happy with it, but, it is what it is. Lots of lessons learned...first being, don't paint a big monster helo yellow! I don't have a clue what happened, but, when I pulled off the masking, almost every glass surface...ON THE INTERIOR was stained with I don't know what. No idea what happened and I'm not impressed. Anyway, overall, it was a huge challenge and I need to do something like this again to try again to improve the technique. Thanks all and I appreciate the comments.

The decal for the rear rotor didn't work against the black, so, I created my own markings.

You can kind of see the marring in the front windshield. It's almost like the mess you get when you get CA glue fog on glass, but, I didn't use CA glue, so, again, NO idea what happened Crying

Thanks for lookin' and if you don't mind, I'll take a badge.

Great job Rob!  You blasted that one out pretty quick!  She came out great!  Yes  Yes 

Ken

  • Member since
    November 2010
  • From: Lafayette, Indiana
Posted by Son Of Medicine Man on Tuesday, May 26, 2015 5:56 AM

Rob S.

Thanks Gam...yeah, I have to say, I made a colossal error, which could have been prevented. I had fully intended to prime this yellow monster. Well, after I dropped the Yellow paint bottle, I got frazzled knowing that I don't have easy access to a LHS, so, with what I had left in the bottle I went right to painting. Anyway, I wasn't happy with the first coats of Model Master acryl. THEN, another disaster struck....I KNOW you cannot mask over MM acryl...I KNOW this, I've made this mistake a dozen times...BUT, I bloody well did it again!! I almost quit on this one when I pulled off tons of yellow paint, but, I took a break for a day and went back at it and re-painted the offending spots! Anyway, after a calm break, I think I managed to recover the balance.

I did realize too, that I was remiss in keeping up with my photos so I missed some progress. Here is my progress after oil wash and initial decal application.

Also, the RCAF roundels supplied were way out of register, so, I had to 'luckily' substitute them from my spares box. Happily, I had a sheet of RCAF markings from a F-104.

Wow Rob!  You went to town on your EH-101!  Looks like you recovered nicely from pulling up the paint.  Sure can't see any blemishes in your photos.  Great job on the wash, it really makes it pop.  Yes  Yes 

Ken

  • Member since
    November 2010
  • From: Lafayette, Indiana
Posted by Son Of Medicine Man on Tuesday, May 26, 2015 5:52 AM

modelcrazy

I was not pleased with the way the sawdust was leaving lumps so I went over it with torn paper.
   

I Painted the blue and sprayed the seafoam green to the churn area. Next it the cotton application.          

Steve

Nice work Steve.  You are truly an artist!  Yes  Yes 

Ken

  • Member since
    November 2010
  • From: Lafayette, Indiana
Posted by Son Of Medicine Man on Tuesday, May 26, 2015 5:50 AM

Rob S.

Well, I got a bunch of YELLOW done tonite..just yellow. Had a disaster too...I opened a brand new bottle of Insignia Yellow I got special for this kit and just as I twisted off the cap, I dropped the whole yellow mess on the floor. Managed to salvage enough to get a base coat and had to finish it off with Tamiya yellow:

Ouch Rob, that is a bummer of dropping a brand new open bottle of paint.  I am sure that was a pain to clean up.

Your EH-101 certainly is yellow!  Looks like you got a nice smooth finish on it!  Yes  Yes 

Ken

  • Member since
    July 2014
Posted by modelcrazy on Monday, May 25, 2015 7:55 PM

You may be less than happy with it Rob, but I think it looks awesome.

Steve

Steve

Building a kit from your stash is like cutting a head off a Hydra, two more take it's place.


http://www.spamodeler.com/forum/

  • Member since
    January 2014
  • From: Toronto
Posted by Rob S. on Monday, May 25, 2015 7:21 PM

I'm done with this yellow mess. I'm not happy with it, but, it is what it is. Lots of lessons learned...first being, don't paint a big monster helo yellow! I don't have a clue what happened, but, when I pulled off the masking, almost every glass surface...ON THE INTERIOR was stained with I don't know what. No idea what happened and I'm not impressed. Anyway, overall, it was a huge challenge and I need to do something like this again to try again to improve the technique. Thanks all and I appreciate the comments.

The decal for the rear rotor didn't work against the black, so, I created my own markings.

You can kind of see the marring in the front windshield. It's almost like the mess you get when you get CA glue fog on glass, but, I didn't use CA glue, so, again, NO idea what happened Crying

Thanks for lookin' and if you don't mind, I'll take a badge.

______________________________________________________________________________


On the Bench: Nothing on the go ATM

  • Member since
    January 2014
  • From: Toronto
Posted by Rob S. on Monday, May 25, 2015 5:35 AM

Yes, Gam...just a dirty browny/black oil wash to bring out high features and panel lines.

______________________________________________________________________________


On the Bench: Nothing on the go ATM

  • Member since
    November 2009
  • From: SW Virginia
Posted by Gamera on Sunday, May 24, 2015 9:21 PM

Despite all the problems Rob she looks good! The red and black look perfect to me. And did you apply a brown wash? Brings out the detail without messing up the yellow.

"I dream in fire but work in clay." -Arthur Machen


  • Member since
    January 2014
  • From: Toronto
Posted by Rob S. on Sunday, May 24, 2015 1:50 PM

Thanks Gam...yeah, I have to say, I made a colossal error, which could have been prevented. I had fully intended to prime this yellow monster. Well, after I dropped the Yellow paint bottle, I got frazzled knowing that I don't have easy access to a LHS, so, with what I had left in the bottle I went right to painting. Anyway, I wasn't happy with the first coats of Model Master acryl. THEN, another disaster struck....I KNOW you cannot mask over MM acryl...I KNOW this, I've made this mistake a dozen times...BUT, I bloody well did it again!! I almost quit on this one when I pulled off tons of yellow paint, but, I took a break for a day and went back at it and re-painted the offending spots! Anyway, after a calm break, I think I managed to recover the balance.

I did realize too, that I was remiss in keeping up with my photos so I missed some progress. Here is my progress after oil wash and initial decal application.

Also, the RCAF roundels supplied were way out of register, so, I had to 'luckily' substitute them from my spares box. Happily, I had a sheet of RCAF markings from a F-104.

______________________________________________________________________________


On the Bench: Nothing on the go ATM

  • Member since
    November 2009
  • From: SW Virginia
Posted by Gamera on Saturday, May 23, 2015 5:30 PM

Rob: She looks fantastic!!! Again let me reiterate how much I HATE SPRAYING ANYTHING FRIGGIN' YELLOW!!! She did a great job with it.

Steve: Looks pretty doggone good to me!!! Looking forward to the larger finished photos.

"I dream in fire but work in clay." -Arthur Machen


  • Member since
    January 2014
  • From: Toronto
Posted by Rob S. on Saturday, May 23, 2015 11:26 AM

That water effect is incredible Steve!

______________________________________________________________________________


On the Bench: Nothing on the go ATM

  • Member since
    July 2014
Posted by modelcrazy on Saturday, May 23, 2015 10:47 AM

I was not pleased with the way the sawdust was leaving lumps so I went over it with torn paper.
   

I Painted the blue and sprayed the seafoam green to the churn area. Next it the cotton application.          

Steve

Steve

Building a kit from your stash is like cutting a head off a Hydra, two more take it's place.


http://www.spamodeler.com/forum/

  • Member since
    June 2003
  • From: Rowland Heights, California
Posted by Duke Maddog on Saturday, May 23, 2015 7:48 AM

Ouch! I hate when that happens! I jut recently spilled a bottle of Lacquer Thinner all over too. Fortunately it was only about a third full, but still, I almost ruined parts of my Annie. Close call there. Paint looks great; you really laid it on smooth. Nice work!

  • Member since
    January 2014
  • From: Toronto
Posted by Rob S. on Friday, May 22, 2015 8:20 PM

Well, I got a bunch of YELLOW done tonite..just yellow. Had a disaster too...I opened a brand new bottle of Insignia Yellow I got special for this kit and just as I twisted off the cap, I dropped the whole yellow mess on the floor. Managed to salvage enough to get a base coat and had to finish it off with Tamiya yellow:

______________________________________________________________________________


On the Bench: Nothing on the go ATM

JOIN OUR COMMUNITY!

Our community is FREE to join. To participate you must either login or register for an account.

SEARCH FORUMS
FREE NEWSLETTER
By signing up you may also receive reader surveys and occasional special offers. We do not sell, rent or trade our email lists. View our Privacy Policy.